Note
Live Browse replaces the Exchange Offline Mining Tool. For more information, see Recovering Messages from an Offline Exchange Database.
Configure Permissions to View All Mailboxes
You can provide certain users with the ability to view all mailboxes.
-
Log on to the computer where the Exchange Offline Mining Tool is installed.
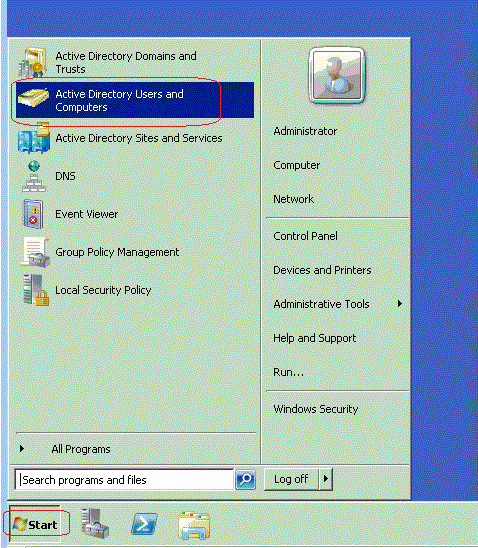
Navigate to Start and click Active Directory Users and Computers.
-
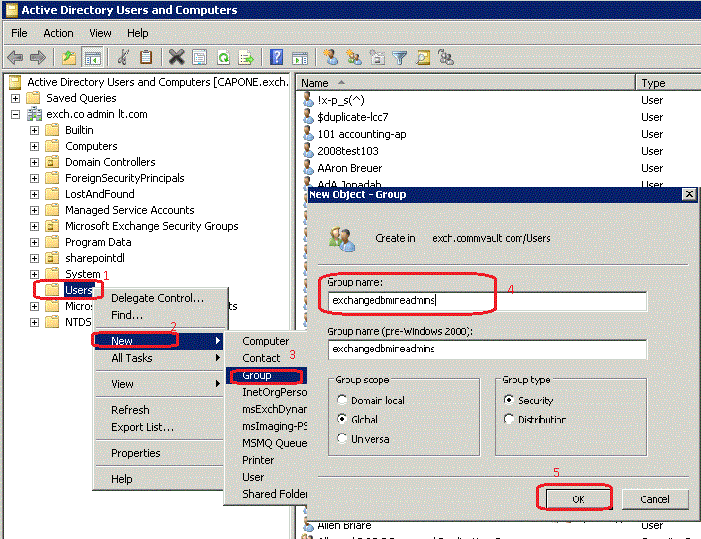
Right-click Users, point to New and then click Groups.
Enter exchangedbmineadmins in the Group Name box.
Under Group Type select Security.
Click OK.
-
Navigate to Start and click Active Directory Users and Computers.
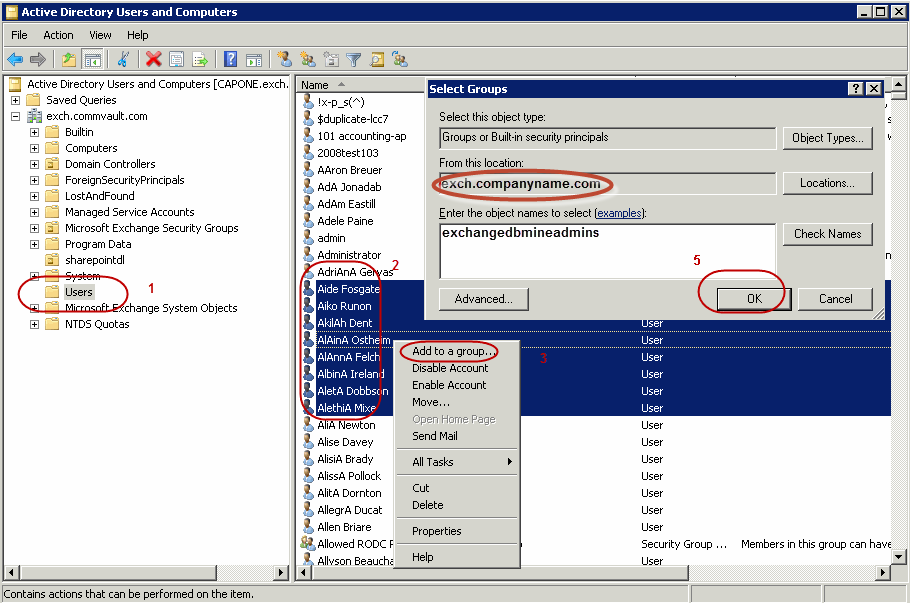
Select Users.
In the right-pane select a user or group of users, right-click and select Add to a group.
From the Locations tab, browse to the exchangedbmineadmins group in the From this location box.
Click OK.
Configure Language Support
By default, the Exchange Offline Mining tool uses the language setting of the computer where the tool is installed. You can change the setting to a different language.
-
Log on to the computer where the Exchange Offline Mining tool is installed.
-
Open the EvMgrCHost file that is located in the software_installation_directory\MiningToolExchange.
-
Add the line lang=language_code.
Where language_code is one of the following:
-
fr-fr (French - France)
-
fr-ca (French - Canada)
-
es-es (Spanish - Spain)
-
es-mx (Spanish - Mexico)
-
de-de (German - Standard)
-
it-it (Italian)
-
ja-jp (Japanese)
-
ru-ru (Russian)
-
zh-cn (Chinese - Simplified)
-
en-us (English - United States)
For example, add the following line to change the language setting to Spanish used in Spain.
lang=es-es -
-
Save the EvMgrCHost file.
Create a Database Using a Snapshot
Database snapshots created with IntelliSnap can be used for offline mining.
If you have not previously used IntelliSnap to back up your databases, perform the following tasks:
-
Configure the available engines.
-
Perform a IntelliSnap backup of the Exchange Database Agent.
After you have the database snapshot, configure the database as described in the following sections.
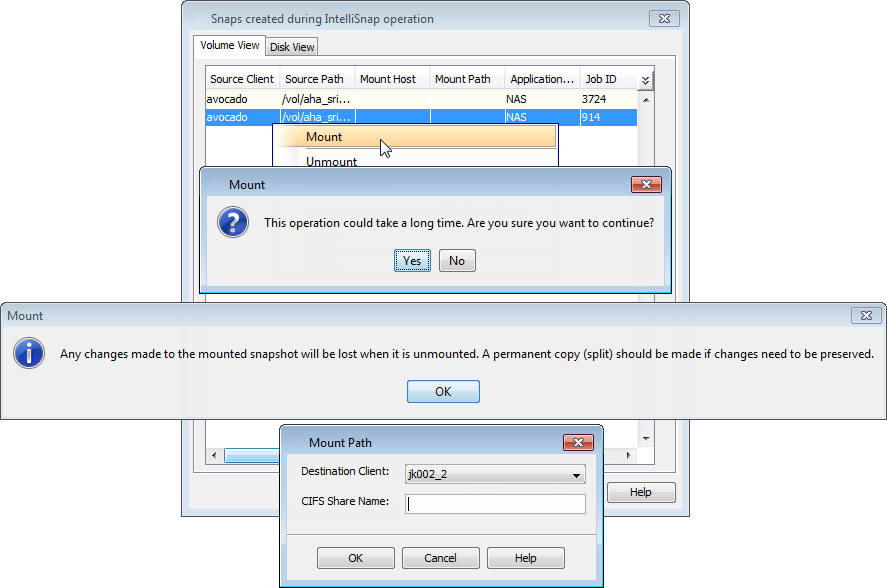
Mount the Snapshot
-
From the CommCell Browser, navigate to Client Computers > client.
-
Right-click Exchange Database and click All Tasks > List Snaps.
-
Right-click the snapshot that you want to mount and click Mount.
To select multiple snapshots, press the Shift key and select the snapshots to be mounted.
-
Click Yes.
-
In the Mount Path dialog box, specify the destination client and the path on the client in the Destination Client and Destination Path fields.
On a Windows platform, enter a CIFS Share Name for the agent.
-
If you do not want to save any changes made to the mounted snapshot after the snapshot is unmounted, select Protect Snapshot during mount.
Caution
For Windows-based agents, select Protect Snapshot during mount to ensure that the changes made to the snapshot while it is mounted are not retained when you unmount the snapshot. By selecting this option, the snapshot is usable for future snap operations (restore, backup copy, and so on.). If this option is disabled, changes made to the snapshot while it is mounted are retained after the snapshot is unmounted. As a result, you cannot use the snapshot for snap operations.
-
Click OK.
Prepare the Database
-
Log on to the computer where the Exchange Offline Mining Tool is installed.
Navigate to the Destination path where the snapshot is mounted.
Copy the .edb log and .dll files to a location from where the Exchange Offline Mining Tool will access these files.
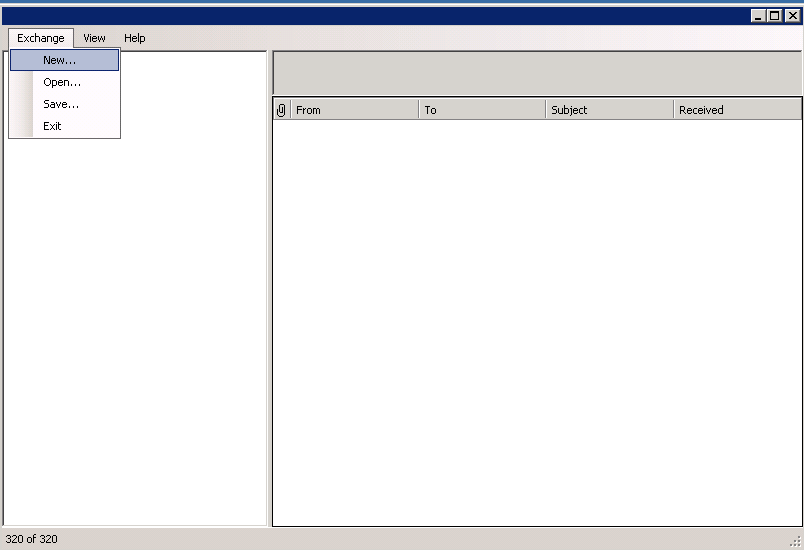
Navigate to Start > All Programs > software_folder.
Click Exchange Database Mining Tool.

-
Click the Exchange menu and then click New.
-
Browse or enter the location of the .edb files in the Exchange EDB Path box.
Click OK.
Repeat this step to register additional databases.
-
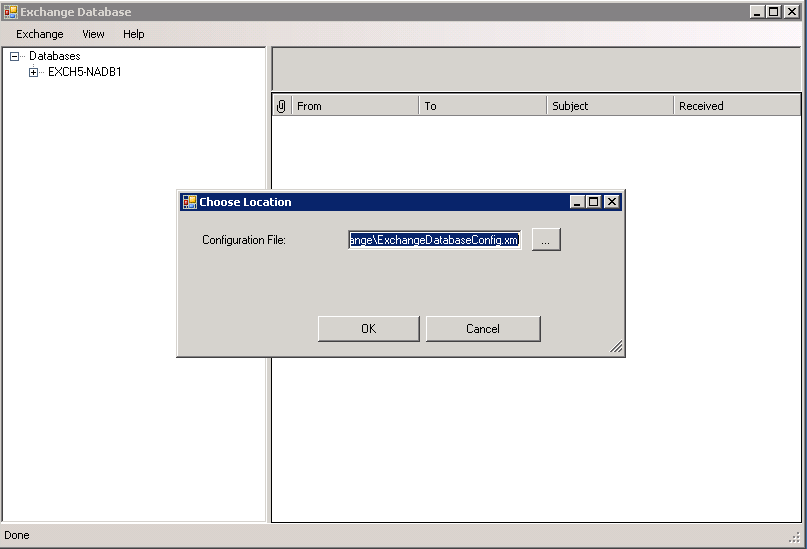
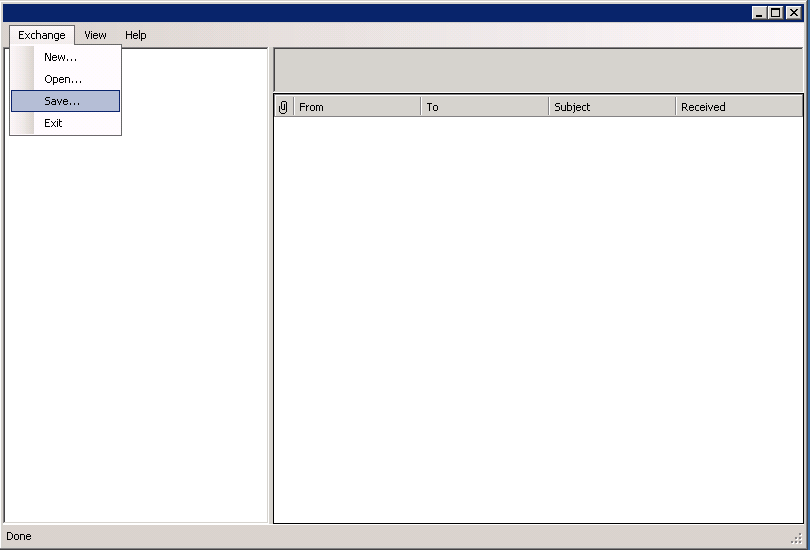
Click the Exchange menu and then click Save.
-
Browse or enter the location of the Configuration File to be exported.
Click OK.