Configuration
Once you have installed the File System iDataAgent on the access node, create an OpenVMS client from the CommCell console using the following steps.
-
From the CommCell Browser, right-click Client Computers, point to New Client > File System, and then click OpenVMS.
The New OpenVMS Client Configuration dialog box appears.
-
On the General tab, in the Client Name box, type the OpenVMS client name.
In the Host Name box, type the host name of the OpenVMS client.
In the Base Install Folder box, type the location for software installation.
All Commvault programs, configuration files, and logs are stored under the software installation directory by default.
Note: Provide UNIX-style path to the location. For example, /SYS$SYSDEVICE/SOFTWARE/ is the UNIX-style path equivalent to SYS$SYSDEVICE:[DEVICE].
In the CVD Port box, type the port number that the Linux proxy CVD will use to communicate with the OpenVMS client, or type 0 to set it to the default value of 9401. (Note that this is a different port than the default 8400 used between the Linux proxy and the CommServe computer.)
To set the OpenVMS user credentials, in the OpenVMS User Credentials area, click Change. Then, on the Enter User Name and Password dialog box, type the OpenVMS user credentials with privileges to perform operations on the OpenVMS client, and click OK.
The SYSTEM user account with full privileges is created by default when you install the OpenVMS operating system. You can use any other user account with similar privileges.
Note: Only the files for which the user account or its group has read access are backed up.
-
On the Proxy Client tab, from the Available Proxy Nodes list, select the access node name or client group name on which the File System iDataAgent was installed, and then click Add.
Note
-
Linux clients and client groups that have OpenVMS File System Agent installed are displayed in the Available Proxy Nodes list. You can select one or more clients or client groups. The proxies are selected for performing a backup operation based on the order of the Selected Proxy Nodes list.
-
When you select a client group, ensure that at least one client in the group has the OpenVMS File System Agent installed. Otherwise, the backup job will go to a pending state.
-
If a access node fails during a backup job and the backup job goes to a pending state, when the job is resumed, that access node will be selected for the job automatically. If that access node fails, the next access node is selected based on the order of the Selected Proxy Nodes list. On resuming the backup job, the proxy selection always starts from the first access node in the Selected Proxy Nodes list.
-
All the access nodes in the Selected Proxy Nodes list must be at the same Service Pack level.
-
-
Click OK.
The OpenVMS client will be added as a client in the CommCell as soon as it is created.
-
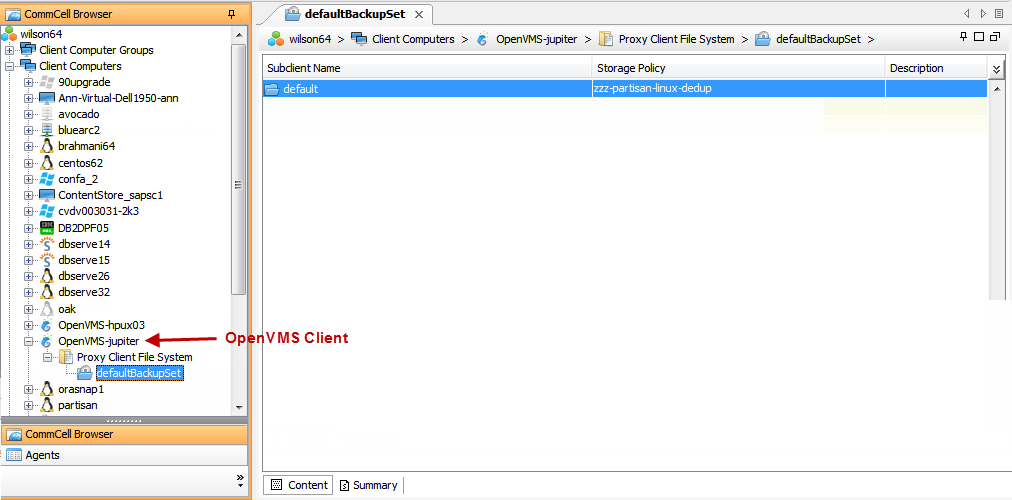
From the CommCell Browser, navigate to Client Computers | <Client> | Proxy Client File System | defaultBackupSet.
Right-click the default subclient and click Properties.
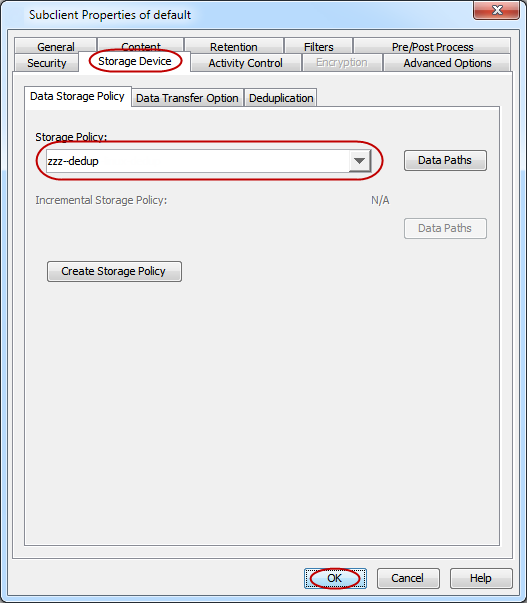
Click the Storage Device tab.
In the Storage Policy box, select the storage policy.
Click OK.
Proceed to the next page.
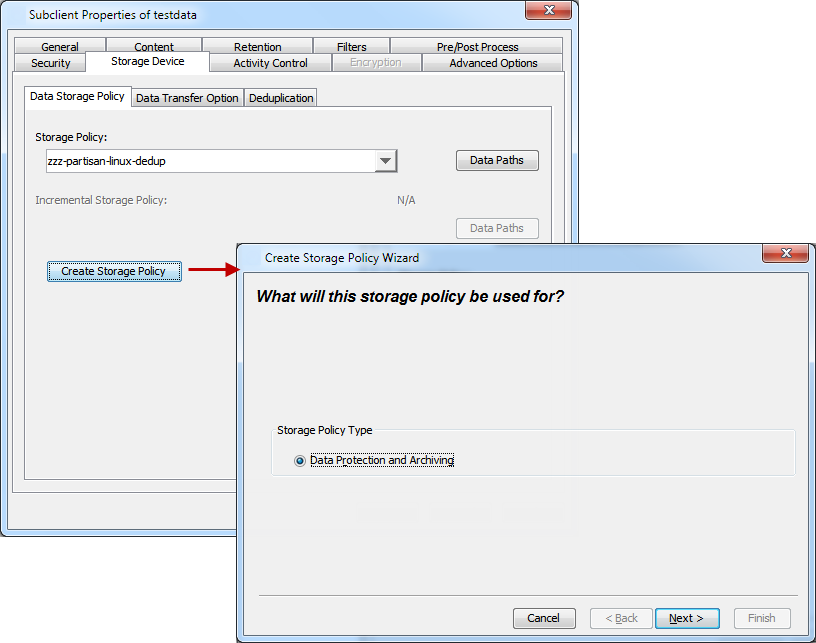
If you do not have Storage Policy created, follow the step given below to create a storage policy.
-
In the Backup Schedule dialog box, click Do Not Schedule, and then click OK.
-
Creating a Storage Policy:
-
Click Create Storage Policy.
-
Follow the prompts displayed in the Storage Policy Wizard. The required options are mentioned below:
-
Select the Storage Policy type as Data Protection and Archiving and click Next.
-
Enter the name in the Storage Policy Name box and click Next.
-
From the Library list, click the name of a disk library to which the primary copy should be associated and then click Next.
Ensure that you select a library attached to a MediaAgent operating in the current release.
-
From the MediaAgent list, click the name of a MediaAgent that will be used to create the primary copy and then click Next.
-
For the device streams and the retention criteria information, click Next to accept default values.
-
Select Yes to enable deduplication for the primary copy.
-
From the MediaAgent list, click the name of the MediaAgent that will be used to host the Deduplication database (DDB).
In the Location box, type the name of the folder in which the DDB must be located or click the Browse to select the folder, and then click Next.
-
Review the details and click Finish to create the Storage Policy.
-
-