The creation of a workflow involves design, save, deploy, and execute phases.
-
Design
In the CommCell Console, drag and drop activities to build the workflow.
-
Save
Save the workflow in the CommServe database.
-
Deploy
The Workflow Engine compiles the workflow and makes it ready for execution.
-
Execute
The Workflow Engine executes the activities defined in the workflow.
The tasks in this topic guide you through the steps for designing, saving, deploying and running a sample workflow that performs the following operations:
-
First, checks the connectivity of a client using the qoperation checkready command. The client name is a user input during workflow execution.
-
Then, sends an email with the client connectivity results:
-
If the qoperation checkready command succeeds, the command output is emailed to the user who ran the workflow.
-
If the command fails, a failure email is sent to the user who created the workflow and to the user who ran it.
-
Designing the Workflow
-
From the CommCell Browser, go to Workflows.
-
Right-click Workflows and then click All Tasks > New.
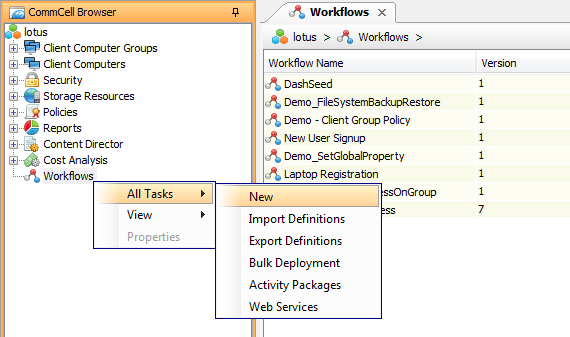
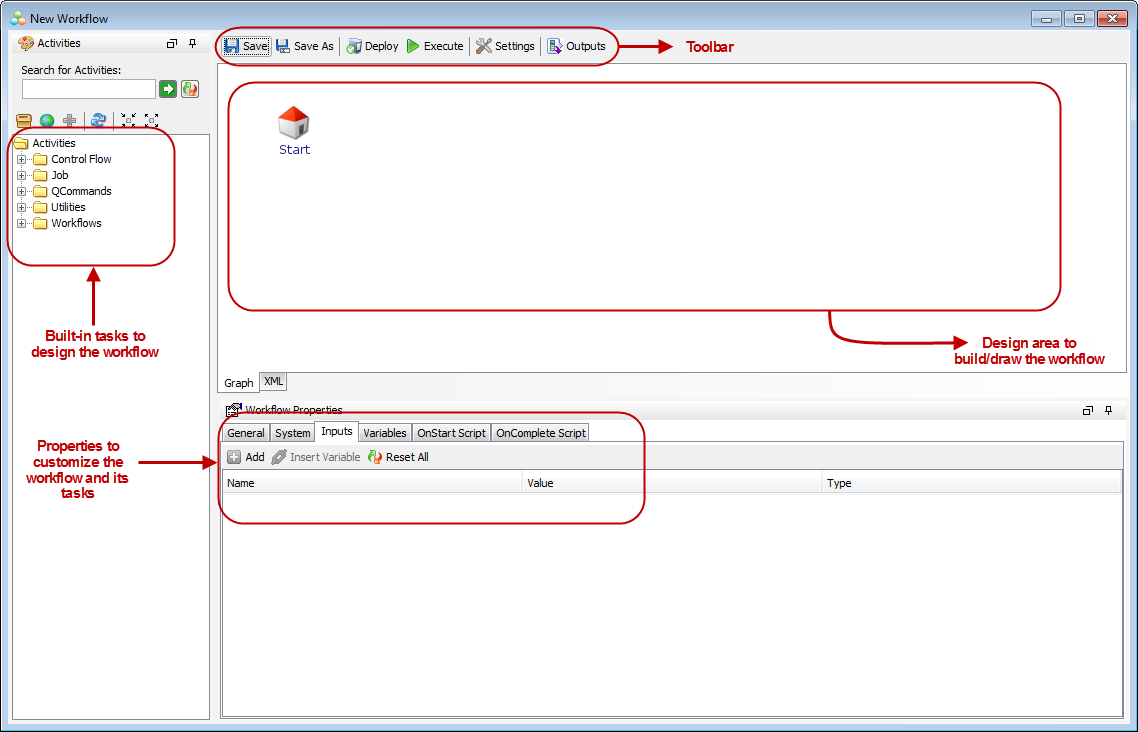
The New Workflow window appears. This is where you design, build, and deploy your Workflow.
-
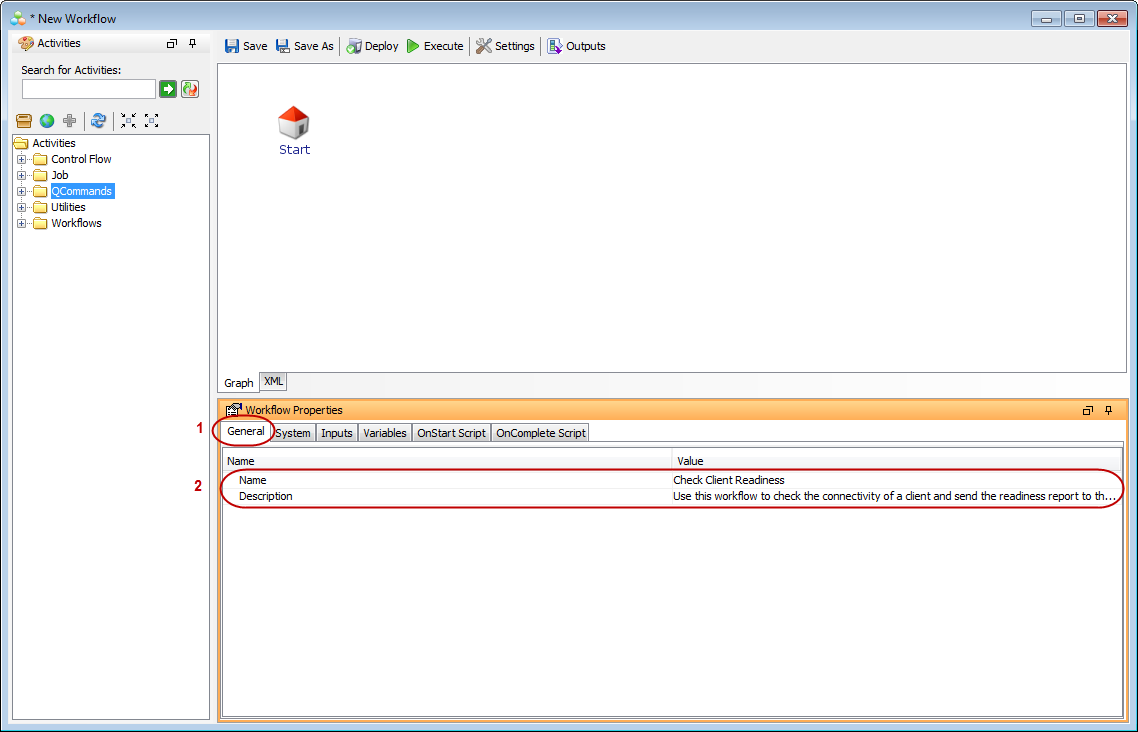
In the Workflow Properties pane, click the General tab and provide a name and a brief description for the Workflow in the respective Value box.
-
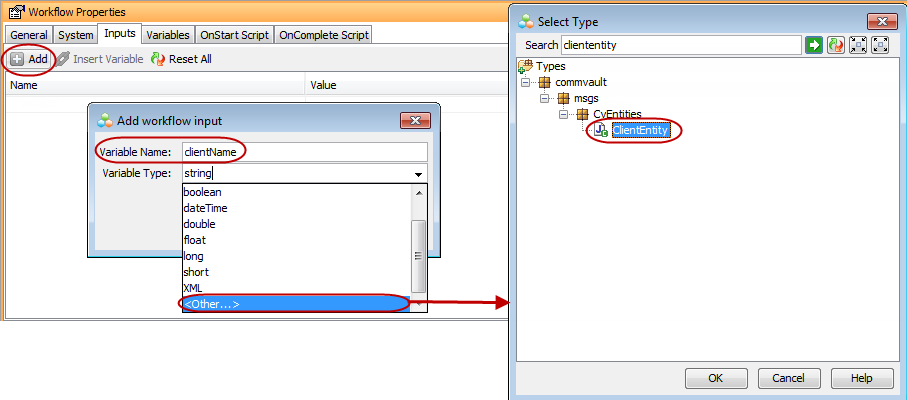
Click the Inputs tab to define a variable for the client name. When the Workflow is run, this variable will hold the client name provided by the user.
Note
The variables defined in the Inputs tab of the Workflow properties are the input values that the user will be prompted for during execution.
-
Click Add.
-
Type clientName in the Variable Name box.
-
Select <Other ...> from the Variable Type list.
-
From the Select Type dialog box, type ClientEntity in the Search box and then click the green arrow next to it.
-
Select ClientEntity from the tree and click OK.
-
Click OK.
-
-
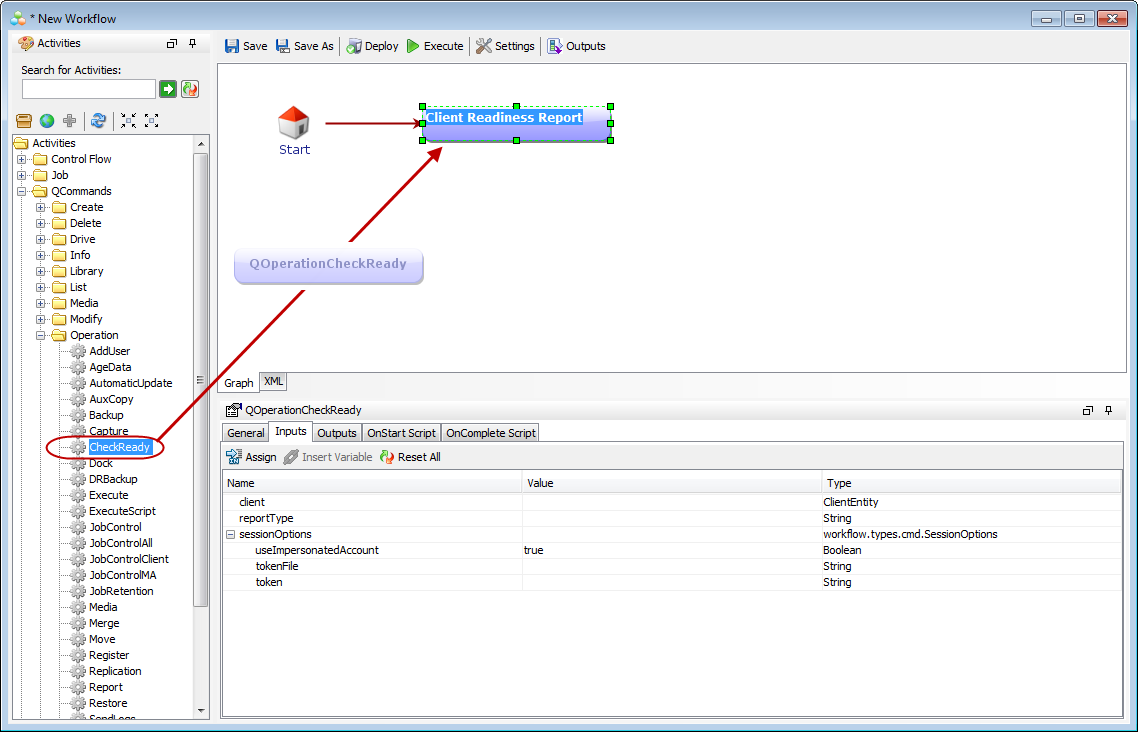
In the left pane, go to Activities > QCommands > Operation.
-
Click CheckReady and then drag it to the design area.
-
Double-click the activity and rename it to Client Readiness Report.
This activity runs the qoperation checkready command.
-
-
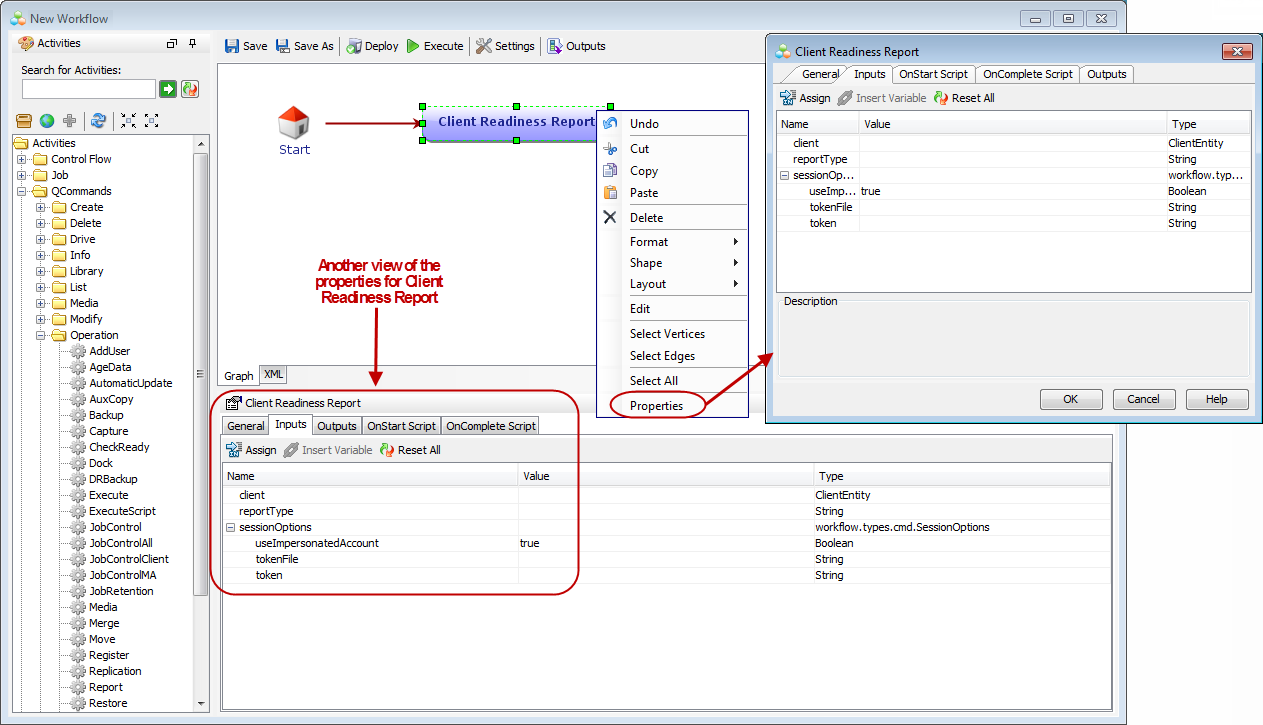
Right-click the Client Readiness Report activity and then click Properties.
The activity properties also appears below the workflow design area when the activity is selected.
-
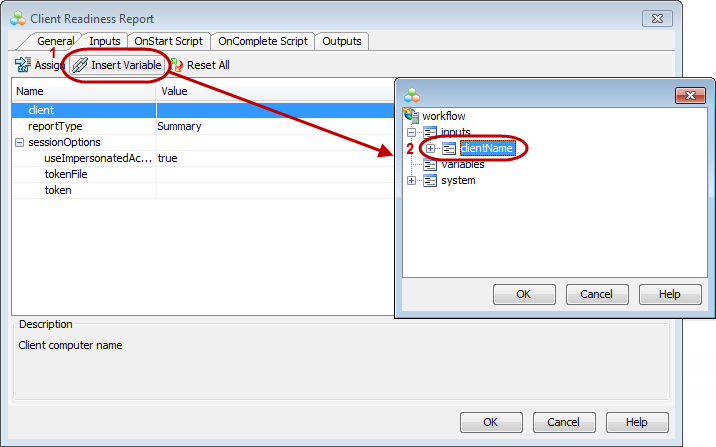
On the Inputs tab, assign the clientName variable (that you defined in step 3) to the client input of this activity using the steps below:
-
Select the client input and then click Insert Variable.
-
Expand inputs and then select clientName.
-
Click OK.
-
-
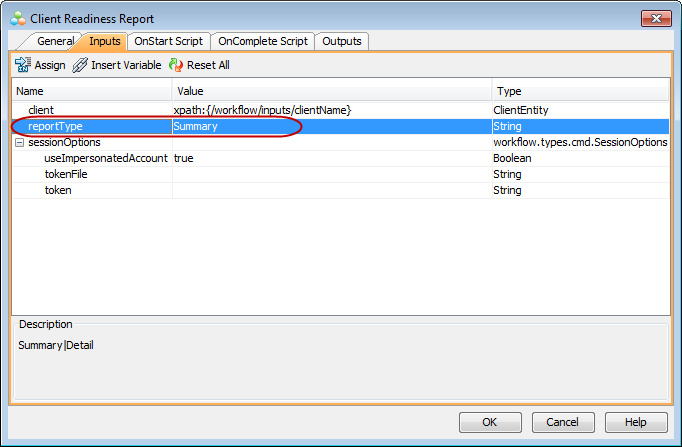
For the reportType input, select the level of detail that you want for the report from the Value column. For example, Summary.
-
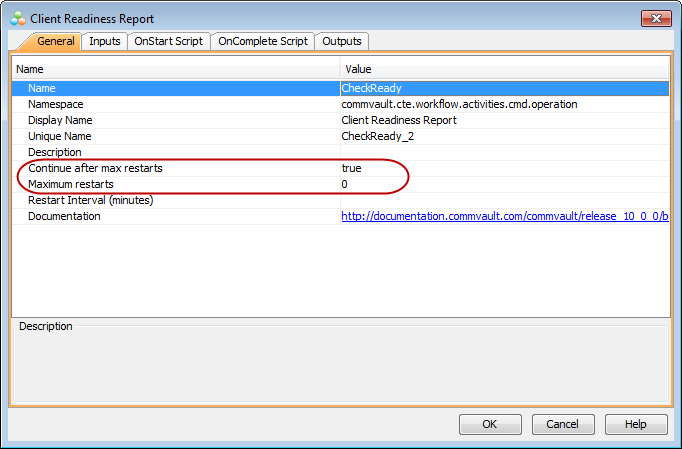
Click the General tab to configure the activity to run once and to continue to the next activity even in the case of failure.
-
Set Continue after max restarts to true.
-
Set Maximum restarts to 0.
-
Click OK.
-
-
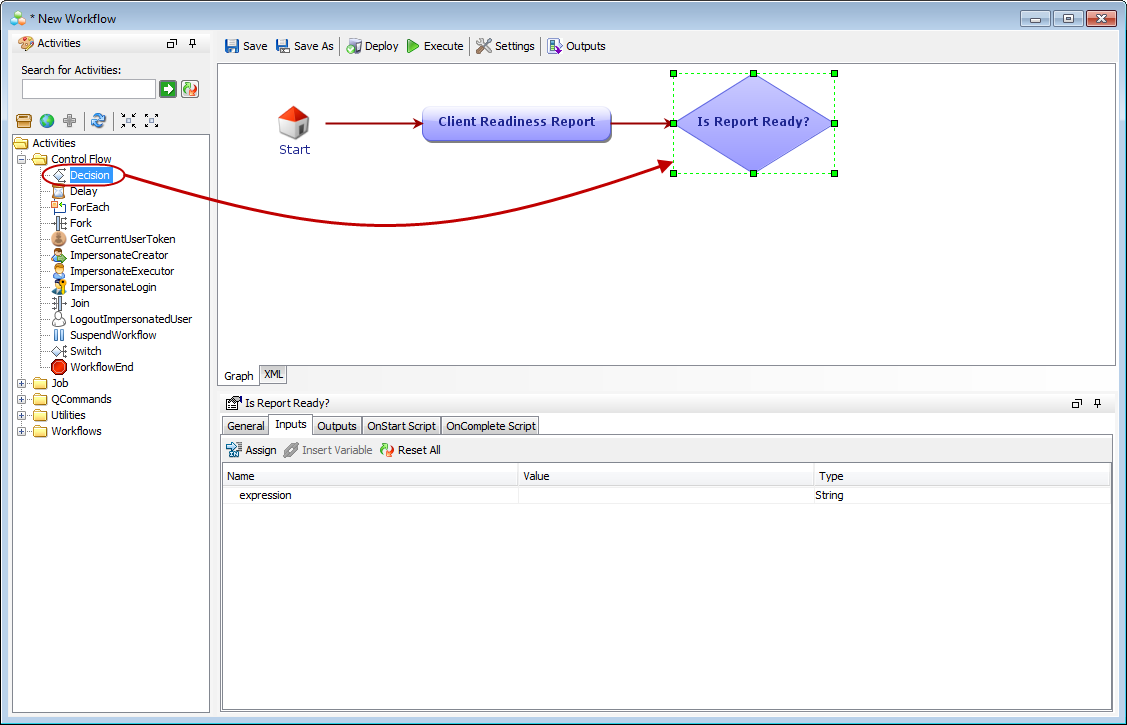
In the left pane, navigate to Activities > Control Flow.
-
Click Decision and then drag it to the design area, next to the Client Readiness Report activity.
-
Double-click the activity and rename it to Is Report Ready?.
This activity verifies that the Client Readiness Report activity completed successfully (that is, the operation completed with exit code 0).
-
-
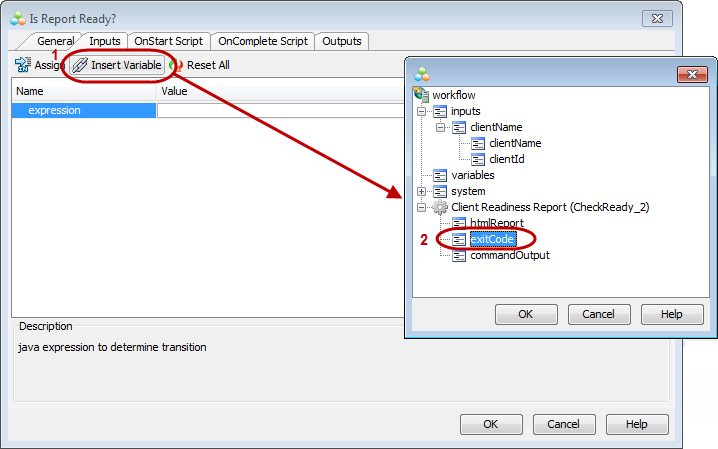
Right-click the Is Report Ready? activity and then click Properties.
-
On the Inputs tab, select the expression input and then click Insert Variable.
-
Expand Client Readiness Report and then select exitCode.
-
Click OK.
-
Add == 0 to the value you added for the expression input and click OK. This checks that the exit code of Client Readiness Report is 0.
The value should look as follows:
xpath:{/workflow/CheckReady_2/exitCode} == 0
-
-
In the left pane, navigate to Activities > Utilities.
-
Click Email and then drag it to the design area, next to the is Report Ready? activity.
-
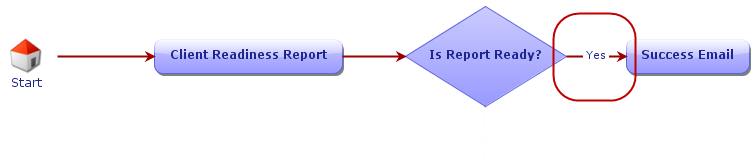
Double-click the activity and rename it to Success Email.
This activity will be configured to send the Client Readiness report to a defined email address.

-
-
To send the report to the user, you must configure two transitions (true or false) for the Is Report Ready? decision activity.
Note
The true condition represents when the Is Report Ready? completes with exit code 0, and the false condition when the exit code is not 0.
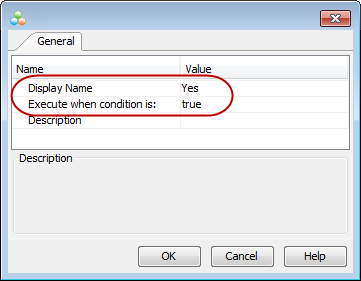
Setting the transition for the true condition
-
Right-click the arrow that points to the Success Email activity, and then click Properties.
-
Set Display Name to Yes.
-
Set Execute when condition is to true.
-
Click OK.
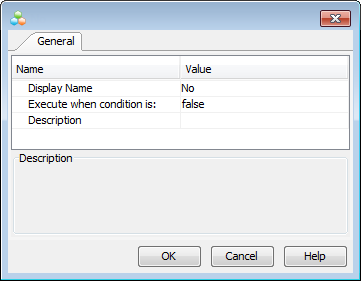
Setting the transition for the false condition
-
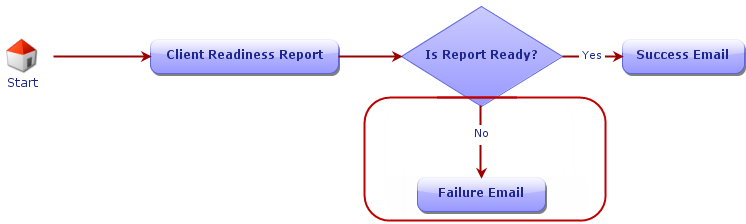
In the left pane, navigate to Activities > Utilities, click Email and then drag it to the design area.
-
Double-click the activity and rename it to Failure Email.
This activity will be configured to send an email to the workflow creator and executor if the qoperation checkready command fails.
-
Remove the arrow that appeared between the Success Email and Failure Email activities. Create a new arrow by clicking the center of the Is Report Ready? activity and dragging the arrow to point to the Failure Email activity.
-
Right-click the new arrow and then click Properties.
-
Set Display Name to No.
-
Set Execute when condition is to false.
-
Click OK.
-
-
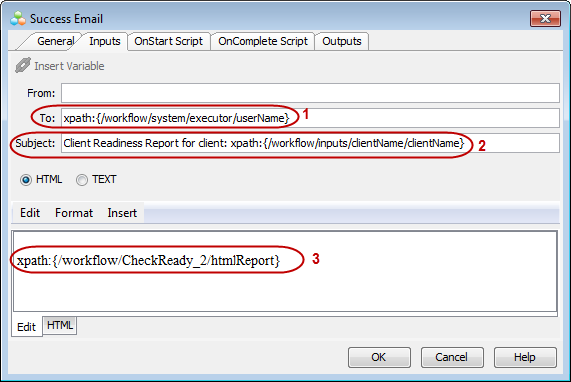
Right-click the Success Email activity and then click Properties to configure the email to be sent to the user.
On the Inputs tab, place your cursor in the To box and then add the variable for the user executing the workflow:
-
Click Insert Variable.
-
Expand system > executor and then select userName.
-
Click OK.
Specify a subject for the email in the Subject box. We recommend that you include the client name as part of the subject.
-
Click Insert Variable.
-
Expand inputs > clientName and select clientName.
-
Click OK.
Place your cursor in the body of the email and do the following:
-
Click Insert Variable.
-
Expand Client Readiness Report and then select htmlReport.
-
Click OK.
Click OK from the Success Email dialog box.
-
-
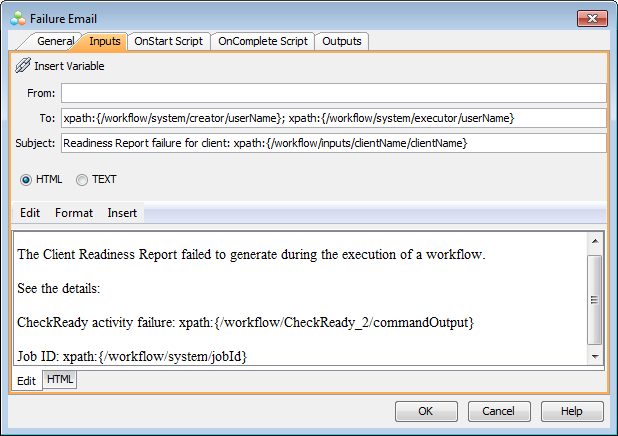
Right-click the Failure Email activity and then click Properties to configure the email to be sent to the workflow creator and executor.
-
On the Inputs tab, place your cursor in the To box and click Insert Variable. Expand system > creator, select userName and then click OK.
-
Again in the To box, enter a semicolon (';') next to the variable that you added, and then enter the following:
xpath:{/workflow/system/executor/userName}
-
Specify a subject for the email in the Subject box. After adding the subject, click the Insert Variable button and add the client name variable.
-
Place your cursor in the body of the email and provide details to the administrator. For example, click Insert Variable, select the system > jobID and Client Readiness Report > commandOutput variables, and then click OK.
-
Click OK.
-
You have completed defining the Workflow. There are a few more steps to make it ready for execution.
Saving and Deploying the Workflow
-
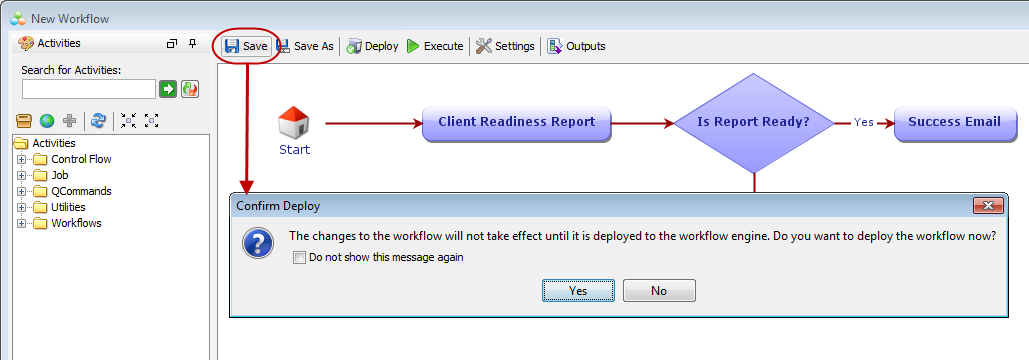
Click Save on the toolbar and then click Yes to deploy the workflow.
-
From the Workflow Engine list, select the engine that deploys the workflow and then click OK.
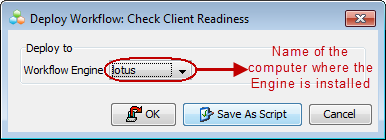
The selected engine deploys the Workflow.

-
Click OK.
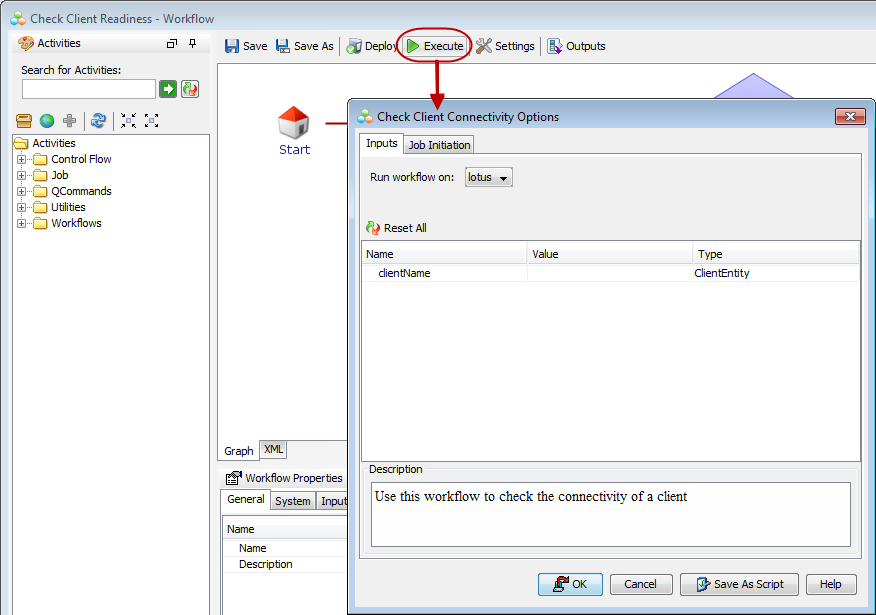
Running the Workflow
-
Click Execute on the toolbar and do the following:
-
For the clientName input, select the name of the client from the Value column. The Workflow will run the readiness report on this client.
-
Click OK.
In addition, you can schedule the Workflow if you do not want to run it immediately. See Schedule the Workflow for instructions about how to schedule the Workflow.
-
-
Return to the CommCell Console. You can track the progress of the workflow job from the Job Controller window.

When the job completes, you receive an email with the Client Readiness report. The following example shows a summary report where the client is ready.
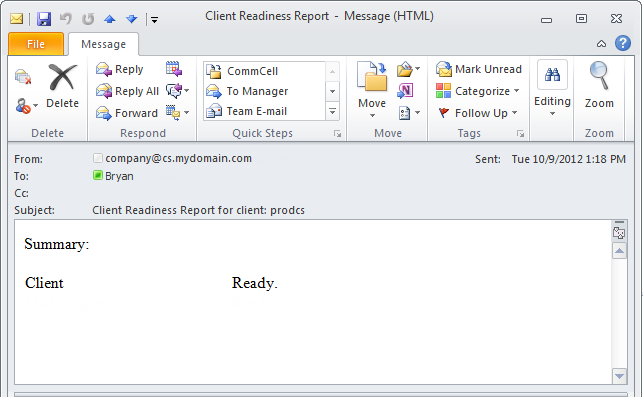
Congratulations! You have successfully designed, deployed and run your first Workflow.