Note
-
Network cabling is not included with the appliance. Please gather and run all needed cables before setting up the appliance.
-
Optional fibre channel or SAS cables may be required for connecting to the fibre channel and SAS adapters if purchased separately.
-
Have a local console, VGA monitor and USB keyboard or console emulation capability available during installation.
Racking the Appliance
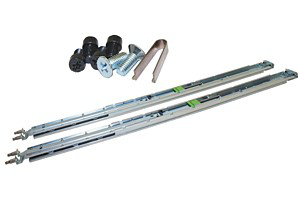
Each node has the following rail kit included in the box. If hardware installation services were not purchased, rack each node using the included rail kit.
-
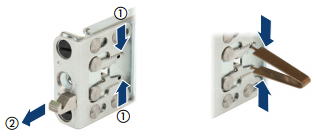
Install the variable size rails into the rack by inserting the retaining bolts into the rear of the rack.
-
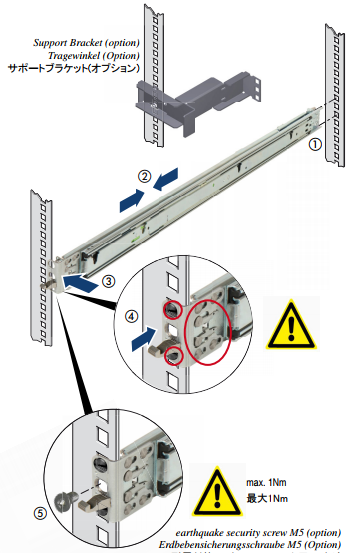
To release the locking mechanism press the rear side of the toothed levers (1) together, and pull the hook (2) simultaneously as far as it will go. If the rail is difficult to access (such as installed in the rack) you can use the unlocking tool to release it.
-
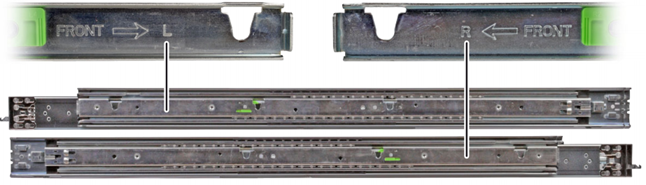
Identify the right and the left rail by slightly extending the telescopic rail to see the stampings.
-
Position the left rail on the rear left support upright (or on the support bracket) by inserting the retaining bolts.
-
Position the left rail on the front left support upright so that the support upright resides between the two brackets of the rail.
-
Press the left rail together.
-
Move the left rail outwards until the designated position (grid of support upright) is reached.
The black bolts must lock in the corresponding holes.
-
Press the bracket backwards until the rail engages.
-
The toothed levers must be closed.
-
The two black bolts must be flush with the bracket.
-
-
Check if the rail will be fixed by pressing the left rail backwards.
-
Repeat this procedure to install the right rail.
-
(Optional) Fix each rail with one earthquake security screw M5.
-
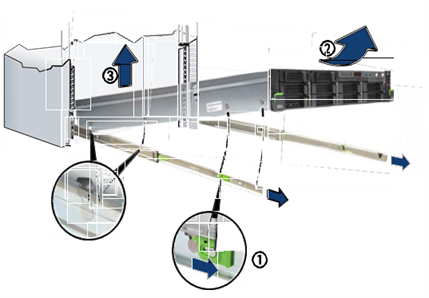
Fully extend the rack rails until they lock in place. Be sure that the rack rails click into place so that they can no longer be moved.
-
Now, at a slight angle, lower the server to the rear mounting point on the extended rails.
-
Fold down the server, while pressing the rail to the server side. Ensure that all six rack mounting bolts are properly seated in the mounting points on the rails and that the locking bars engage.
-
Now release the green locking mechanism of both rails.
-
Finally push the server as far as it will go into the rack until the quick-release levers engage.
-
-
Repeat the steps for all nodes.