You can set up the database on the new hardware by using one of the following methods, depending on your needs:
-
CommServe LiveSync For High Availability Disaster Recovery: Use this method to add the new hardware as a passive node to your environment and perform a production failover to make it active.
This is the recommended method to keep the old production CommServe computer as passive CS for as long as you want.
Choose from the following options:
-
Hardware using a floating CommServe name or hardware uses the same IP and Host Name for the CommServe host: Submit the database during the CommServe installation
This method requires that you provide the database dump during the CommServe installation.
Use this method if the new hardware uses the same IP and host name of the old CommServe computer. This method is the simplest way to set up the CommServe database in the new hardware.
-
Hardware uses a different IP and Host Name for the CommServe host: Install the CommServe software, and then restore the database
This method requires that you install the CommServe software, and then restore the database by using the CommServe Recovery Assistant tool.
Use this method if the new hardware uses a different IP or host name than the old CommServe computer. Remember that the CommServe client name must be the same as the old CommServe client.
-
Cluster Environment: If you moved the CommServe database from a Windows cluster to another Windows cluster, see CommServe Hardware Refresh: Configuring a Cluster Environment for instructions.
If none of the methods work for your environment, contact Customer Support for assistance.
Before You Begin
-
Create a server group or go to existing server groups and add all the clients. Add the CommServe hostname(s) sCSINTERFACELIST additional setting to the client group using a comma separated list of CommServe interfaces, including both existing and new or standby Commserve hostnames (such as a.commvault.com and b.commvault.com).
For more information about adding additional settings from the CommCell Console, see Adding or Modifying Additional Settings from the CommCell Console
-
Wait for sufficient time and then verify that the registry key of the clients are populated with hostnames:
- For windows, go to Computer HKEY_LOCAL_MACHINE\SOFTWARE\CommVault Systems\Galaxy\Instance00X\CommServe\sCSINTERFACELIST
- For Linux, go to /etc/CommVaultRegistry/Galaxy/Instance00X/CommServe/.properties/sCSINTERFACELIST
-
You must perform the steps described in Preparing the Old CommServe Computer for Shutdown.
-
If you have an older license that is set to Static, then you must request a new, updated license.
-
Obtain a new license from your software provider. To request a new license, on the Commvault Maintenance Advantage Customer Support portal, go to Product Registration & License Management. In this form, you must include your CommCell ID, Serial Number, and Registration Code. You can copy this information from the License page.
-
After you receive an updated license, you can add it on the Command Center.
Note
If in the old CommServe license, the IP address was set to dynamic, then you do not require a new CommServe license. You can reuse the old CommServe license in the new CommServe computer.
-
-
During new CommServe installation or CommServe database restore operation, you must plan to keep enough free space in the volume of the new hardware for uncompressed CommServe database and future growth of the database size.
-
Change the CommServe name for clients after restoring the database.
Procedure
Choose the method that better accommodates your requirements.
Preferred Method: Submit the Database During the CommServe Installation
-
Log on to the new computer and ensure that the network details (computer name and IP settings) are properly set.
Tip
If you plan to set up an exact replica of the old CommServe computer, add the new computer to the same domain as the old computer.
-
Copy the Disaster Recovery backup files to the local drive.
The disaster recovery backup files were saved during the Preparing the Old CommServe Computer for Shutdown procedure.
-
Install the CommServe software. During the installation, submit the database dump file from the old CommServe computer.
-
Windows
For the installation instructions, see Installing the CommServe Software.
Make sure that you specify the following settings:
-
On the Select Packages page of the installation wizard, select CommServe and any other package that you had in your old CommServe computer. You can later uninstall the packages that you do not want on the new computer.
-
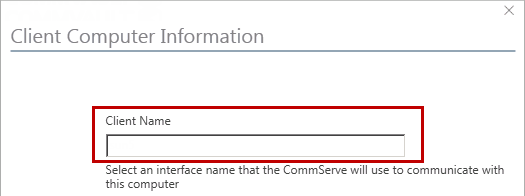
Later on the installation, on the Client Computer Information page, make sure that you provide the name of the old CommServe computer.
-
To submit the dump file, perform the following steps during the installation:
-
On the Database Install Option page, click Use Existing Database and select the CommServe check box.
If you had other server packages installed on the CommServe computer (for example, Workflow Engine and Web Server), select the check boxes associated with them.
-
On the Database Dump Location page, specify the location of the CommServe database dump file (and of any other database that you selected).
The dump files are located with your Disaster Recovery backup files. For example, the default name for the CommServe dump file is commserv.dmp.
-
Linux
For the installation instructions, see Installing the CommServe Server in a Linux Environment.
Make sure that you specify the following settings:
-
On the Package Selection screen of the installation wizard, select CommServe and any other package that you had in your old CommServe computer. You can later uninstall the packages that you do not want on the new computer.
-
To submit the dump file, perform the following steps during the installation:
-
On the Commvault Database Setup Recommended Settings screen, remove the selection for the Create new database instead of restoring from database dump option, and then click Next.
-
On the Commvault Database Dump Location screen, modify or verify the database dump location, and then click Next.
The dump files are located with your Disaster Recovery backup files. For example, the default name for the CommServe dump file is commserv.dmp.
-
-
-
If you had hotfixes installed on your old CommServe computer, make sure to install the same hotfixes on the new computer.
-
To match the ports used by the Consoles on the old CommServe computer, open IIS Server Manager to modify the default IIS port.
The port numbers should match the information collected during the Preparing the Old CommServe Computer for Shutdown procedure.
-
If a deduplication database (DDB) was configured in the old CommCell environment, copy the DDB content (CV_SIDB folder and icl_label.txt file) to the same drive and folder.
-
To verify that your CommServe database was successfully moved to the new computer, open the CommCell Console.
The console should display the CommServe computer and the associated clients in the CommCell Browser.
-
If the MediaAgent was installed in the old CommServe computer, complete the following steps:
-
If you have a tape library, the library should already be plugged into the new hardware. Make sure to reconfigure the library from the CommCell Console.
See Configuring Devices for step-by-step instructions.
-
If you have a disk library, copy the local mount path folder to the same drive as it was on the old CommServe.
-
Install the MediaAgent software in the new CommServe computer using the steps described in MediaAgent Installation.
-
-
Enable CommCell activities.
-
From the CommCell Browser, right-click the CommServe node, and click Properties.
-
On the Activity Control tab, enable all the activities that you cleared when the CommServe database was on the old hardware, and click OK.
Note
If the DDB activity was disabled before DR restore, re-enabling the DDB activity after the DR restore automatically starts the DDB resynchronization process.
-
-
Perform a test backup. Refer to the Agent-appropriate documentation for instructions on how to run backups.
Alternative Method: Install the CommServe Software, and then Restore the Database
-
Log on to the new computer and ensure that the network details (computer name and IP settings) are properly set.
-
Copy the disaster recovery backup files to the local drive.
The disaster recovery backup files were saved during the Preparing the Old CommServe Computer for Shutdown procedure.
-
Install the CommServe software on the new computer.
-
For Windows computers, see Installing the CommServe Server in a Windows Environment.
-
For Linux computers, see Installing the CommServe Server in a Linux Environment.
Important
If you need to retrieve data from a tape or disk library, do not install the MediaAgent when you install the CommServe software. You will be able to properly retrieve data from a tape or disk library when you get to Step 11, below.
-
-
Restore the CommServe database on the new CommServe computer using the CommServe Recovery Assistant tool.
-
For Windows computers, see Recovering the CommServe Database Using the Recovery Assistant Tool for Windows.
-
For Linux computers, see Recovering the CommServe Database Using the Recovery Assistant Tool for Linux.
-
-
Point the host name of the old CommServe computer to the IP address of the new computer. For more information on changing the IP address, refer to the documentation associated with DNS software implemented in your environment.
Important
Verify that all client computers point to the host name of the old CommServe computer, and not to the IP address.
-
Optional: If you want to update the clients and MediaAgents with the name of the new CommServe computer, see Changing the CommServe Host Name on a Client.
-
To match the ports used by the Consoles on the old CommServe computer, open IIS Server Manager to modify the default IIS port.
The port numbers should match the information collected during the Preparing the Old CommServe Computer for Shutdown procedure.
-
If a deduplication database (DDB) was configured in the old CommCell environment, perform one of the following steps:
-
If the DDB was hosted in the CommServe computer, then copy the DDB content (CV_SIDB folder and icl_label.txt file) to the same drive and folder in the new computer.
-
If the DDB was hosted on a separate MediaAgent computer, no action is required.
-
-
To verify that your CommServe database was successfully moved to the new computer, you must do the following:
-
Verify that services are running and then open the CommCell Console.
The console should display the CommServe computer and the associated clients in the CommCell Browser.
-
Verify that the CommServe client name is the same as the old CommServe client name.
-
Verify that the CommServe host name is the same as the new hardware host name.
-
Verify that the old CommServe host name resolves to the new hardware IP address using the
pingcommand, or other name resolution commands or tools.
-
-
If the MediaAgent was installed in the old CommServe computer, complete the following steps:
-
If you have a tape library, the library should already be plugged into the new hardware. Make sure to reconfigure the library from the CommCell Console.
See Configuring Devices for step-by-step instructions.
-
If you have a disk library, copy the local mount path folder to the same drive as on the old CommServe computer.
-
Install the MediaAgent software in the new CommServe computer using the steps described in MediaAgent Installation.
-
-
Enable CommCell activities as follows:
-
From the CommCell Browser, right-click the CommServe node, and then click Properties.
-
On the Activity Control tab, enable all of the activities that you cleared when the CommServe database was on the old hardware, and then click OK.
Note
If the DDB activity was disabled before DR restore, re-enabling the DDB activity after the DR restore automatically starts the DDB resynchronization process.
-
-
Perform a test backup and restore. Refer to agent-appropriate documentation for instructions on how to run backups.
What to Do Next
Note
During CommServe installation, if you moved the CommServe database to or from a cluster environment, make sure to perform the Configure Cluster Environment steps in the Post-Migration Operations page.