Verify the setup from the production CommServe host to ensure that the default components are installed and configured properly.
CommCell Console
Open the CommCell Console and verify the following. For more information on opening the CommCell Console, see Opening the Stand-Alone CommCell Console.
-
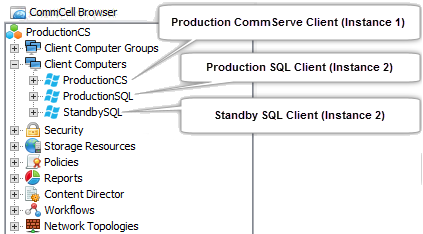
Clients: From the CommCell Browser, navigate to Client Computers.
The following clients should be displayed.
-
CommServe Client on the Production host
-
SQL Client on the Production host
-
SQL Client on the Standby host
Click here to view an example
-
-
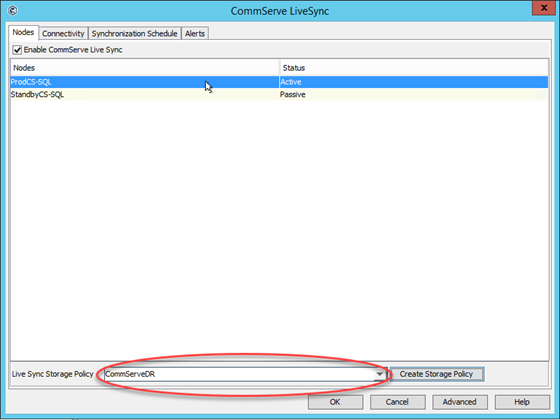
Storage Policy: From the Control Panel, click CommServe LiveSync in the CommCell group.
The CommServeDR storage policy will be selected in the Live Sync Storage Policy box.
Important
To ensure successful completion of the LiveSync operation, make sure that a library is configured in the CommCell. This CommServeDR storage policy is automatically created when the first library is configured in the CommCell. This storage policy is used by default by the LiveSync operation.
Click here to view an example
If necessary, a user-defined storage policy can also be used to perform the LiveSync operation. For more information on changing the storage policy, see Modifying the Storage Policy for SQL LiveSync Operations.
-
Tunnel Port on the SQL client: From the CommCell Browser, right-click the SQL client on the active CommServe host > Properties > Network > Summary.
The tunnel ports are displayed under [incoming].
Click here to view an example.
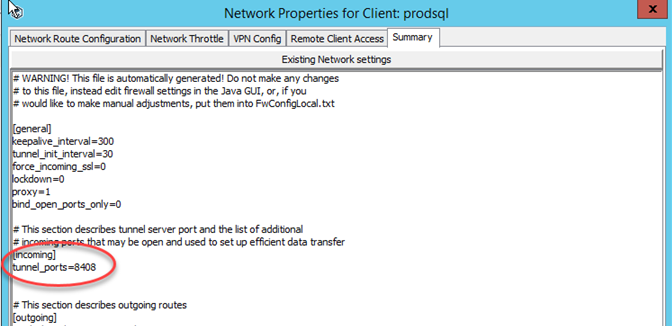
Important
By default, network route are added to all the clients using the SQL clients in the CommServe hosts as the proxy. Make sure that all clients can communicate with the SQL client in the active CommServe, on the tunnel port. The default tunnel port for the SQL client is 8408.
If necessary, you can setup an alternate route for client communication. For more information on setting up client communication, see Setting Up Client Communication With the CommServe.
-
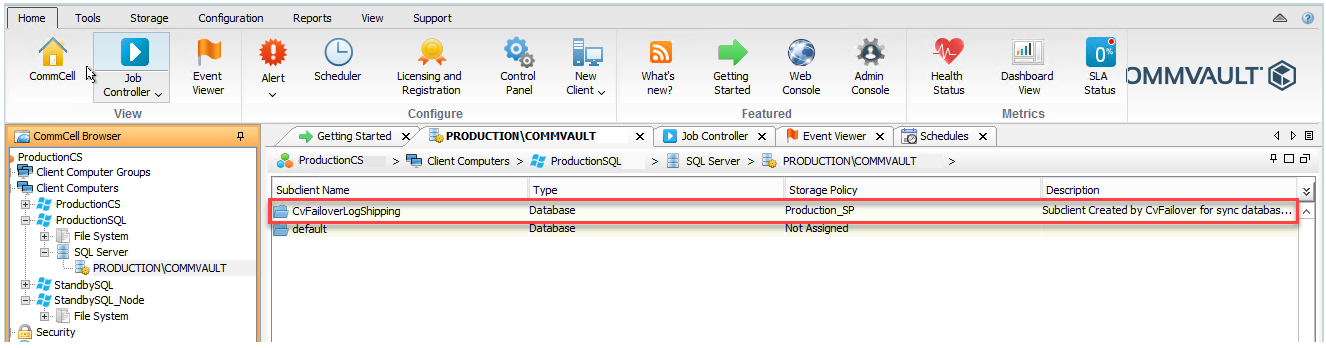
Live Sync Subclient: From the CommCell Browser, navigate to Client Computers > <SQL Client on the Production host> > SQL Server > <Instance>.
The CVFailoverLogShipping subclient will be displayed in the right pane.
Click here to view an example
-
Default Subclient on the standby SQL Client: From the CommCell Browser, navigate to Client Computers > <SQL Client on theStanndby host> > SQL Server > <Instance>.
The default subclient will be displayed in the right pane.Right-click the default subclient, click Properties and then click the Activity Control tab.
Important
Verify and ensure that all Data Management activities is disabled on the default subclient.
-
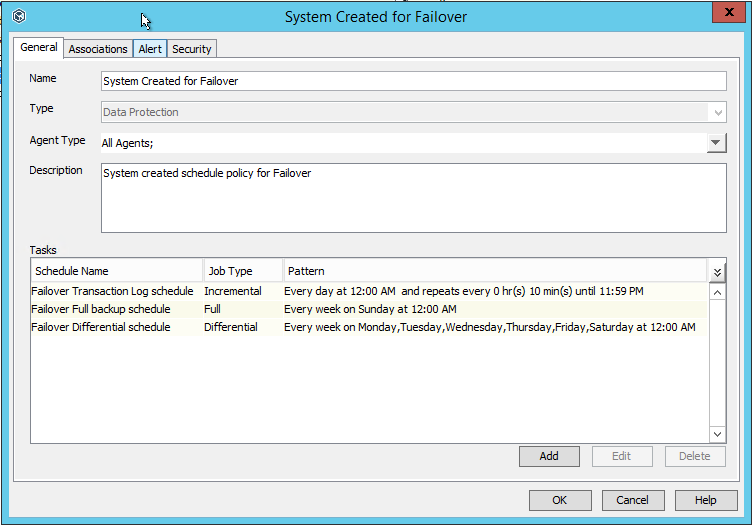
Schedule Policy: From the CommCell Browser, expand Policies > Schedule Policies.
The System Created for Failover schedule policy will be displayed in the right pane.
The following schedules will be created in this Schedule Policy:
-
Failover Transaction Log schedule
-
Failover Full backup schedule
-
Failover Differential backup
Click here to view an example
-
-
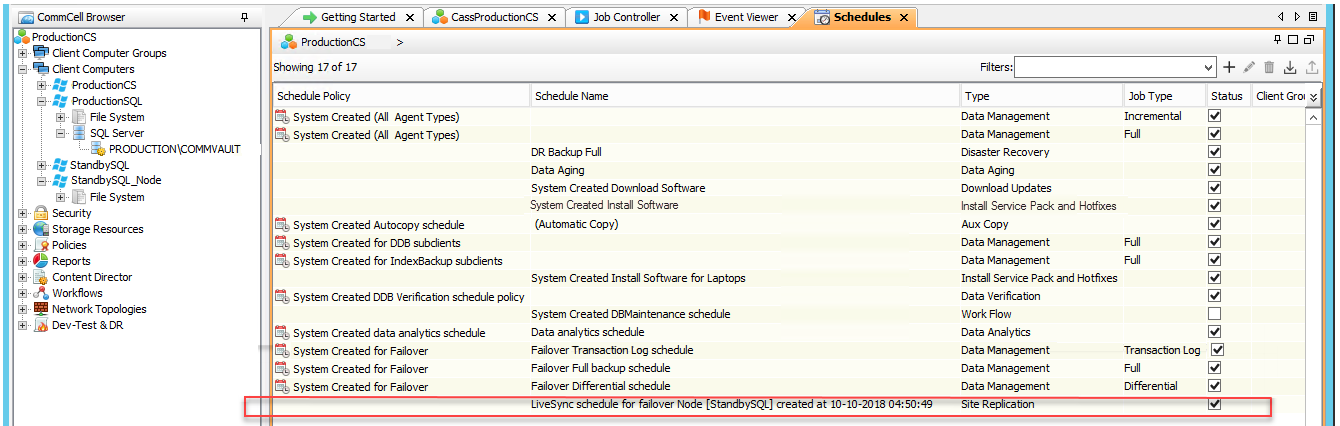
LiveSync schedule: From the CommCell Browser, right-click the <CommServe> > View > Schedules.
The LiveSync Schedule will be displayed in the right pane.
Click here to view an example
-
Multiple CommServe Hostnames: The Clients For Commserv LiveSync Client Group is created, and all clients with Version11 SP14 (and above) are included in this Client Group. If the Clients For Commserv LiveSync Client Group is not created automatically, follow the steps described in Missing Clients For Commserv LiveSync Client Group.
The sCSINTERFACELIST additional setting is setup, for this client group, with the names of the active and passive CommServe hosts, so that the clients can automatically connect to an available CommServe host.
-
Verify that remote cache was configured and enabled for passive CommServe client, and then verify that the remote cache for the production CommServe SQL client (Instance002) was configured and disabled.
Services
-
Verify the status of the CommServe hosts using the following steps:
-
Log on to either the production CommServe host, or the standby CommServe host.
-
Open command prompt and navigate to the following folder associated with the SQL client:
For example: /opt/commvault2/Base
-
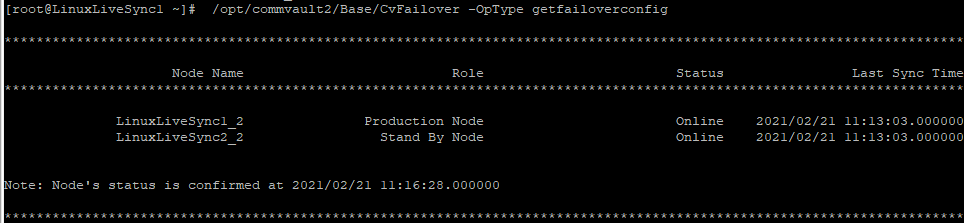
Execute the following command to view the status of the CommServe hosts:
./CvFailover -OpType GetFailoverConfigThe status of the production and standby CommServe hosts will be displayed.
Click here to view an example
-
-
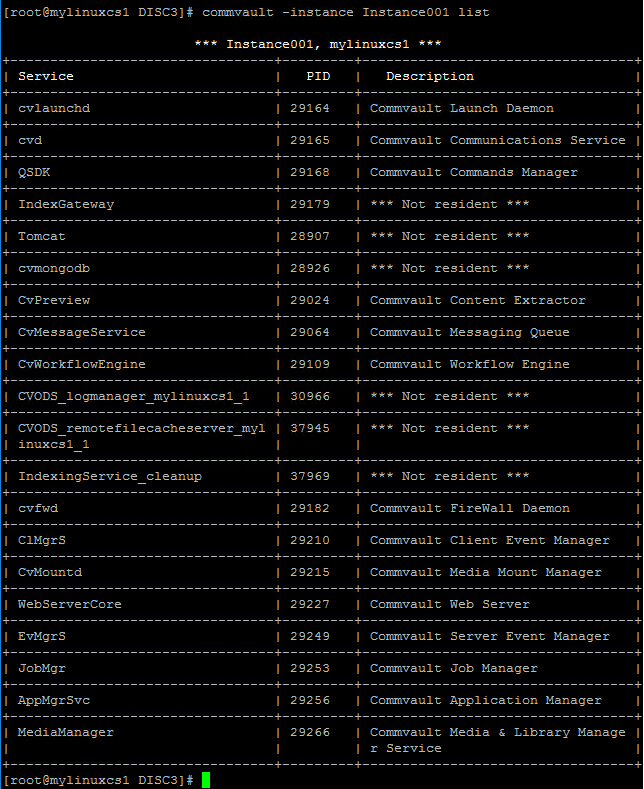
View the services on the production CommServe host as follows:
-
Use the following command to view the services in Instance001:
commvault -instance Instance001 listClick here to view a sample output
-
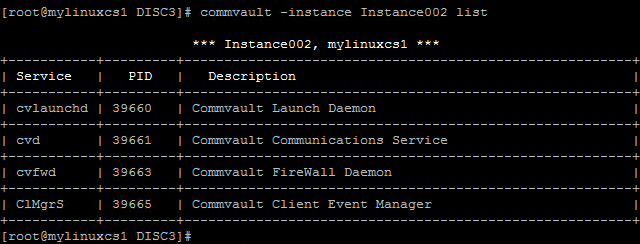
Use the following command to view the services in Instance002:
commvault -instance Instance002 listClick here to view a sample output
-
-
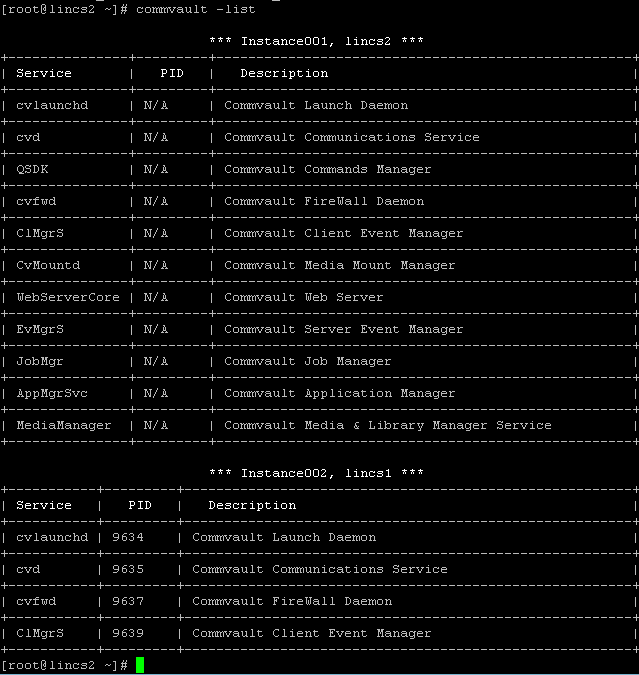
View the services on the standby CommServe host as follows:
commvault -listClick here to view a sample output
What to Do Next
OPTIONAL: Verify disaster readiness
Related Topic
Network Topologies and Clients Groups Created for CommServe LiveSync