Perform the interactive recovery when you do not want to use the recovery response file.
Procedure
-
Boot the client using the ISO image.
-
Type Default and press Enter to start the default recovery.
On certain hardware, after the system state restore, the kexec system call fails and the machine reboots. On such hardware, we recommend to select the nolapic boot option. Similarly, the noapic boot option is relevant to a particular hardware configuration.
Note: Selecting the nolapic or noapic boot options for default recovery might result in incorrect hardware initialization.
-
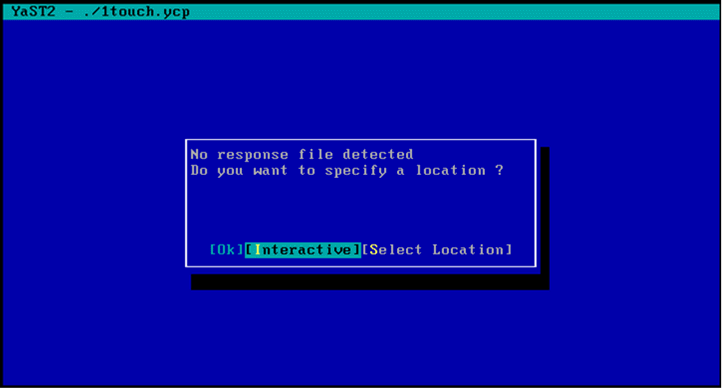
Select Interactive and press Enter.
-
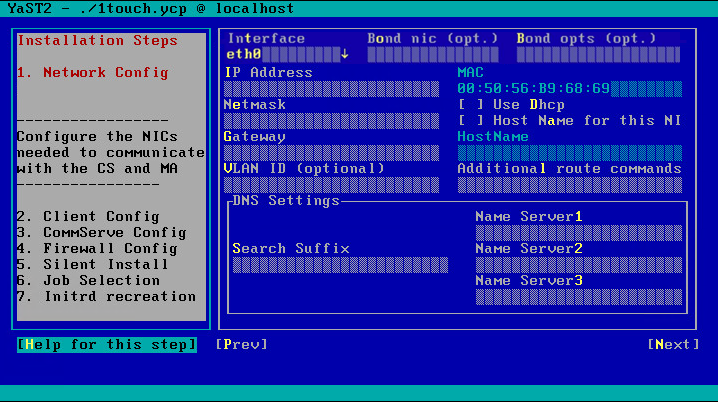
On the Network Config page, enter the IP address, network and name server details of the network specified in the client information checklist.
Note
To configure the network using DHCP, verify that the source server has dhclient.
If VLAN tagging for NICs is required, enter the VLAN ID.
Information
VLAN ID is a numeric value between 1-4095. When you specify a VLAN ID, a new virtual NIC will be brought up on the selected physical NIC with name: ethX.vlanID. VLAN tagged NICs follow four naming conventions:
-
VLAN_PLUS_VID (e.g., vlan0023)
-
VLAN_PLUS_VID_NO_PAD (e.g., vlan23)
-
DEV_PLUS_VID (e.g., eth1.0023)
-
DEV_PLUS_VID_NO_PAD (e.g., eth1.23)
The naming type in use is saved in the system state backup.
During the first and second phases of 1-Touch recovery, the VLAN_PLUS_VID_NO_PAD naming type is always used. However, as part of network persistence, the appropriate network configuration file will be reconfigured based on the naming type in use on the backed up machine.
In the Additional Route Commands field, you can add additional networking commands that are executed after the selected NIC has been brought up. You can also add additional static routes in this field. Multiple commands must be separated by a semi-colon.
Example
route add -net 10.10.10.0 netmask 255.255.255.0 gw 172.19.109.1; ip route add 10.20.0.0/16 dev eth0
Note
The networking commands must be valid and the commands must use only standard system utilities. These commands take effect automatically during the second phase when the network is re-configured.
If link aggregation (802.3ad) is required, it is recommended to select the bonded NIC configuration. For the remaining bonding modes, it is recommended to configure a single NIC during the restore operation and ignore the options for bonded NIC. To configure bonded NIC configuration, select the first slave NIC from the list.
Optional: In the Bond NIC box, type the name of the bonding master.
Optional: In the Bond opts box, specify the bonding options separated by a space. For example,
miimon 100 mode 802.3ad.You can configure the IP and other options.
Select all other slave NICs from the list and specify only the name of the bonding master. The remaining configuration options are picked from the first slave NIC.
Select Next and press Enter.
-
-
On the Client Config page, enter the short name of the backed up client in the Backed up Client Name field, and then select the fully qualified client hostname of the client that you are performing recovery on, from the Current Client HostName selection box.
The Current Client Hostname list contains values of all hostnames entered on the Network Config page and the client hostname present in the recovery response xml file. It also contains the hostnames resolved via nslookup for each IP address configured on the Network Config page. You can also enter a new client hostname manually as specified in the client information checklist. This hostname will be used during recovery and will persist on the machine after the recovery completes.
The hostname must be resolvable from the CommServe and the MediaAgent to the client being recovered. Skip the hostname field to enable installation of the client being recovered with an IP instead of hostname.
Select Next and press Enter.

If you want to clone the client computer, select the Clone client with new name check box and enter the new client name. Otherwise, continue with the next step.

-
On the CommServe Config page, enter the details of the CommServe server and the MediaAgent.
If two-factor authentication is enabled on CommServe, press ALT+F3 to switch to the alternate terminal.
Provide the the two-factor authentication PIN in a /tmp/pin file.
Press ALT+F1 to switch to the main terminal.
Note
You must provide a regular password without appending the PIN, in the Password field on the CommServe Config page.
Select Next and press Enter.

-
On the Firewall Config page, enter the details of the firewall.
Select Next and press Enter.

-
The Installation Progress page appears, showing the installation process. If there is an error during installation, select one of the following options:
-
Ok - to start the recovery process again from the CommServe Configuration page.
-
Abort - to exit the recovery process.
-
-
On the Job Selection page, select Next and press Enter.
By default the system state and the file system data, backed up during the most recent backup is restored. You can select a backup job to restore the system state data and a backup job to restore the file system data.

-
The recovery process now boots into the kernel that was restored from the backup of the source client. After the boot up completes, the GUI will restart and perform a temporary commvault client install before showing up the Multipath Settings page. The temporary client will be initially installed to use port numbers 8111 and 8112. The temporary client will be deleted after the recovery process completes, and the client being recovered will be registered with the port numbers used by the original client.
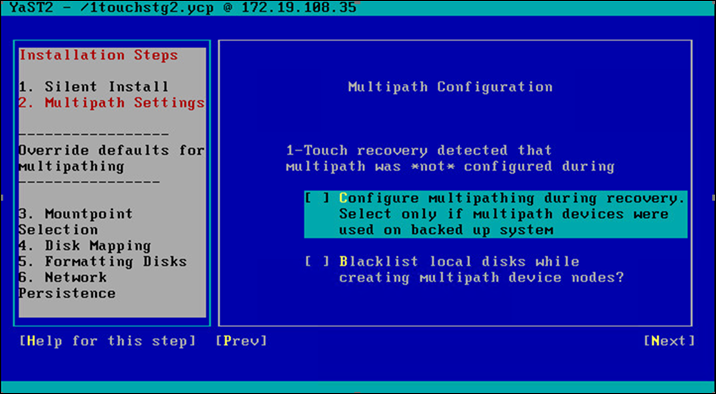
On the Multipath Settings page, select Next and press Enter.
-
If Linux native multipathing needs to be enabled, select the Configure multipathing during recovery check box.
By default, the selection will be made based on the configuration of the backed up machine. Do not change the default value of this option when performing a Recovery on a Similar System .
-
To ignore the local disks while generating multipath devices during a restore, select Blacklist local disks check box.
-
-
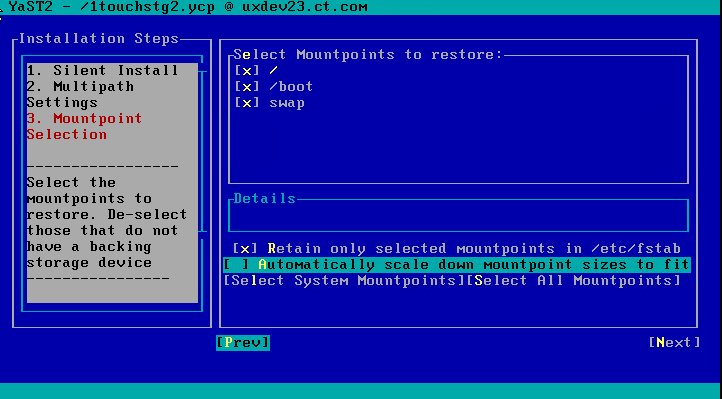
On the Mountpoint Selection page, select Next and press Enter.
By default, the system mount points are selected for restore. You can select the mount points that you want to recover.
Btrfs subvolumes are supported for restore.
Note
-
If you choose the Automatic Disk Layout option during a Virtualize Me operation, the size of each Btrfs mount point is increased to a total of the utilized size plus an additional 512 MB to allow for increased metadata size requirements.
-
To restore a subvolume, you must select the parent subvolume in the nesting hierarchy.
-
You can exclude bind mount points from backup operations by adding the bind mount points to backup filters.
You can select the Retain only selected mountpoints in /etc/fstab check box to keep /etc/fstab entries only for restored mount points on the recovered machine.
If the target disks are smaller in size or less in number than that of the source client, the option to configure the mount points manually appears in the next step. To scale down the mount points automatically to fit the available disks, select the Automatically scale down mountpoint sizes to fit check box.
-
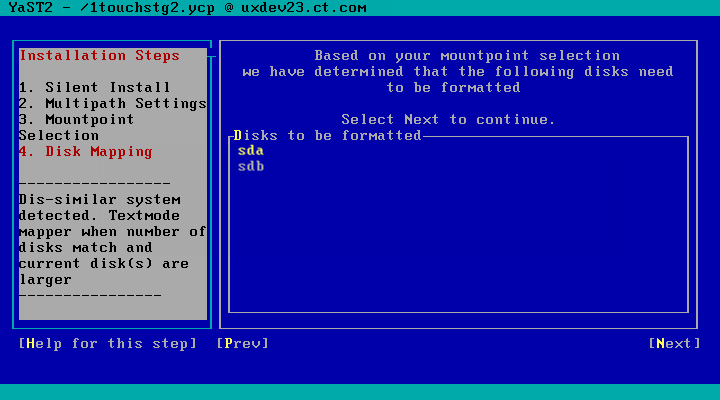
If you do not select the Automatically scale down mountpoint sizes to fit option in the previous step, on the Disk Mapping page, select Next and press Enter.
You can filter out specific files and folders from restore operation at any step in the second phase of 1-Touch recovery, before partitioning disks:
-
Press ALT+F2 to go to an alternate terminal.
-
Add the files and folders that you want to filter from the restore operation to the /tmp/restore_skip_list file.
Note: Wildcards are not supported in the file and folder names.
Once the restore operation starts, you can verify that the content was filtered in the /fullsys.xml file.
-
-
Select Yes and press Enter.

-
File system restore starts.

-
On the Network Persistence page, the option to persist the network configuration used during the recovery process onto the machine after it boots up, appears. The options available are:
-
No: Do not persist any configuration. Upon reboot, the machine has the network configuration of the backed up machine. Select this option if VLAN tagged NICs are configured.
-
Yes-only configured: Persist the network configuration of only those NICs that were enabled and configured during the recovery (this option is selected by default).
-
Yes-All: Persist the network configuration for all NICs detected during recovery. An empty configuration file is created for the NICs that were detected but not configured during the recovery process.
Note
If bonded NIC was configured during the restore operation (step 5), it is recommended to select the No option, and to review or update the network configuration scripts after the restore operation completes.
Select Next and press Enter.

-
-
If there is a mismatch in the network configuration on the source (backed up) machine and the current machine, you can map the network interfaces. You may choose not to add any map on this page, and by default, the network interfaces on the current system are mapped to the network interfaces on the backed up machine that have the same name. To override this option, select one NIC from each of the boxes labeled Backed Up and Current, and map using Add Map. It is recommended to leave this option empty, in most of the cases.
Example:
The backed up machine has 1 NIC named eth0 and the current machine has 1 NIC named eth1. On selecting each NIC, the details for the NIC appear. Proceeding from this page without adding any map ensures that the configuration used on eth1 will be applied to the active NIC on the machine. The name may now be different, depending on udev rules present on the restored machine..
Select Next and press Enter.

-
Press Enter.
-
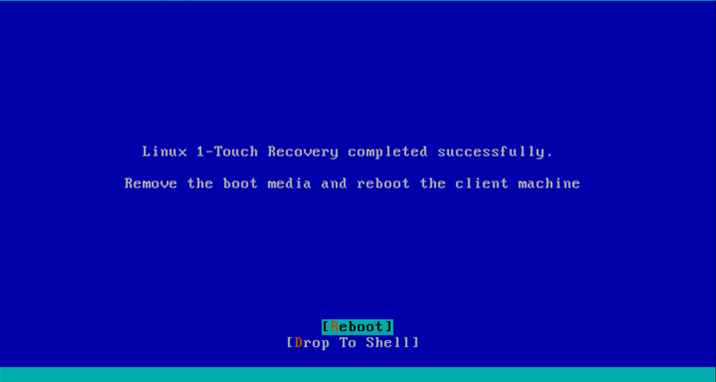
Remove the 1-Touch Linux Live CD and reboot the system.