You can save the File Level Analytics report as script and execute directly from any client machine. You can configure the following steps once to generate the report as text file.
Procedure
-
On the CommCell Console menu bar, select the Reports tab, and then click Other Reports > File Level Analytics.
The Report Selection dialog box appears.
-
Select the Job ID.
The job ID can be changed later from the client machine.
-
In the Filter tab, unselect Date Modified and Filter checkbox.
-
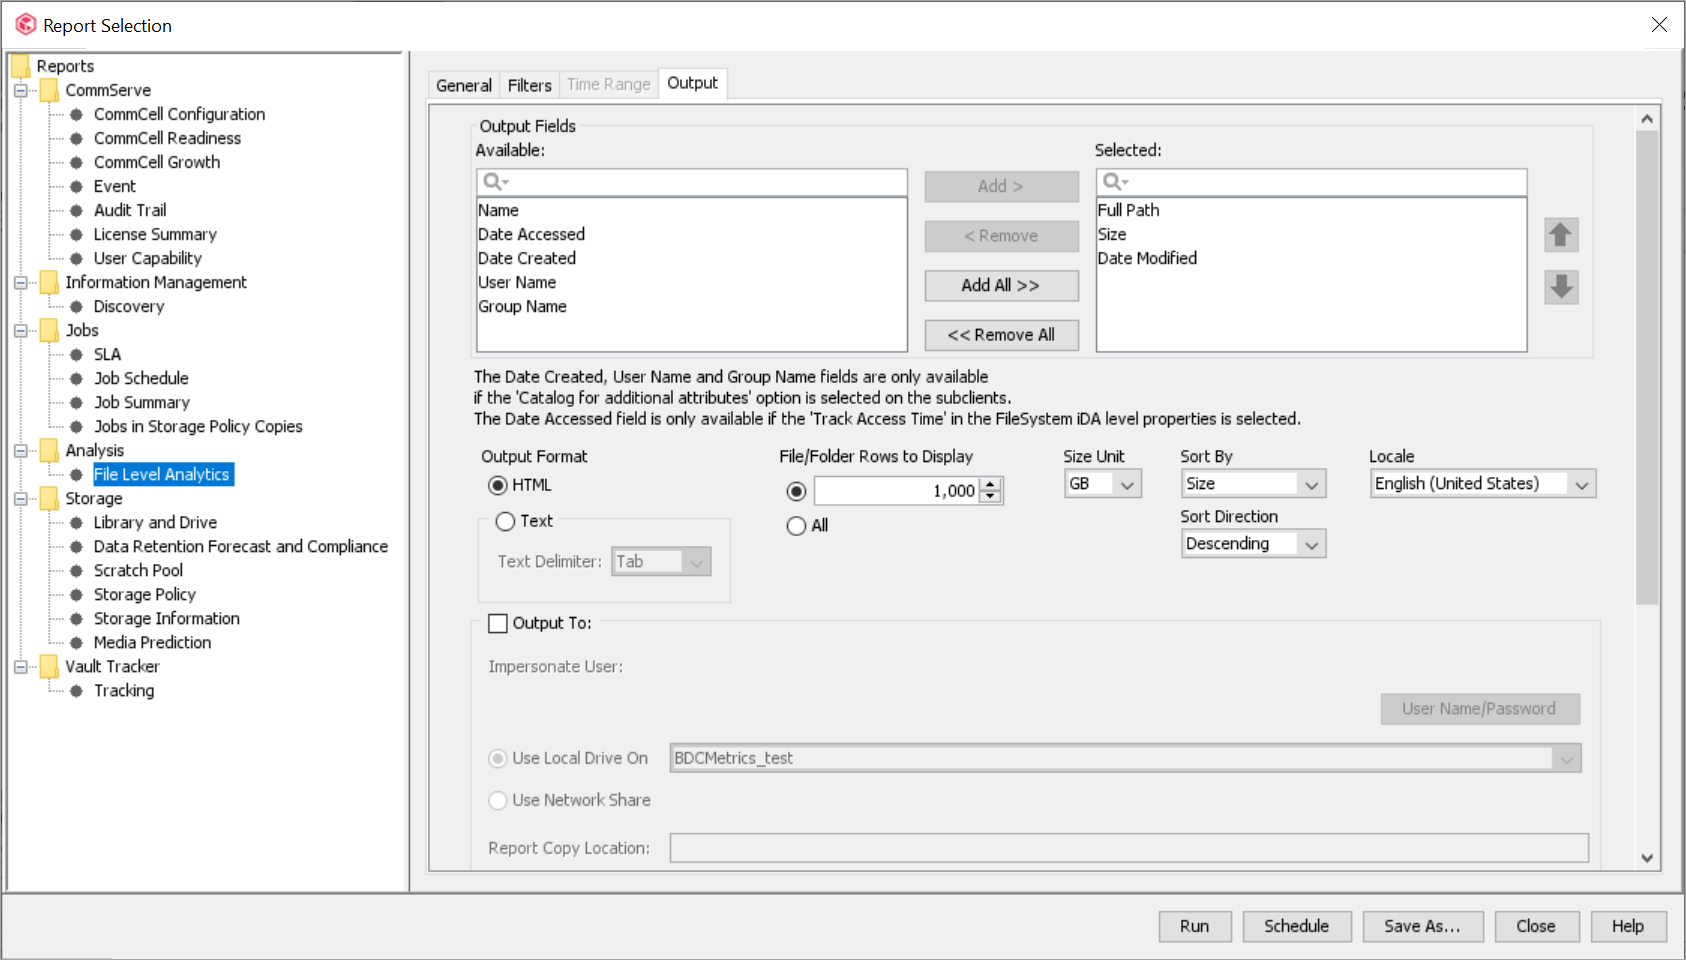
In the Output tab, make the following:
-
In the Output Fields section, you can select additional columns to include in the details table. You may also choose not to include a column in the output field, though that column was used in report output generation.
-
In the Output Format, _select Text.
-
In the File/Folder Rows to Display, select All.
-
In the Sort By and Sort Direction, specify the parameters.
-
-
Select the Output To checkbox, and specify the location where the report containing list of files backed up for the particular job must be generated.
-
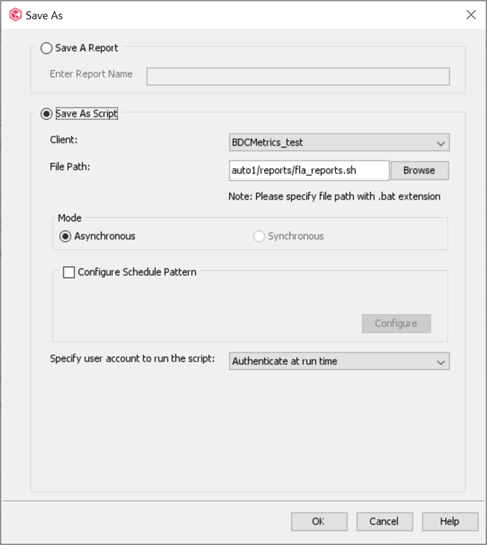
Click Save As.
The Save As dialog box appears.
-
To save this as a script on the client computer, select Save As Script, and specify the client and file path.
-
Click OK.
When the report is saved as script, *.sh and *.xml files are generated on the client computer.
-
To execute the *.sh file, enter the credentials.
After authentication, new job will be triggered.
-
When the job is complete, the report will be generated.
-
To redirect all the file list to the text file, run the following command:
sed 's/...$//' name_of_the_File_Analytics_report.xls | tail -n +28 > text_file_name.txt -
To view the backed up item for different job, perform the following:
-
Run the following command to replace the job ID in the fla_report.xml:
sed -i 's/old_job_ID/new_job_ID/g' fla_report.xml -
Perform step 9 to step 11 to collect the text file.
-