You can configure a new Threat Scan group.
Start the Wizard
-
From the Command Center navigation pane, go to Secure > Threat scan.
The Threat Scan page appears.
The Threat Scan groups tab shows all existing resource groups.
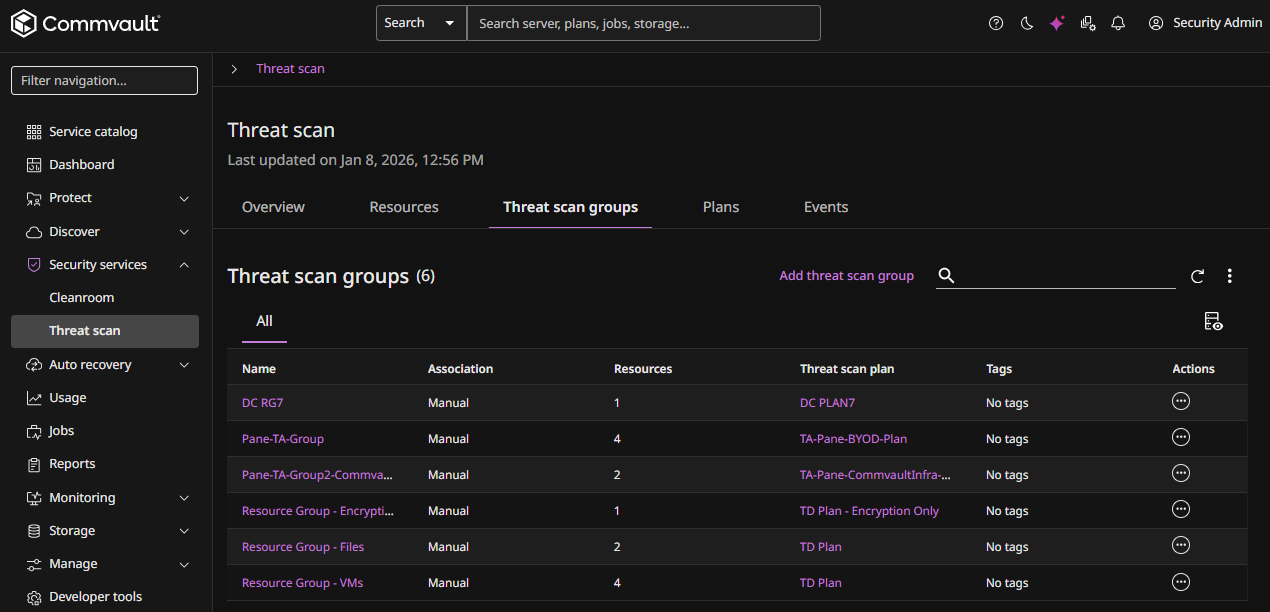
-
Click Add Threat Scan group at the top of the page.
The Create Threat Scan Group wizard appears.
Configure Resources
-
Enter a Name for the Threat Scan group.
-
Click Next.
The Add Rules page appears.
Add Rules
-
Optional: Create a manual association resource group without adding rules.
Steps to select resources manually.
-
Click Skip This Step.
The Add Resources page appears.
-
Select one or more resources, and then click Next.
The Assign Plan page appears. Go to the "Assign Plan" section, below.
-
-
Click Add Rule.
The Add Rules page appears.
-
For Client scope, select one of the following:
-
Clients in this CommCell
-
Clients of company
- After selecting this option, select or enter a Company name.
-
Clients of user
- After selecting this option, select or enter a User name.
-
Clients of user group
- After selecting this option, select or enter a User group.
-
-
Click Add rule group
The Edit associations dialog box appears.
-
Select or enter the criteria for this new rule group.
-
Click Save, and then click Next.
The Assign Plan page appears.
Assign Plan
-
To use an existing plan, click Select an existing plan, select the plan.
-
To create a new plan, click Create a new plan and then do the following:
-
Enter a name for the new plan in the Plan name field.
-
Under Plan settings, review the following:
-
The Scheduled scanning frequency is automatically selected. To modify the schedule as per your requirements, click the Schedule Edit button
 and then edit the schedule.
 -
Select the Scan anomalous resources only option to scan only resources with anomalous backup activity.
-
Select the backup storage:
-
Access nodes. Select an existing access node, or click the Add button
 and then add a new access node.
 -
Storage. Select an existing storage pool.
-
-
-
Under Detection services, select from the following:
-
Anomaly detection is enabled by default and cannot be disabled. It automatically monitors backup metadata and file attributes to identify suspicious or unusual activity patterns.
-
Threat detection. Enable this option and then select from the following:
-
Encryption detection. Select this to scan backups for encrypted files and ransomware threats.
-
Malware detection. Scans backups for known malware signatures to identify threats.
-
-
-
Optional. Under Indicators of Compromise, you can select one or more existing IOCs or upload your own IOC hash file, as follows:
-
Under Upload your own files, click Select File.
A file dialog box appears.
-
Browse and select the IOC file. Note the following:
- Supported file types: YAR and YARA
- YARA rule format:
rule RuleName
{
      meta:
           key1 = "value"
           key2 = "value"

      strings:
           $a = "text string"
           $b = "hex pattern"
           $c = /regex_pattern/

      condition:
           <logical expression>
}
The new file (with a type of YARA Rule Match) will appear in the Indicators of Compromise table.
-
-
Select the checkboxes for IOC files you wish to use, and then click Next.
The Summary page appears.
-
Onboard the Threat Scan Group
-
Review the summary information.
-
Click Submit.