Setup a static IP for the Intelligent Platform Management Interface (IPMI) port on Remote Office Appliance RO1200. IPMI is needed to setup the Remote Office Appliance RO1200. In addition, this will also ensure that the IPMI is accessible in the network using the static IP. For example, it would be useful to power-on or power-off the appliance using the IPMI console.
Before You Begin
-
Make sure that the appliance is properly racked and secured as described in Racking and Cabling the Remote Office Appliance RO1200.
-
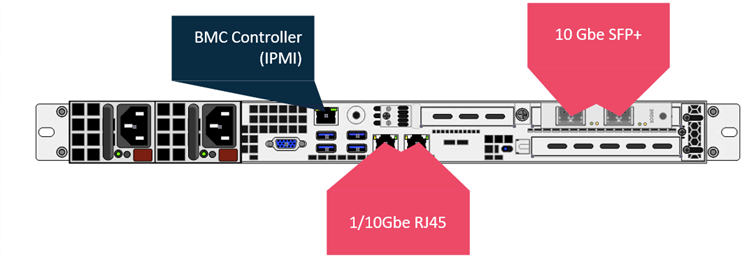
Connect the IPMI (or BMC Controller) port to the IPMI network.
Click here to view the IPMI port for RO1200
-
Connect a VGA monitor and USB keyboard, or the KVM connection, to the appliance.
Procedure
-
Power on the appliance.
-
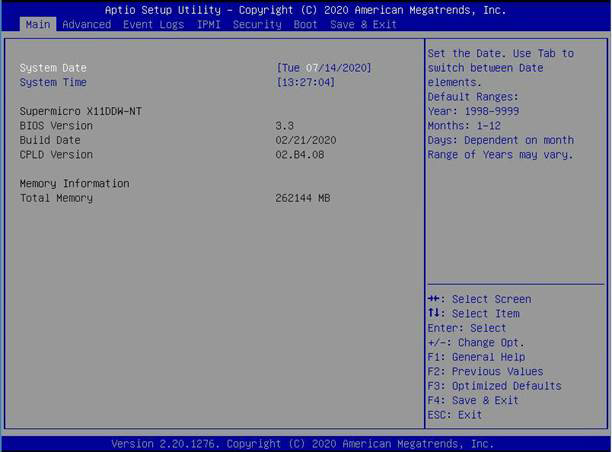
Press <DEL> during the boot splash screen. The Setup Utility will be displayed.
-
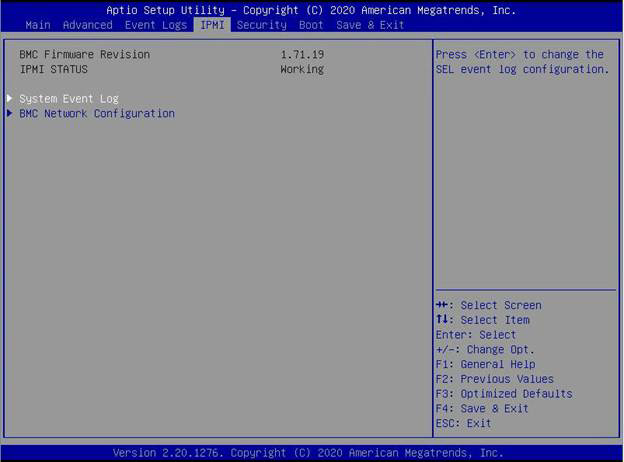
Navigate to the IPMI tab.
-
Navigate to the BMC Network Configuration option.
Press <Enter> to select the option.
-
Set Update IPMI LAN Configuration to [Yes].
-
Set Configuration Address Source to [Static].

-
Enter values for the Station IP Address, Subnet Mask, and Gateway Address for the selected appliance.
-
Press <F4> to save and exit the Setup Utility.
-
Verify that the IPMI is accessible using the static IP address as follows:
-
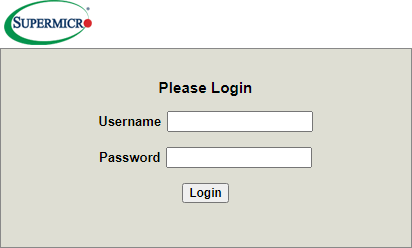
Open a web browser from a remote workstation and enter the static IP of the IPMI.
-
The login screen will be displayed.
-
Type in the credentials for the default administrator account as follows:
Username: ADMIN
Password: ADMIN
Note
The IPMI password can be changed later from the IPMI Web Server interface. For more information, see Changing the IPMI Password on Remote Office Appliance RO1200.
-
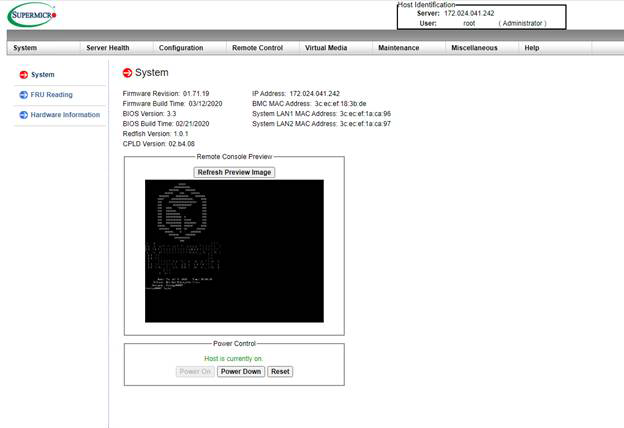
Click Login.
The IPMI Web Server interface is displayed.
-
-
Launch the Remote Console window as follows:
-
Click inside the Remote Console preview.
This will launch a Java Applet.
-
Run the Java applet to start the Remote Console Window.
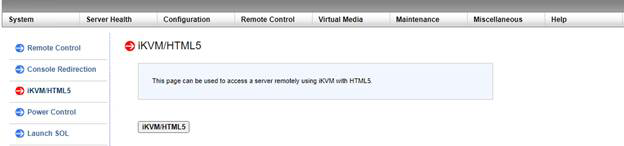
Alternatively, if you do not want to use Java Applet, you can use HTML5 viewer. Click Remote Control > iKVM/HTML5 and then click the iKVM/HTML5 button.
The Remote Console window will be displayed.
-
-
Login using the following default credentials:
Login:Administrator
Password: appliance@cv1
If the login prompt is not displayed, press <Ctrl>+<Alt> + <Del> to display the prompt.
Note
The password must be changed after installing and configuring the appliance. For more information, see Changing the Windows Administrator Password.