A new CommCell can be setup using Remote Office Appliance RO1200 by setting up the CommServe server and the MediaAgent in the appliance.
Before You Begin
-
Collect the necessary information using the Pre-Installation Checklist to plan and prepare for setting up the Remote Office Appliance RO1200. For more information, see Preinstallation Checklist for Remote Office Appliance RO1200.
-
Ensure that the appliance is properly racked and cabled, before powering-on the appliance. For more information, see Racking and Cabling the Remote Office Appliance RO1200.
-
Ensure that network connectivity is available and the necessary firewall authorizations have been enabled.
-
Dynamic naming is required by the appliance for network communication. Ensure that the Fully Qualified Domain Name (FQDN) is configured for the appliance in the network.
Note
Verify and ensure that no USB drives are connected to the appliance during the installation.
Procedure
-
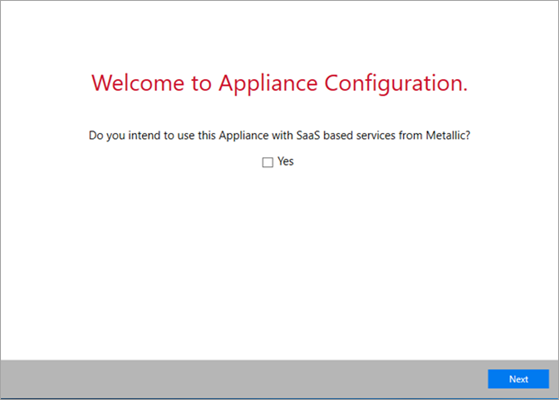
Turn on the appliance and press Ctrl+Alt+Del to login.
-
In the Administrator box, type appliance@cv1 and press Enter.
-
The Commvault Configuration Wizard will start automatically after a successful login.
-
Click Next.
Note
If the wizard does not start automatically, navigate to C:\ApplianceInstall\Sapphire and then double-click SapphireApplication.exe.
-
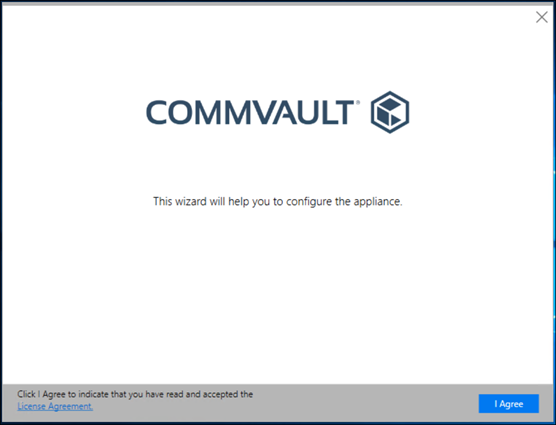
Click the License Agreement and review the Commvault End User License Agreement.
-
Click I Agree to continue.
-
-
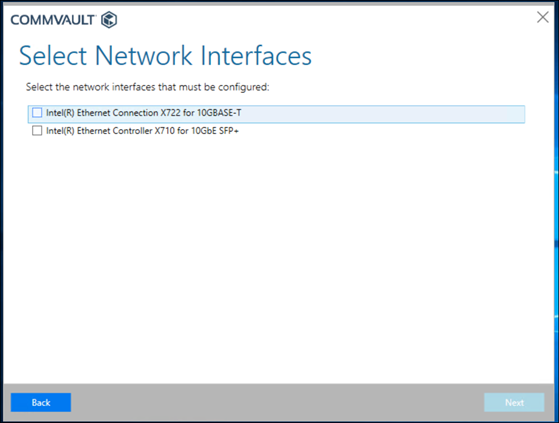
The Select Network Interfaces page is displayed.
-
Select one or more ports to configure the network settings for data.
-
Click Next.
Tip
The Select Network Interface page displays all the network ports that have an active connection.
-
-
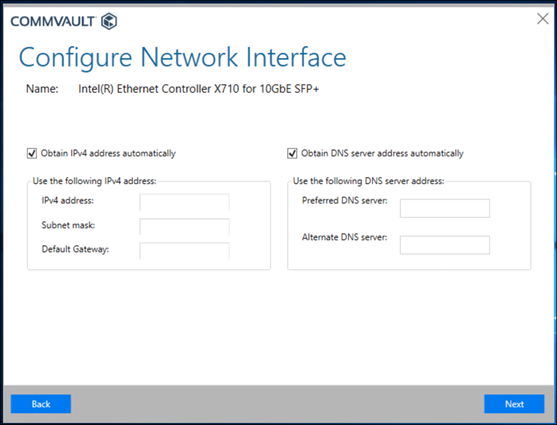
The Configure Network Interface page is displayed.
Choose one of the following options:
-
If you have a DHCP server to automatically assign IP addresses and detect the DNS server, select the Obtain IPV4 address automatically and the Obtain DNS server address automatically options and then click Next.
-
In the absence of a DHCP server, clear the Obtain IPV4 address automatically and the Obtain DNS server address automatically options, type the appropriate details, and then click Next.
Note
If you selected more than one network port in step 4, the Configure Network Interface page will be displayed again until all the network ports have the necessary details.
-
-
The Configure Host Name and Domain Settings page is displayed.
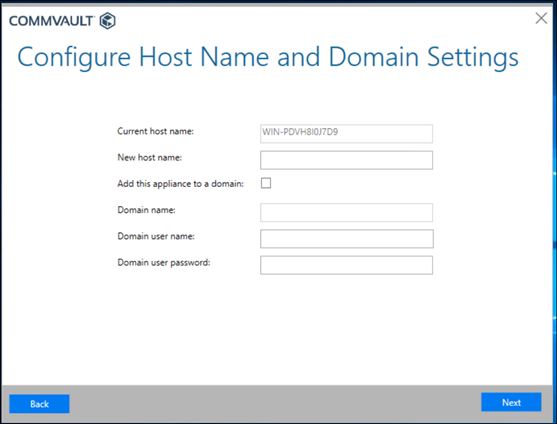
Choose one of the following options:
-
To assign a new host name, in the New Host Name box, enter a unique name to identify the computer in the network.
-
To configure the appliance in an existing domain, select the Add this appliance to a domain check box.
Type the appropriate domain credentials in the Domain name, Domain user name and Domain user password boxes.
Note
If you do not join an existing domain, the appliance remains in the Workgroup.
-
-
A message prompts you to restart your computer.
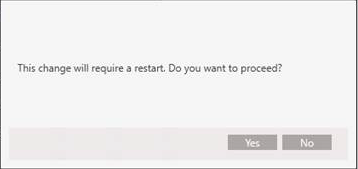
Click Yes to continue. (Clicking No will proceed with the installation without changing the host name and/or the domain.)
Note
It is recommended to reboot the computer to avoid network related issues later in the installation.
-
A confirmation prompt is displayed.
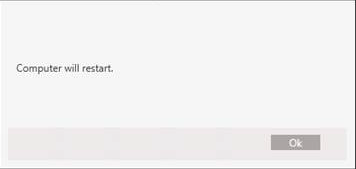
Click OK to restart the computer.
After the reboot, login using the administrator credentials appliance@cv1. (Same as step 2.)
The Commvault Configuration Wizard will resume automatically.
Note
If the wizard does not start automatically, navigate to C:\ApplianceInstall\Sapphire and then double-click SapphireApplication.exe.
-
The Setup Commvault Software page is displayed.

-
Select CommServe and MediaAgent.
-
If you want to configure email alerts, in the Email server and the Email address for the Commvault administrator boxes, type the server name and the administrator details.
-
Click Next.
-
-
A confirmation message is displayed.
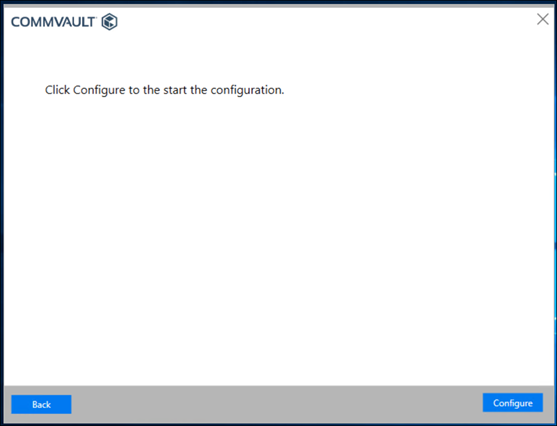
Click Configure to complete the installation and the configuration process.
Note
The configuration process takes approximately 30 to 45 minutes. The wizard will install the CommServe server, MediaAgent software, Virtual Server agent and the File System agent.
-
The Automatic Disk Group Configuration prompt is displayed.
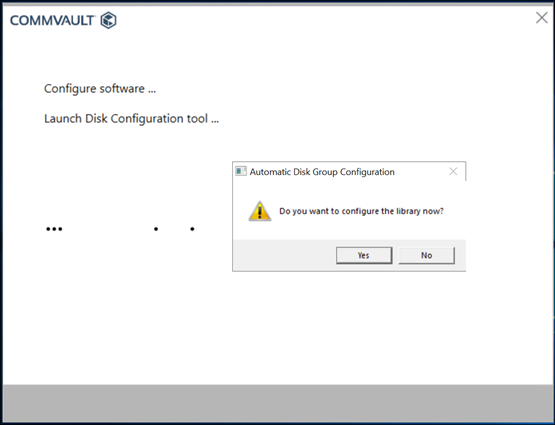
Click Yes to confirm the library configuration. (You must click Yes when you setup the appliance for the first time.)
-
The library is configured and the result is displayed.
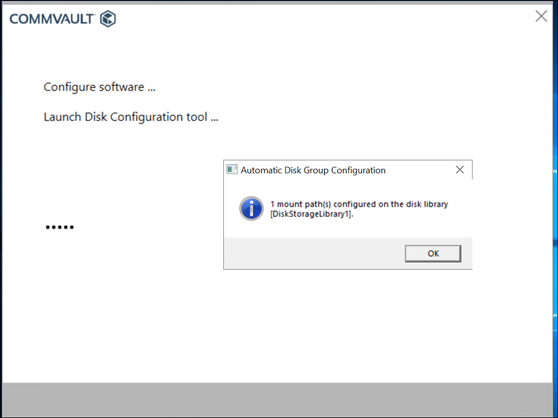
Note
If an error is displayed, resolve the errors and then resume the installation by navigating to C:\ApplianceInstall\Sapphire and then double-clicking SapphireApplication.exe.
For more information about resolving errors, see Troubleshooting.
Click OK to continue.
-
The configuration result page is displayed.
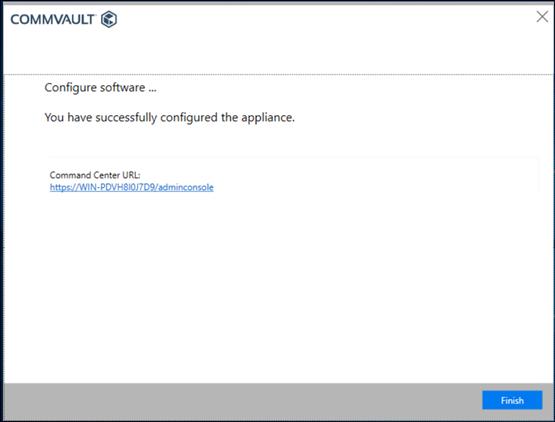
-
Click the Command Center URL to launch the Command Center.
-
Click Finish.
-
What to Do Next
Complete the setup as described in Completing the Setup For Appliances with CommServe and MediaAgent.