You can create a quick access tool for an existing workflow in the CommCell Console. The quick access tool can be executed directly from any associated CommCell component, such as Client, Client groups, or CommServe.
For example, you can create a tool for the "Check Readiness" workflow that can be accessed by any client in the CommCell Console (at the CommServe, MediaAgent or client level).
Before You Begin
Deploy the workflow you want to create a quick access tool for. For information on deploying workflows, see Deploying a Workflow.
Procedure
-
From the CommCell Console ribbon, on the Home tab, click Control Panel.
-
Under Others, click Quick Access Tools.
Alternatively, right-click the client computer, point to Tools and click Customize tools.
-
Click Add.
The Create Tool dialog box appears.
-
On the General tab, in the Alias Name box, type the name you want to see in the Tools menu in the CommCell Console.
Tip: To create submenus in the Tools menu, create tool names in the following format: submenu_name_level_1\submenu_name_level_n\tool_name. You can add as many submenu levels as needed. Every tool with the same submenu path is grouped under that path. For example, the Admin\Maintenance\DB Maintenance and the Admin\Maintenance\Hardware Refresh tools both appear in the "Maintenance" submenu under the "Admin" submenu.
-
From the Tool Type list, select WORKFLOW.
-
In the Workflow to run box, select the workflow you want to run.
-
In the Run workflow on box, select the workflow engine on which the workflow was deployed.
-
In the input group box, set the values to use when the workflow is run.
For example, if your workflow has a client name input, you can use $%CLIENT_NAME%$. %CLIENT_NAME% is a tokenized parameter that automatically retrieves the hostname of the CommServe, MediaAgent or client computer.
-
To limit the workflow to specific clients, do the following:
-
From the OS Type list, select the operating system of the clients where you want the workflow to appear.
-
From the Associate tool to list, clear All and select the clients where you want the workflow to appear.
-
-
To skip the input dialog, select the Click Skip input dialog and execute workflow immediately checkbox.
By default, the input dialog is displayed when executing the workflow.
-
To make the workflow visible to other users, on the Security tab, click Public, and add users and user groups to the User/User Groups box.
By default the workflow is only visible to you.
-
Click OK.
Results
The workflow appears when you right-click your client or your job in the Job Controller and go to Tools.
Configuring the Parameters Needed for an Application to Run
Some applications require parameters to execute. These parameters can be permanent, variable or both. See the following example which uses both permanent and variable parameters:
-u $user_name$
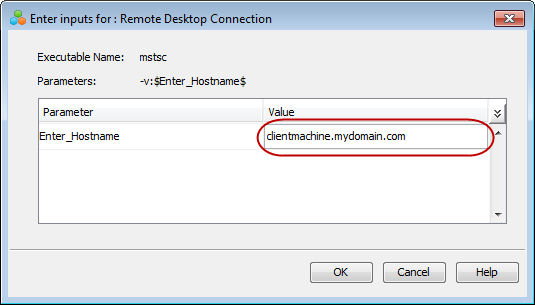
where -u is a permanent parameter and $user_name$ is a variable parameter. Variable parameters are defined using the $ character which prompts the user to enter the required value during the execution of the application. The image below shows a parameter prompt example for the Remote Desktop application.

Configure a Parameter Using Tokens
You can provide a tokenized parameter to skip the parameter prompt during the execution of an application or workflow. Tokens are automatically replaced by the Commvault software with the correct value.
The following table lists the tokens you can use:
|
Tokens |
Description |
|---|---|
|
%CLIENT_INSTALL_DIR% |
Retrieves the installation directory of the Commvault software. |
|
%CLIENT_NET_HOSTNAME% |
Retrieves the hostname of the CommServe, MediaAgent or client computer you are trying to access. For example, you can use this token when configuring the Remote Desktop connection option. |
|
%CLIENT_NAME% |
dRetrieves the name of the MediaAgent or client computer you are trying to access. For example, you can use this token when configuring an application option to display all agents installed on a client (using the qlist dataagent command) |