As restoring your backup data is very crucial, it is recommended that you perform a restore operation immediately after your first full backup to understand the process.
The following sections explain the steps for restoring the data of a volume to a different location in the file server. If you are restoring from a vFiler backup, see Backup Copy for IntelliSnap Backup for the NDMP Agent to create a backup copy, and then restore your vFiler data from the backup copy.
Considerations for Huawei Storage Servers
For Huawei storage servers, the default configuration for the support_snapshot property is enabled. When support_snapshot is enabled, IntelliSnap restores for Huawei storage servers are not supported. If you want to run IntelliSnap restore operations on Huawei storage servers, then you must disable the support_snapshot property.
If you disable the support_snapshot property, NDMP backup jobs do not create a snapshot during the backup job, and NDMP restore jobs restore from the live file system.
For information about how to disable the support_snapshot property, see the documentation for your Huawei storage server.
Procedure
-
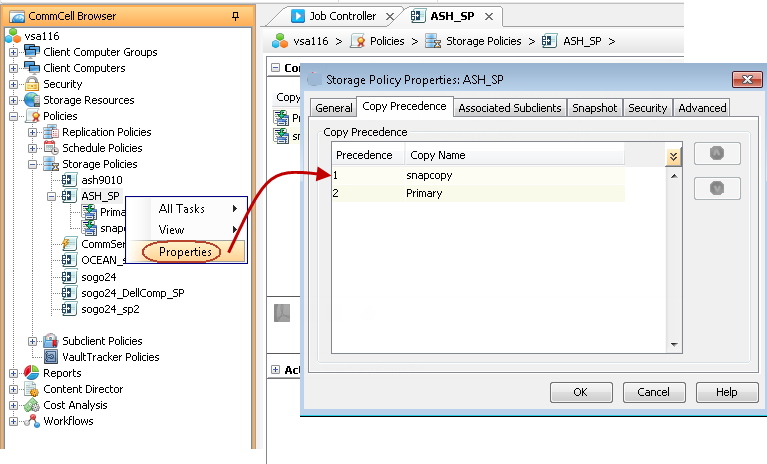
From the CommCell Console, go to Policies > Storage Policies.
-
Right-click the storage policy, and then click Properties.
-
On the Copy Precedence tab, select the backup copy and set the copy precedence as 1.
-
Click OK.
-
In the CommCell Browser, expand Client Computers > NAS Client > NDMP.
-
Right-click the default backup set, point to All Tasks, and then click Browse and Restore.
The Restore Options dialog box appears.
-
On the Advanced Options tab, click View Content.
-
In the left pane, expand the default backup set node, select the volume containing the data you want to restore, and then click Recover All Selected.
-
In the Restore Options for All Selected Items dialog box, do the following:
-
Clear the Restore to same folder check box.
-
In Specify destination path, enter a location to specify the destination path.
For NetApp 7-Mode, NetApp C-Mode, and Isilon file servers, you can also click Browse to browse for a location. For vendor-specific information about browse, see Guidelines for Adding Subclient Content.
-
Click Preserve or Remove source paths to specify whether the restore operation will keep or remove the specified number of levels from the beginning or end of the source path.
-
-
Click OK.
Note
You can track the progress of the job from the Job Controller window.
-
After the restore job is complete, right-click the backup set, point to View, and then click Restore History.
The Restore History Filter dialog box appears.
-
Click OK.
-
You can right-click the job and view the following details:
-
View Restore Items
You can view them as Successful, Failed, Skipped or All.
-
View Job Details
-
View Events of the restore job
-
View Log files of the restore job
-
Send Logs
-
Resubmit Job
The restored files/folders of the volume are available in the restore destination that you specified.
-