Use the following steps to restore an image data backup:
-
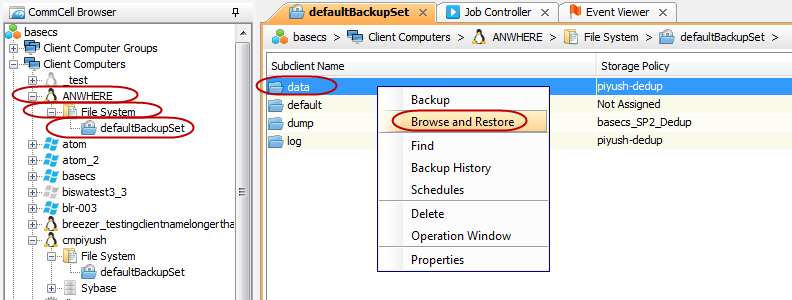
From the CommCell Browser, navigate to Client Computers | <Client> | File System | <Backup Set>.
-
Right-click the Subclient created for SQL Anywhere data backups in the right pane and then click Browse and Restore.
-
Click View Content.
-
Select the database files that you want to restore and click Recover All Selected.
-
Stop the database and rename the database files.
-
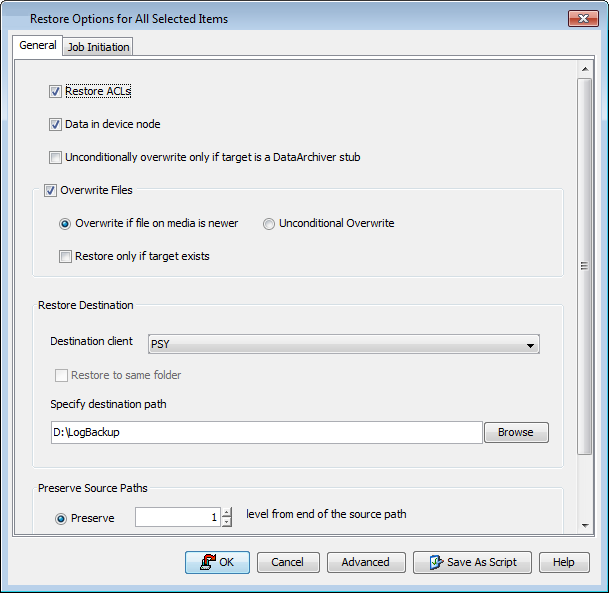
In the Restore Options dialog box, select the Destination client from the drop down list.
-
Type the destination path or click Browse to select the destination path to restore the selected database files.

-
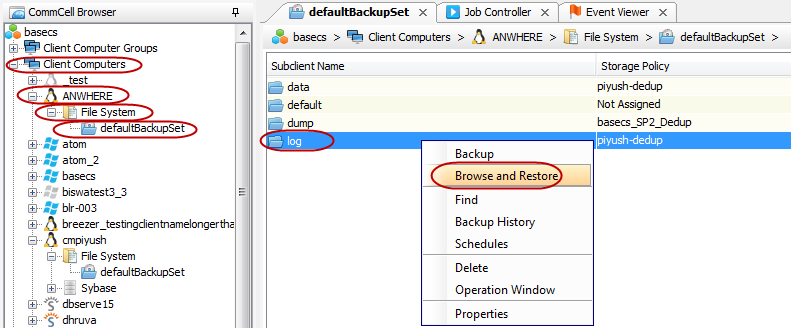
From the CommCell Browser, navigate to Client Computers | <Client> | File System | <Backup Set>.
-
Right-click the Subclient created for SQL Anywhere log backups in the right pane and then click Browse and Restore.
-
Click View Content.
-
Select the log files that you want to restore and click Recover All Selected.
-
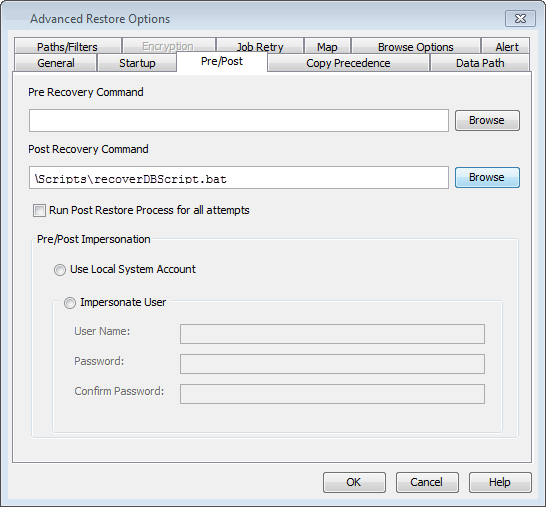
Click Advanced.
-
Click Pre/Post tab.
-
Click Browse to locate the recoverDBScript path and add the script for recovering the database and transaction log files.
The script should contain the dbeng as a post recovery command. This command should include the database file and transaction log files location.
-
Click OK.
The recoverDBScript dbeng for UNIX and Windows based file systems will be as follows:
dbeng11 -n Server-Name Database-File -ad Transaction-Log-Files-Location.where
-ad : specifies the location of the transaction log files. The database server determines the correct order for applying the transaction logs to the backup copy of the database based on the log offsets.
Example (UNIX):
dbeng11 "/Sybase Anywhere/mydb/mydb.db" -ad /databackup/LogBackup$Example (Windows):
dbeng11 "d:\Sybase Anywhere\mydb\mydb.db" -ad d:\LogBackupNote
Use dbspawn command with dbeng utility to start the database server in the background.
Example:
dbspawn dbeng11 "/Sybase Anywhere/mydb/mydb.db" -ad /temp1/LogBackup(UNIX)dbspawn dbeng11 "d:\Sybase Anywhere\mydb\mydb.db" -ad d:\LogBackup(Windows)Note