Commvault administrators can assign an administrator role to a user in the ServiceNow Commvault application.
Procedure
-
From the ServiceNow navigation pane, go to Users and Groups > Users.
A list of existing users appears.
-
Search for and then select an existing user.
The User window appears.
-
On the Roles tab, click Edit.
The Edit Members window appears.
-
Select the approver_user role from the left pane, and then click the Add button
 to move the role to the right pane.
 -
Click Save.
-
On the Groups tab, click Edit.
The Edit Members window appears.
-
From the left pane, select an administrator group (for example, Commvault Admin), and then click the Add button
to move the group to the right pane. -
Click Save.
-
Click the All Applications button
 , and then search for and select Studio.
The Load Application window appears.
-
Click Commvault.
The Application Explorer pane appears.
-
Go to Workflow > Workflows > Commvault - Initialize based on config.
A workflow appears in the Workflow Editor.
-
Double-click Approval - User:
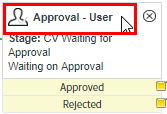
The Activity Properties: Approval - User window appears.
-
Go to Approvers > Groups, and then click the Unlock Groups button
 .
.The Groups box becomes available.
-
Delete existing groups and then, in the Groups box, add the administrator group that you added in step 7, above.
For example, Commvault Admin.
-
Click the Lock Groups button
 , and then click Update.