You can set up the database on new hardware by using one of the following methods:
Note
If none of these methods work for your environment, contact Commvault Customer Support for assistance.
-
Preferred Method: Upgrade the database during the CommServe installation. This method requires that you provide the old database dump during the new CommServe installation. The CommServe database is upgraded as part of the installation process.
Use this method if the new hardware uses the same IP and host name of the old CommServe computer. This method is the simplest way to set up the CommServe database in the new hardware.
-
Alternative Method: Install the latest CommServe software, then restore and upgrade the database using the Recovery Assistant tool. This method requires that you install the latest CommServe software, and then restore and upgrade the old database by using the CommServe Recovery Assistant tool.
Use this method in the following scenarios:
-
The new hardware uses a different IP or host name than the old CommServe computer. Note that the the CommServe client name must remain the same as the old CommServe client.
-
The latest CommServe software is already installed on the new hardware.
-
-
Cluster Environment Method: If you moved the CommServe database from a cluster to another cluster, see CommServe Upgrade with Hardware Refresh: Configuring a Cluster Environment.
Before You Begin
-
Perform the steps described in Preparing the Old CommServe Computer for Shutdown.
Note
Remember: If the IP address of the new CommServe computer is different from the old CommServe computer, obtain a new CommServe license configured with the new IP address from your software provider.
-
If an index server is hosted on the old CommServe computer, move the index server to the new CommServe computer. For more information, see Moving the Index Directory for an Index Server.
Procedure
Choose one of the following methods:
Preferred Method: Upgrade the Database During the CommServe Installation
-
Log on to the new computer and ensure that the network details (computer name and IP settings) are properly set.
If you plan to set up an exact replica of the old CommServe computer, add the new computer to the same domain as the old computer.
-
Copy the Disaster Recovery backup files to the local drive.
The disaster recovery backup files were saved during the Preparing the Old CommServe Computer for Shutdown procedure.
-
Install the CommServe software using the latest Commvault V11 installation package. During the installation, submit the database dump file from the old CommServe computer.
For the installation instructions, see Installing the CommServe Software.
Caution
You must specify the following settings:
-
On the Select Packages page of the installation wizard, select CommServe and any other package that you had in your old CommServe computer. You can later uninstall the packages that you do not want on the new computer.
-
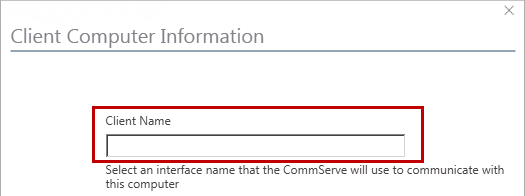
During the installation, on the Client Computer Information page, in the Client Name field, enter the old Commserve client name.
Note
-
To submit the dump file, perform the following steps during the installation:
-
On the Database Install Option page, click Use Existing Database and select the CommServe check box.
If you had other server packages installed on the CommServe computer (for example, Workflow Engine and Web Server), select the check boxes associated with them.
-
On the Database Dump Location page, specify the location of the CommServe database dump file (and of any other database that you selected).
The dump files are located with your Disaster Recovery backup files. For example, the default name for the CommServe dump file is commserv.dmp.
Important
After you provide the dump files, the installation program upgrades the CommServe database (and any other database that you provided) silently.
-
-
To match the ports used by the Consoles on the old CommServe computer, open IIS Server Manager to modify the default IIS port.
The port numbers should match the information collected during the Preparing the Old CommServe Computer for Shutdown procedure.
-
If a deduplication database (DDB) was configured in the old CommCell environment, perform one of the following steps:
-
If the DDB was hosted in the CommServe computer, then copy the DDB content (CV_SIDB folder and icl_label.txt file) to the same drive and folder in the new computer.
-
If the DDB was hosted on a separate MediaAgent computer, no action is required.
-
-
To verify that your CommServe database was successfully moved to the new computer, verify that services are running and then open the CommCell Console.
The console should display the CommServe computer and the associated clients in the CommCell Browser.
-
If the MediaAgent was installed in the old CommServe computer, complete the following steps:
-
If you have a tape library, the library should already be plugged into the new hardware. Make sure to reconfigure the library from the CommCell Console.
See Configuring Devices for step-by-step instructions.
-
If you have a disk library, copy the local mount path folder to the same drive as it was on the old CommServe.
-
Install the MediaAgent software in the new CommServe computer using the steps described in MediaAgent Installation.
-
-
Index Cache Sharing is not supported in this release. If a shared Index Cache used by a set of MediaAgents was hosted on the old CommServe computer, that arrangement must be transitioned from a shared index cache to a local index cache. In the shutdown procedure for this hardware refresh, you copied the contents of the Index Cache to a directory you can access. Transitioning from a Shared Cache provides procedures for moving to a local cache. Use the copy of the Index Cache that you created during the shutdown when performing your chosen transition procedure.
-
Enable CommCell activities.
-
From the CommCell Browser, right-click the CommServe node, and click Properties.
-
On the Activity Control tab, enable all the activities that you cleared when the CommServe database was on the old hardware, and click OK.
Note
If the DDB activity was disabled before DR restore, re-enabling the DDB activity after the DR restore automatically starts the DDB resynchronization process.
-
-
Perform a test backup. Refer to the Agent-appropriate documentation for instructions on how to run backups.
Alternative Method: Install the CommServe Software, then Restore and Upgrade the Database Using the Recovery Assistant Tool
-
Log on to the new computer and ensure that the network details (computer name and IP settings) are properly set.
-
Copy the disaster recovery backup files to the local drive.
The disaster recovery backup files were saved during the Preparing the Old CommServe Computer for Shutdown procedure.
-
Install the CommServe software on the new computer. See Installing the CommServe Software.
Caution
If you need to retrieve data from a tape or disk library, do not install the MediaAgent when you install the CommServe software. You will be able to properly retrieve data from a tape or disk library when you get to Step 11, below.
-
Restore the CommServe database by using the CommServe Recovery Assistant tool. See Recovering the CommServe Database.
Important
During the restore process, the tool upgrades the CommServe database silently.
-
Shut down the old CommServe computer using the following sequence:
-
Stop all Commvault services.
-
Shut down the computer.
-
Unplug the network cables.
-
If you have a tape library attached to the CommServe, unplug the library from the CommServe computer and plug it in to the new hardware.
Note
If you plan to reuse this computer, complete the following tasks before you activate the computer in the network:
-
Uninstall Commvault software.
-
Change the computer name and IP settings to different values.
-
-
-
Configure the host name of the old CommServe computer to point to the IP address of the new computer.
Important
Verify that all client computers point to the host name of the old CommServe computer (not to the IP address).
-
Optional: If you want to update the clients and MediaAgents with the name of the new CommServe computer, see Changing the CommServe Host Name on a Client.
To match the ports used by the Consoles on the old CommServe computer, open IIS Server Manager to modify the default IIS port.
The port numbers should match the information collected during the Preparing the Old CommServe Computer for Shutdown procedure.
-
If a deduplication database (DDB) was configured in the old CommCell environment, perform one of the following steps:
-
If the DDB was hosted in the CommServe computer, then copy the DDB content (
CV_SIDBfolder andicl_label.txtfile) to the same drive and folder in the new computer. -
If the DDB was hosted on a separate MediaAgent computer, no action is required.
-
-
To verify that your CommServe database was successfully moved to the new computer, verify that services are running, and then open the CommCell Console.
The console should display the CommServe computer and the associated clients in the CommCell Browser.
-
If the MediaAgent was installed in the old CommServe computer, complete the following steps:
-
If you have a tape library, the library should already be plugged into the new hardware. Make sure to reconfigure the library from the CommCell Console.
See Configuring Devices for step-by-step instructions.
-
If you have a disk library, copy the local mount path folder to the same drive as on the old CommServe computer.
-
Install the MediaAgent software on the new CommServe computer using the steps described in MediaAgent Installation.
Index Cache Sharing is not supported in this release. If a shared Index Cache used by a set of MediaAgents was hosted on the old CommServe computer, that arrangement must be transitioned from a shared index cache to a local index cache. In the shutdown procedure for this hardware refresh, you copied the contents of the index cache to a directory you can access. Transitioning from a Shared Cache provides procedures for moving to a local cache. Use the copy of the index cache that you created during the shutdown when performing your chosen transition procedure.
-
-
Enable CommCell activities as follows:
-
From the CommCell Browser, right-click the CommServe node, and then click Properties.
-
On the Activity Control tab, enable all the activities that you cleared when the CommServe database was on the old hardware, and then click OK.
Note
If the DDB activity was disabled before DR restore, re-enabling the DDB activity after the DR restore automatically starts the DDB resynchronization process.
-
-
Perform a test backup and restore. Refer to the Agent-appropriate documentation for instructions on how to run backups.
What to Do Next
-
Note
If you moved the CommServe database to or from a cluster environment, make sure to perform the Configure Cluster Environment steps On the Post-Migration Operations page.