Setting Priority Precedence
Job Priority is represented by a 3 digit number. The first digit represents Operation Priority.
-
On selecting Client priority precedence, the second digit represents Client priority and third digit represents Agent priority.
-
On selecting Agent Type priority precedence, the second digit represents Agent priority and third digit represents Client priority.
For a Client
On selecting Client priority precedence, the second digit represents Client priority and third digit represents Agent priority.
Use the following steps to set Client Priority Precedence:
-
From the CommCell Console ribbon, on the Home tab, click Control Panel.
-
Under Data, click Job Management.
The Job Management dialog box is displayed.
-
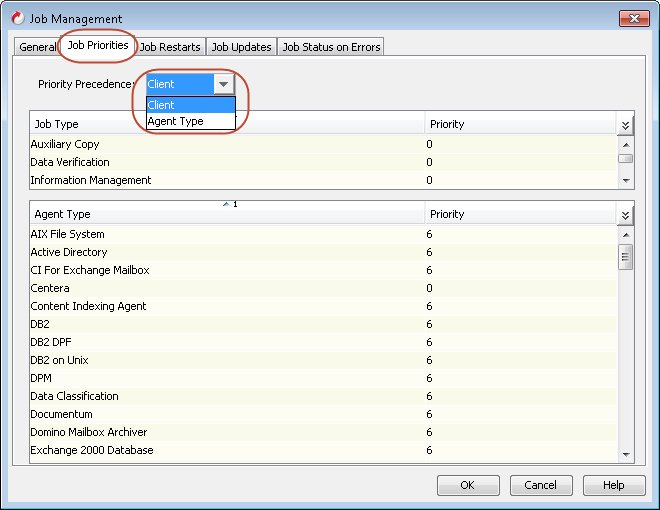
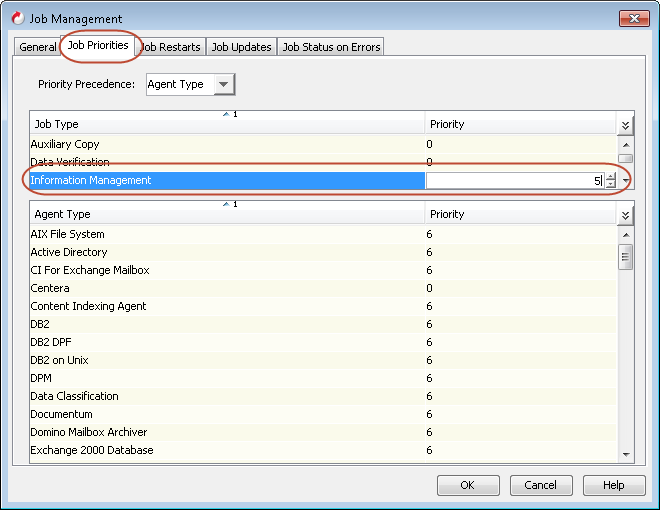
Click the Job Priorities tab.
-
Select Client from the Priority Precedence box.
-
Click OK.
For an Agent
On selecting Agent Type priority precedence, the second digit represents Agent priority and third digit represents Client priority.
Use the following steps to set Agent Priority Precedence:
-
From the CommCell Console ribbon, on the Home tab, click Control Panel.
-
Under Data, click Job Management.
The Job Management dialog box is displayed.
-
Click the Job Priorities tab.
-
Select Agent Type from the Priority Precedence box.
-
Click OK.

Setting the Priority for a Client
By default, the Job Manager automatically assigns a priority of 6 to all client computers except Edge Drive clients. Edge Drive clients are automatically assigned a priority of 3. You can prioritize your clients according to your requirements by updating the default values.
Use the following steps to set a user-defined client priority:
-
From the CommCell Browser, right-click the client and select Properties.
-
In the Client Properties dialog box, click Advanced.
the Advanced Client Properties dialog box is displayed.
-
On the Job Configuration tab, in the Job priority (0-9) box, enter a priority.
Note: The lower the value, the higher the priority of the client.
-
Click OK.
Setting the Priority for an Agent
The Job Manager automatically assigns default priorities to all Agents. You can prioritize them according to your requirements by updating the default values.
Use the following steps to set user-defined agent priority:
-
From the CommCell Console ribbon, on the Home tab, click Control Panel.
-
Under Data, click Job Management.
The Job Management dialog box is displayed.
-
On the Job Priorities tab, select an Agent Type, and in the Priority column, enter the priority value.
Note: The lower the value, the higher the priority of the agent.
-
Click OK.
Viewing Job Priorities
You can view the priorities assigned to
-
All jobs in the Job Controller window.
-
A specific job by viewing the details of the job.
For All Jobs
You can view the priorities of all jobs in the Job Controller window. By default, the Job Controller window does not display the priorities of running jobs. To view the job priorities for all jobs, you need to enable the Priority column.
Use the following steps to view all job priorities:
-
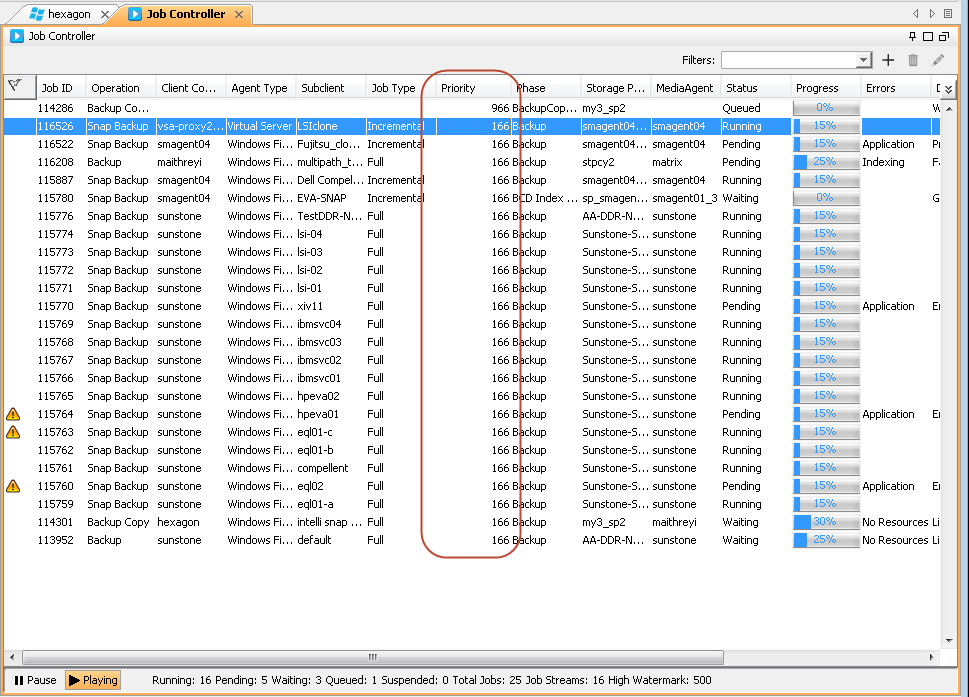
From the CommCell Console toolbar, click Job Controller.
-
In the Job Controller pane, right-click any table header or click the double arrows located on the extreme right to display table menu.
-
Click Choose Columns and then select Priority.
-
In the Job Controller window, the Priority column indicates the priority numbers for all jobs listed.
For a Specific Job
You can view the priority assigned to a specific job by viewing the details of the job.
Use the following steps to view priority of a specific job:
-
From the CommCell Console toolbar, click Job Controller.
-
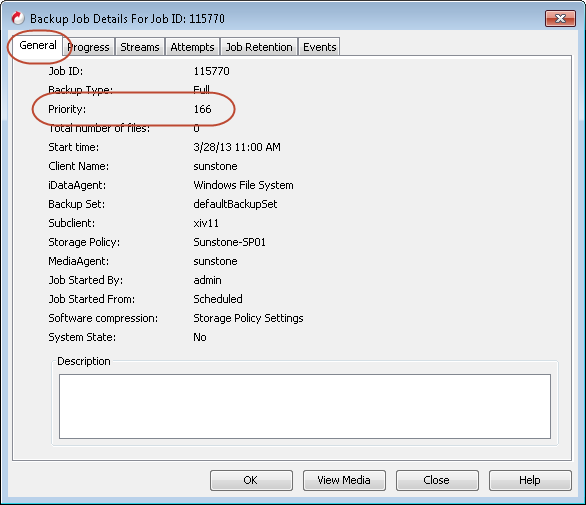
In the Job Controller pane, right-click an active job and select Detail.
-
You can view the Priority of the selected job under the General tab.
Setting the Job Priority
Setting Job Priority allows you to change the priority of a job or a group of jobs. You can use it to prioritize jobs based on your requirements by changing their job priority value.
After changing the job priority, if a higher priority job interrupts another lower priority job for resources, then the Job Manager interrupts the running job and allocates the freed resources to a higher priority job only if Job Preemption is allowed.
For Administration Jobs
You can change the priority of the following administration jobs:
-
Auxiliary Copy
-
Data Verification
-
Information Management
-
Media Refresh
-
Persistent Recovery
The Job Manager automatically assigns a priority of 0 to all the jobs. Therefore, the Job Manager assumes that all jobs have the same priority.
Use the following steps to change the priority of administration jobs:
-
From the CommCell Console ribbon, on the Home tab, click Control Panel.
-
Under Data, click Job Management.
The Job Management dialog box is displayed.
-
Click the Job Priorities tab
-
Select a Job Type and enter the priority value in the Priority column.
Note
The lower the value, the higher the priority of the agent.
-
Click OK.
For an Active Job
Use the following steps to change the priority for an active job:
-
From the CommCell Console ribbon, on the Home tab, click Job Controller.
-
In the Job Controller window, right-click an active job, and then click Change Priority.
-
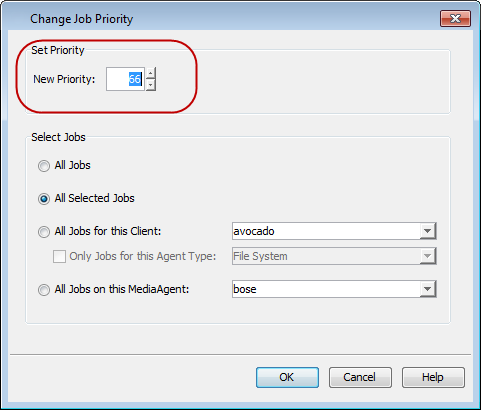
In the Change Job Priority dialog box, enter or select a value from 0 (highest priority) to 999 (lowest priority) in the New Priority box.
-
Click OK.
For a Group of Active Jobs
Use the following steps to change the priority for a group of active jobs:
-
From the CommCell Console ribbon, on the Home tab, click Job Controller.
-
In the Job Controller window, right-click an active job, and then click Change Priority.
-
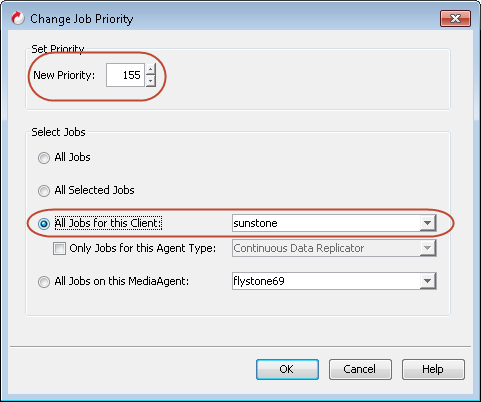
In the Change Job Priority dialog box, enter or select a value from 0 (highest priority) to 999 (lowest priority) in the New Priority box.
-
In Select Jobs pane:
-
Select All Jobs to change the priority of all active jobs.
-
Select All Selected Jobs to change the priority of all highlighted jobs.
-
Select All Jobs for this Client to change the priority of jobs of a particular client and then select the client. You can also change the priority of jobs for a particular agent by selecting the Only Jobs for this Agent Type checkbox and then select the agent.
-
Select All Jobs on this MediaAgent to change the priority of jobs of a particular MediaAgent and then select the MediaAgent.
-
-
Click OK.
For an Immediate Job
Use the following steps to change the priority of an immediate job:
-
From the dialog box of an appropriate operation (such as data protection, data recovery or auxiliary copy) click Advanced.
-
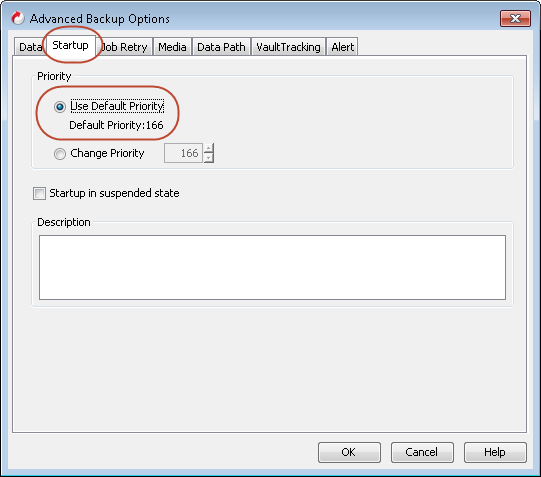
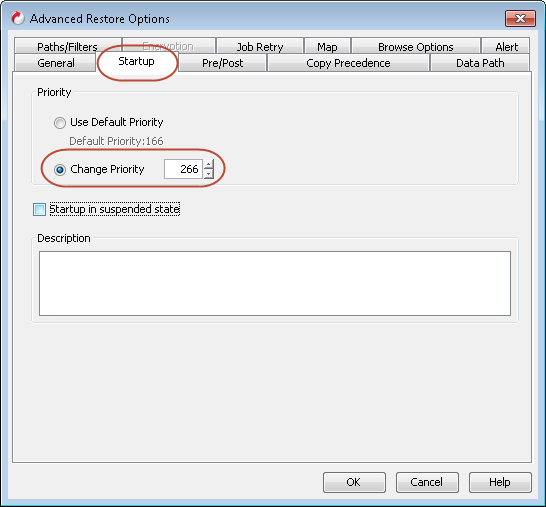
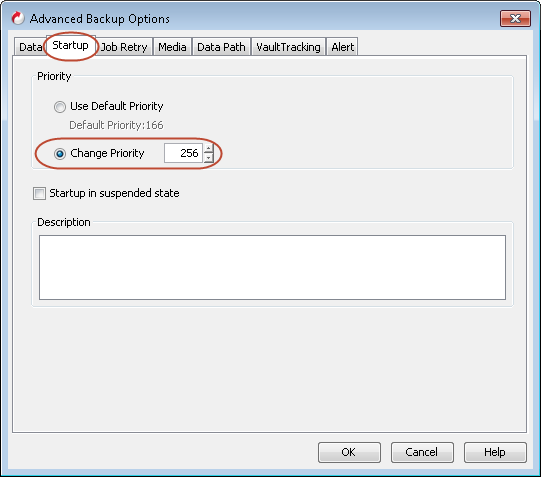
From the resulting dialog box, click the Startup tab.
-
Select Change Priority and enter a value from 0 (highest priority) to 999 (lowest priority).
-
To start the job in a suspended state, select the Startup in suspended state checkbox.
-
Click OK.
For a Scheduled Job
You can change the priority of data protection jobs after it is scheduled.
Use the following steps to change the priority of a scheduled backup job as an example:
-
From the CommCell Console, right-click CommServe/Client/Agent/BackupSet and then click View | Schedules.
If you are at the subclient level, right-click the <Subclient> and click Schedules.
-
Select a scheduled job, right-click and select Edit from the shortcut menu.
-
Click Advanced.
-
From the resulting dialog box, click the Startup tab.
-
Select Change Priority and enter a value from 0 (highest priority) to 999 (lowest priority).
-
To start the job in a suspended state, select the Startup in suspended state check box.
-
Click OK.
Setting the Default Job Priority
You can change the priority of a scheduled job from user-defined value to default value.
Use the following steps to set the default priority for a scheduled job:
-
From the dialog box of an appropriate operation (such as backup, restore or auxiliary copy) click Advanced.
-
From the resulting dialog box click the Startup tab.
-
Select Use Default Priority.
-
To start the job in a suspended state, select the Startup in suspended state check box.
-
Click OK.