Basic Configuration
Enable 1-Touch
After you install the File System iDataAgent, follow the steps given below to enable 1-Touch for the default subclient:
-
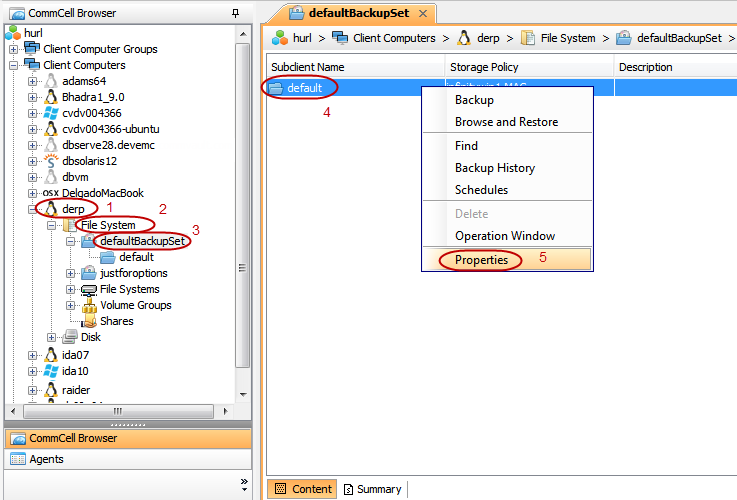
From the CommCell Console, navigate to <Client> | File System iDataAgent | defaultBackupSet.
Right-click the default subclient and click Properties.
-
In the Subclient Properties dialog box, click Advanced.
-
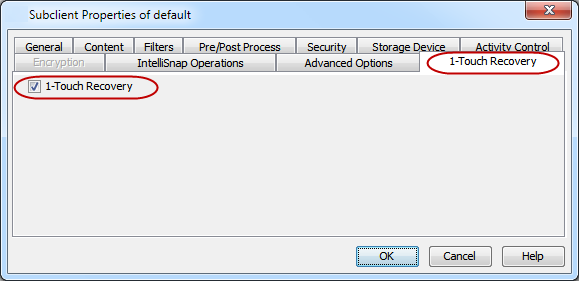
In the Advanced Subclient Properties dialog box, click the 1-Touch Recovery tab.
Select the 1-Touch Recovery check box.
Click OK.
Perform a Backup
After you enable 1-Touch, perform backups of the default subclient periodically to capture any changes in the client system configuration. Before recovering a client, ensure that you have run at least one full backup of the default subclient.
Note
Verify that the USB storage module is enabled on the client computer.
-
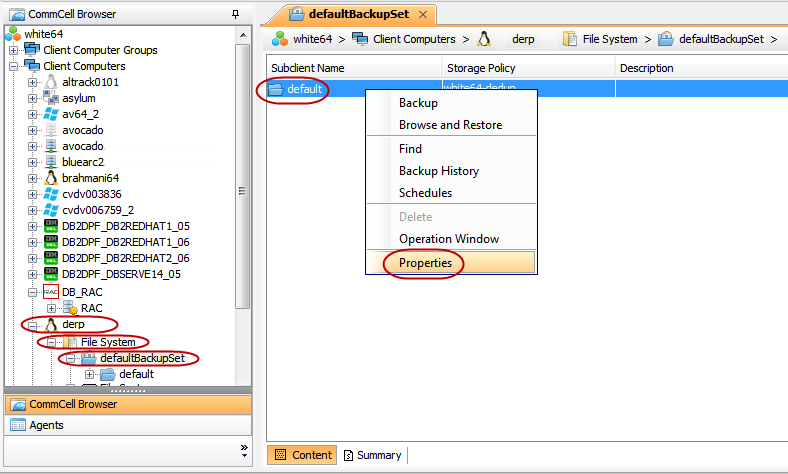
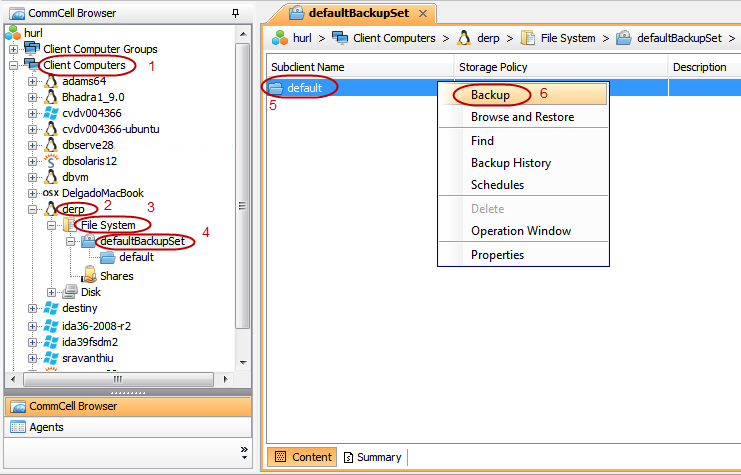
From the CommCell Console, navigate to <Client> | File System iDataAgent | defaultBackupSet.
Right-click a <Subclient>, and click Properties.
-
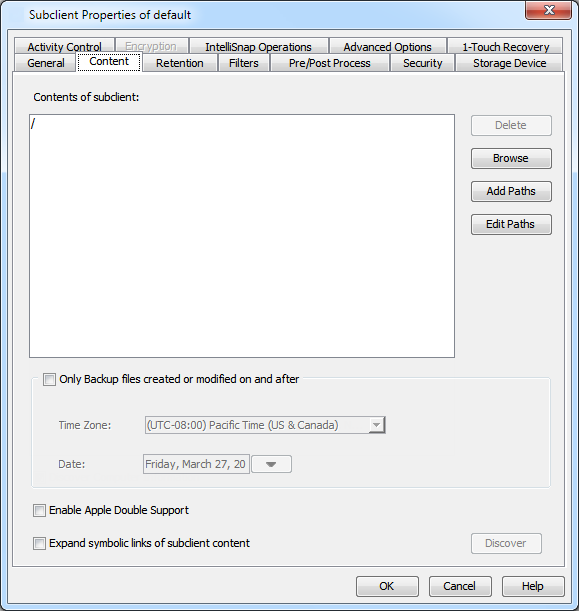
Click the Content tab.
Click Browse.
Select the root directory (/), and click Add.
Note: Use filters to exclude specific directories and mount points. Verify that the system mount points are not excluded from backups; otherwise, 1-Touch recovery fails.
Click OK.
-
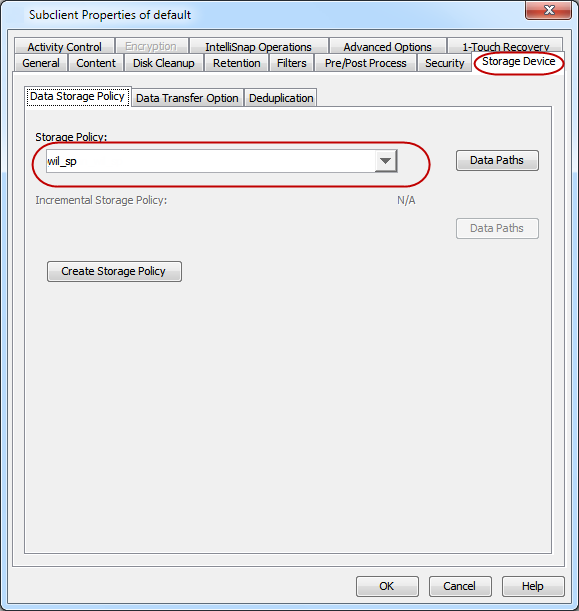
Click the Storage Device tab.
In the Storage Policy box, select the storage policy.
Click OK.
-
Right-click the <Subclient>, and click Backup.
-
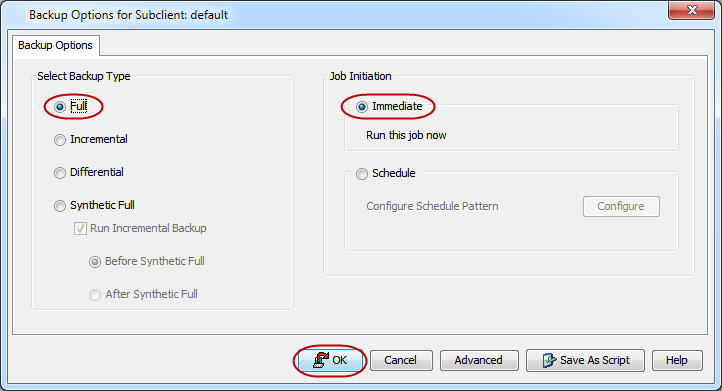
Click Full as backup type and then click Immediate.
Click OK.
-
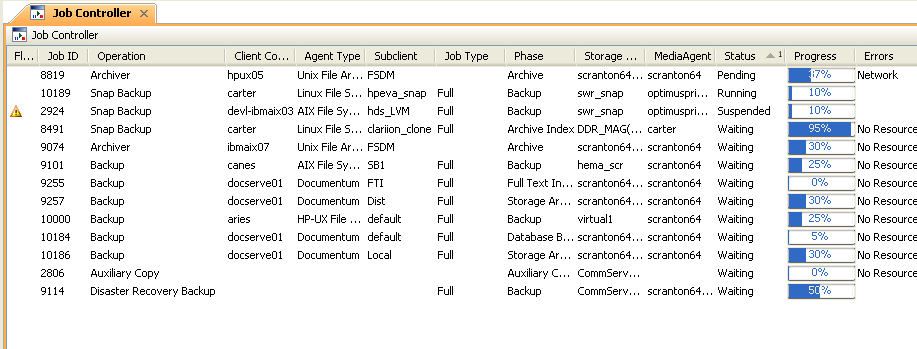
You can track the progress of the backup job from the Job Controller window of the CommCell Console.
Performing 1-Touch Backups on a Cluster
You can perform 1-Touch backups on a cluster.
Procedure
-
On the virtual node, complete the following steps:
-
Disable 1-Touch on the virtual node. For instructions, see Disabling 1-Touch on a Client Computer.
-
Back up shared data by adding the shared paths to the subclient content. For instructions, see Perform a Backup.
-
-
On each of the physical nodes, complete the following steps:
-
Enable 1-Touch on the physical node. For instructions, see Enable 1-Touch.
-
Add shared data to filters, and back up the remaining data or mount points. For instructions, see Perform a Backup.
-
Advanced Configuration
Create a Client Information Checklist
If you want to perform the interactive recovery, you must create a client information checklist before starting the recovery. You can also use client configuration stored on a CommServe to create a client information checklist.
Create a checklist that contains the following client information:
|
Required Information |
How to Find It |
|
Client Information |
|
|
|
|
Note down IP address, Net Mask and Gateway address of the interface of the client that is used to communicate with the CommServe. For Example:
|
|
DNS Server address |
|
|
CommServe and MediaAgent Information |
|
|
CommServe Client Name |
|
|
CommServe Host Name |
|
|
CommServe IP Address |
|
|
CommCell Credentials |
|
|
Firewall Port Number |
You will need this information only when the firewall is set between the CommServe and the client.
|
|
MediaAgent Name |
|
|
MediaAgent IP Address |
|
Create a Client Information Checklist Using the Client Configuration
A new Client Configuration is stored on a CommServe when you make any changes in the client system configuration and perform a backup. Use the client configuration stored on a CommServe to create a client information checklist.
-
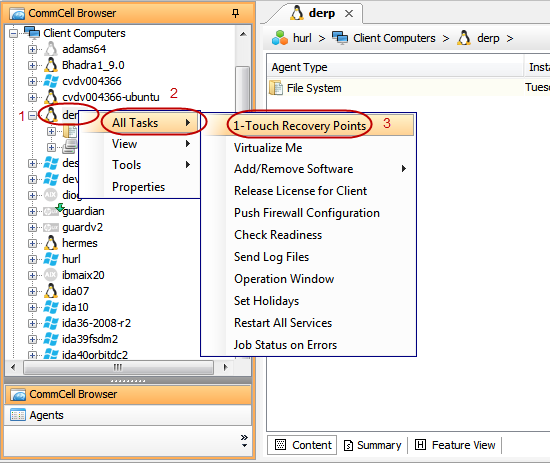
From the CommCell Console, navigate to <Client>
Right-click the <Client> and click All Tasks | 1-Touch Recovery Points.
-
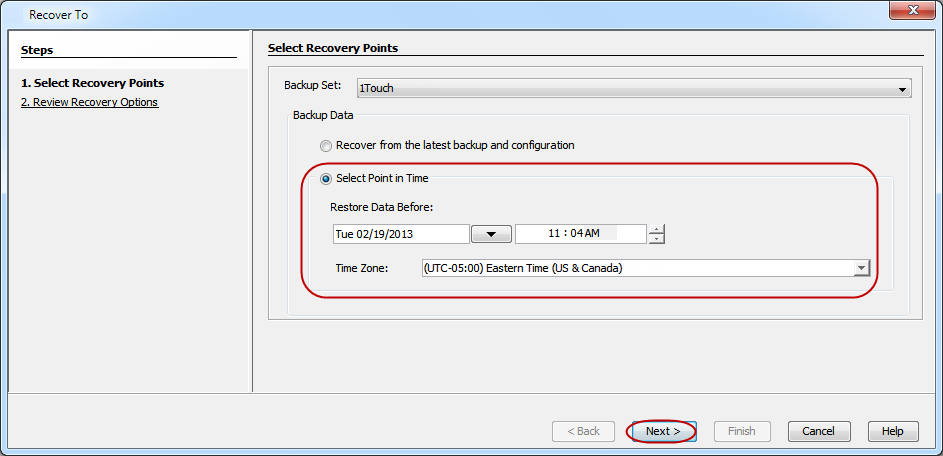
Select the most recent client configuration.
Click Next.
-
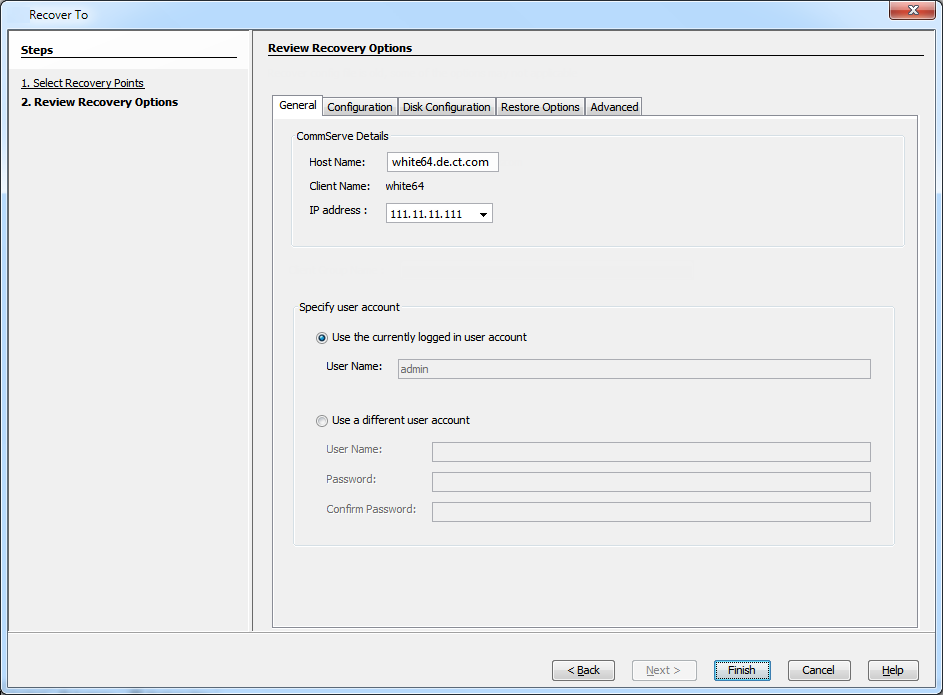
Note down the following related information in the client information checklist:
-
CommServe Host Name
-
CommServe Client Name
-
CommServe IP Address
-
-
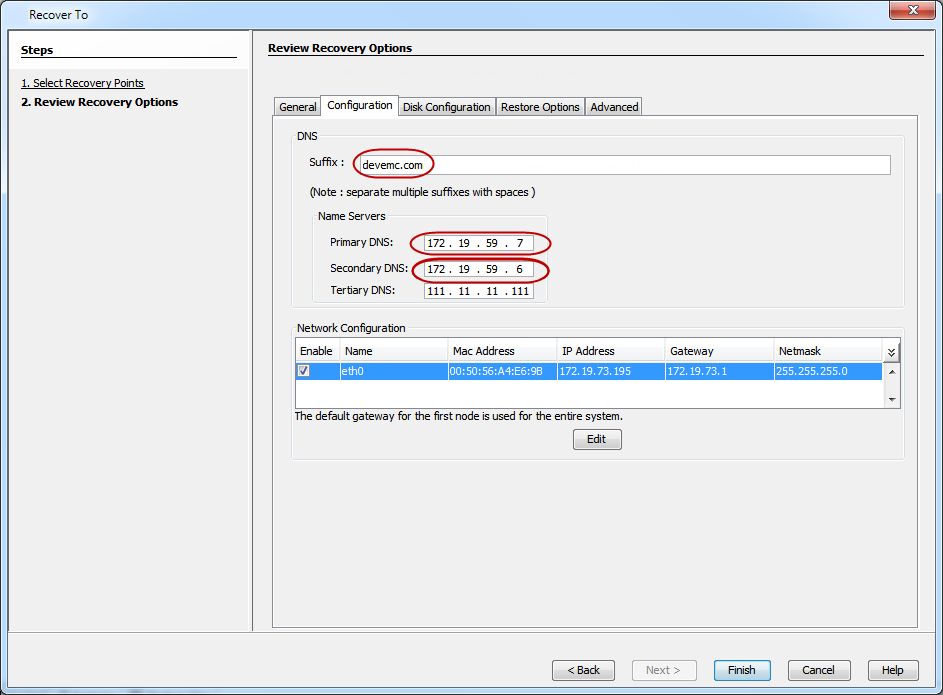
Click the Configuration tab and note down the following information in the client information checklist:
-
DNS Suffix
-
Primary and Secondary Name Server IP address
-
-
From the Configuration tab, note down the following information in the client information checklist:
-
Client IP Address
-
Client Gateway
-
Client Netmask
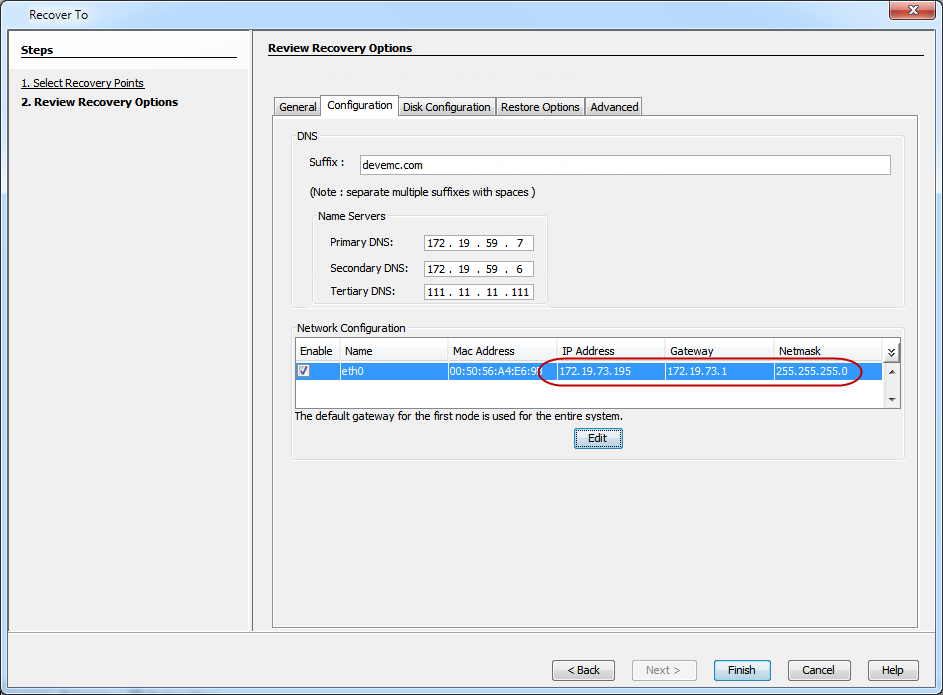
-
-
Click Cancel to close the dialog box.
-
From the CommCell Console, navigate to <Client>.
Right-click the <Client> and click Properties.
Note down the following information in the client information checklist:
-
Client Name
-
Client Host Name
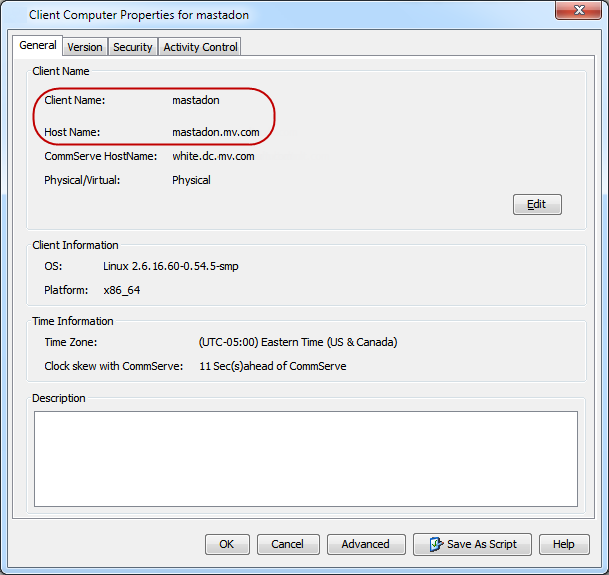
-
-
Click Cancel to close the dialog box.
Schedule a Backup
-
From the CommCell Console, navigate to <Client> | File System iDataAgent | defaultBackupSet.
Right-click the subclient, and click Backup.
-
Click Schedule to schedule the backup for a specific time.
Click Configure to set the schedule for the backup job.
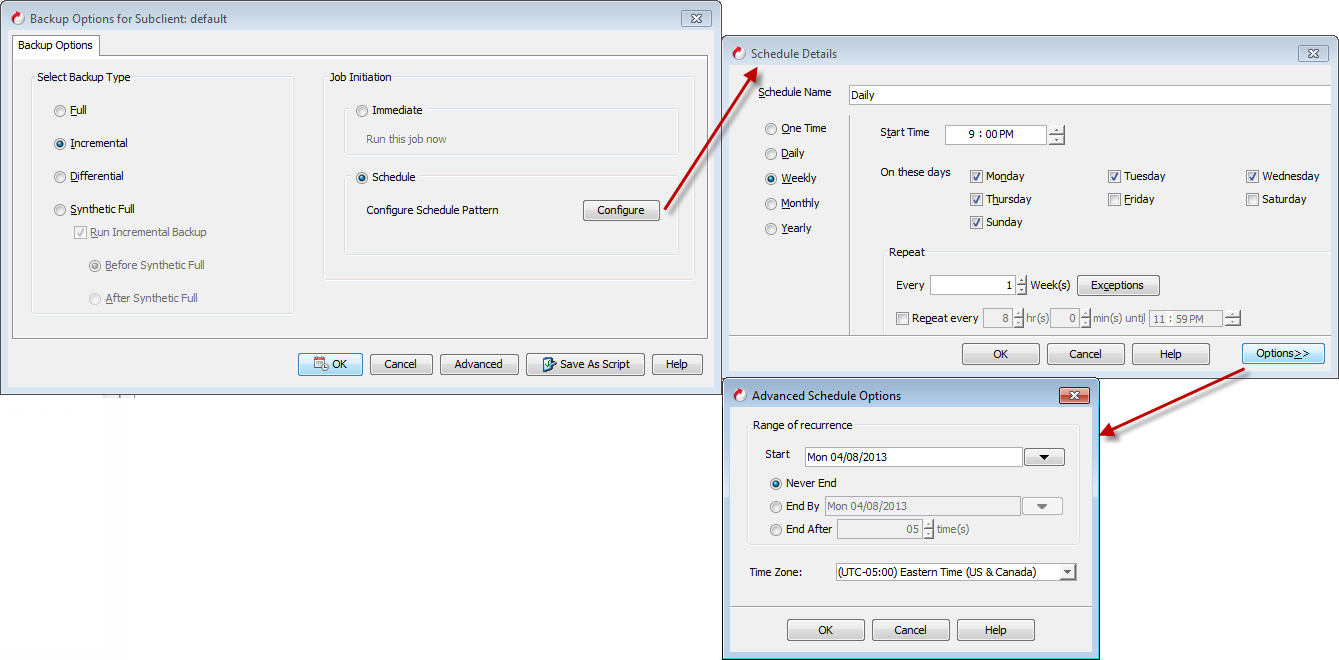
-
Select the appropriate scheduling options. For example:
-
Click Weekly.
-
Check the days you want the run the backup job.
-
Change the Start Time to 9:00 PM
-
Click OK to close the Schedule Details dialog
-
Click OK to close the Backup Options dialog
The backup job will execute as per the schedule.
-