Configure the network bonding for the Data Protection network.
Before You Begin
Obtain the following IP addresses before you start:
|
Entity |
IP Address |
|---|---|
|
Bonded public (data protection network) IP address |
|
|
Data protection Netmask |
|
|
Data Protection Gateway |
|
|
Data Protection DNS Servers |
Procedure
-
Power on the nodes.
Note
Recommended: Power on 3 un-configured nodes at a time. (If you have more than 3 un-configured nodes, you can add the other nodes later.)

Tip
-
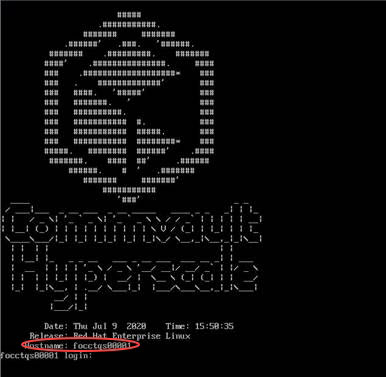
If the login prompt is not displayed, press <Alt> + <F2> or <++> keys to display the prompt.
-
Note down the serial number (Hostname) for the node. This will be useful to identify the node during setup.
-
-
Login to a node using the following default credentials:
Login: root
Password: cvadmin
Note
This password can be changed during setup.
-
Navigate to the following folder:
/opt/commvault/MediaAgent -
Execute the
cvnwlacpbond.pywith appropriate parameters to setup the bonding. -
Restart the network service to create the bonding with the appropriate parameters using the following command:
systemctl restart network -
Repeat these steps in the other nodes.
Examples
Configuring Active-Backup Bonding on Data Protection Network
Use the following options to set mode 1 (active-backup bonding) for Data Protection network:
./cvnwlacpbond.py -c -m active-backup -t dp -i <Bonded IP for public data protection network> -n < Data Protection Netmask IP> -g <Data Protection Gateway IP> -d <Data Protection DNS Server IP1> <Data Protection DNS Server IP2>
For example:
./cvnwlacpbond.py -c -m active-backup -t dp -i 10.11.11.61 -n 255.255.255.0 -g 10.11.11.1 -d 10.11.11.21 10.11.11.22The following output will be displayed:
Arguments entered: {'nwtype': 'dp', 'configure': True, 'ip': '10.11.11.61', 'netmask': '255.255.255.0', 'mode': 'active-backup', 'dns': ['10.11.11.21', '10.11.11.22'], 'validate': False, 'gateway': '10.11.11.1'}
Creating network config files for Data protection network..
Processing file: /opt/commvault/MediaAgent/ifcfg-scripts/lacp/ifcfg-eno3...
Processing file: /opt/commvault/MediaAgent/ifcfg-scripts/lacp/ifcfg-enp134s0f0...
Processing file: /opt/commvault/MediaAgent/ifcfg-scripts/lacp/ifcfg-bond1...
All network config files created successfully..
Configuring LACP Bonding on Data Protection Network
Use the following options to set mode 4 (LACP bonding) for Data Protection network:
./cvnwlacpbond.py -c -m 802.3ad -t dp -i <Bonded IP for public data protection network> -n < Data Protection Netmask IP> -g <Data Protection Gateway IP> -d <Data Protection DNS Server IP1> <Data Protection DNS Server IP2>
For example:
./cvnwlacpbond.py -c -m 802.3ad -t dp -i 10.11.11.50 -n 255.255.255.0 -g 10.11.11.1 -d 10.11.11.11 10.11.11.12Use the following options to set mode 4 (LACP bonding) for Data Protection network using specific interfaces:
./cvnwlacpbond.py -c -m 802.3ad -t dp -i <Bonded IP for public data protection network> -f enpsf2 enpsf3 -n < Data Protection Netmask IP> -g <Data Protection Gateway IP> -d <Data Protection DNS Server IP1> <Data Protection DNS Server IP2>
For example:
./cvnwlacpbond.py -c -m 802.3ad -t dp -i 10.11.11.50 -f enpsf2 enpsf3 -n 255.255.255.0 -g 10.11.11.1 -d 10.11.11.11 10.11.11.12The following output will be displayed:
Arguments entered: {'nwtype': 'dp', 'configure': True, 'ip': '10.11.11.50', 'netmask': '255.255.255.0', 'mode': '802.3ad', 'dns': ['10.11.11.11', '10.11.11.12'], 'validate': False, 'gateway': '10.11.11.1'}
Creating network config files for Data protection network..
Processing file: /opt/commvault/MediaAgent/ifcfg-scripts/lacp/ifcfg-eno3...
Processing file: /opt/commvault/MediaAgent/ifcfg-scripts/lacp/ifcfg-enp134s0f0...
Processing file: /opt/commvault/MediaAgent/ifcfg-scripts/lacp/ifcfg-bond1...
All network config files created successfully..
Help to Run the Bonding modes
Use the following command to display help:
./cvnwlacpbond.py -hThe following output will be displayed:
usage: cvnwlacpbond.py [-h] [-c] [-m {802.3ad,active-backup}] [-t {dp,sp}]
                       [-i IP] [-f IFACE IFACE] [-n NETMASK] [-g GATEWAY]
                       [-d DNS [DNS ...]] [-v VLANID] [-nr] [-s] [-r]
Tool to augment and validate network settings for HyperScale
optional arguments:
  -h, --help            show this help message and exit
Configure Network:
  -c, --configure       Option to configure network
  -m {802.3ad,active-backup}, --mode {802.3ad,active-backup}
                        Mode of bonding. Defaults to 802.3ad
  -t {dp,sp}, --nwtype {dp,sp}
                        Type of network. Defaults to Data Protection
  -i IP, --ip IP        IP address of the interface
  -f IFACE IFACE, --iface IFACE IFACE
                        Interfaces to use for configuring the bond
  -n NETMASK, --netmask NETMASK
                        Netmask IP of the interface
  -g GATEWAY, --gateway GATEWAY
                        Gateway IP for the interface to connect to
  -d DNS [DNS ...], --dns DNS [DNS ...]
                        DNS IPs for the interface to configure with
  -v VLANID, --vlanid VLANID
                        Tagged VLAN ID in case where IP needs to be assigned
                        to tagged VLAN
  -nr, --nonroutable    Data Protection network on a flat network. This will
                        not mandate a gateway to be provided
  -s, --suppress        Suppress link validation while configuring the
                        interface
Restore network files:
  -r, --restore         Restore network files from the inital boot time
Note
-
Multiple DNS servers can be provided for the
-doption, using space as the delimiter. -
The
-nroption can be used to setup an IP address to a network interface that is not routable through a gateway network.