Follow these steps to convert a physical computer into a virtual machine:
-
Disable the network connection for the client computer. From the CommCell Console, navigate to Client Computers.
Right-click the <Client>, point to All Tasks | Virtualize Me,click VMware.
-
Click Next.
By default, the latest data and configuration of the client computer, backed up by the default backup set, will be used to create the virtual machine.
-
If you are virtualizing your client computer using VMware:
-
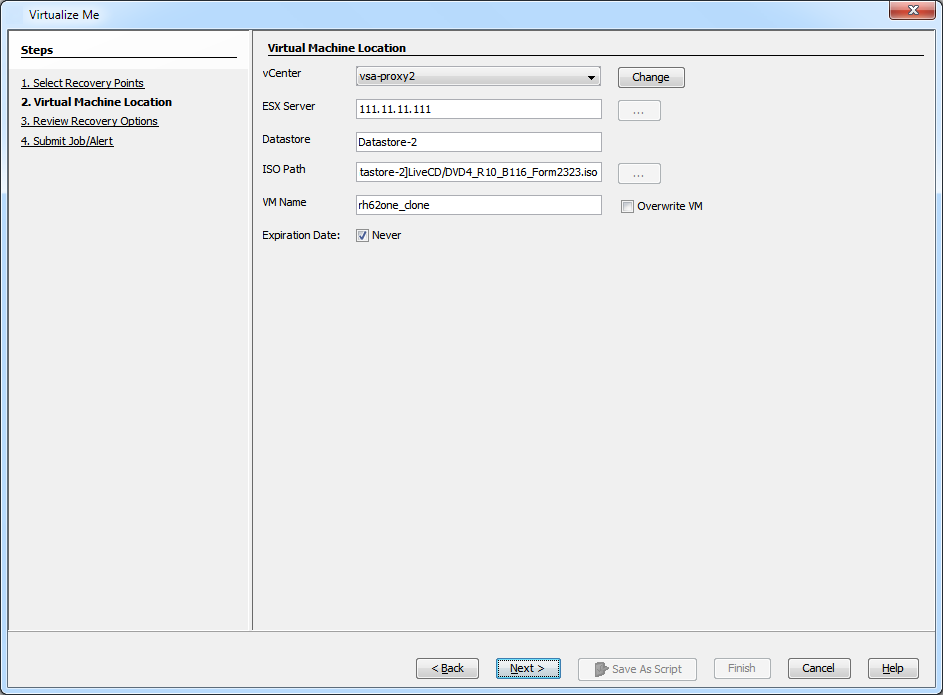
Select a vCenter from the vCenter list.
-
Click the ... button and browse to select an ESX Server and a Data Store.
-
The selected data store will be the default data store for the virtual machine and all the disks will be created in it.
-
Click the ... button for the ISO Path box and browse to the location of the Boot CD image on the ESX Server. 1Touch.iso is available in the Windows Live CD directory of the Commvault Installation Media List. You can also download 1Touch.iso.
-
Go to the Commvault Store.
-
Click the MEDIA KITS tab and then 1-Touch to download the 1Touch.iso.
-
-
Enter the name of the virtual machine in the VM Name box. By default, the name of the client computer will be used as the name of the virtual machine.
-
If a virtual machine with the same name already exists, select the Overwrite VM check box. The existing virtual machine will be deleted during the virtualization operation.
-
Click Next.
-
-
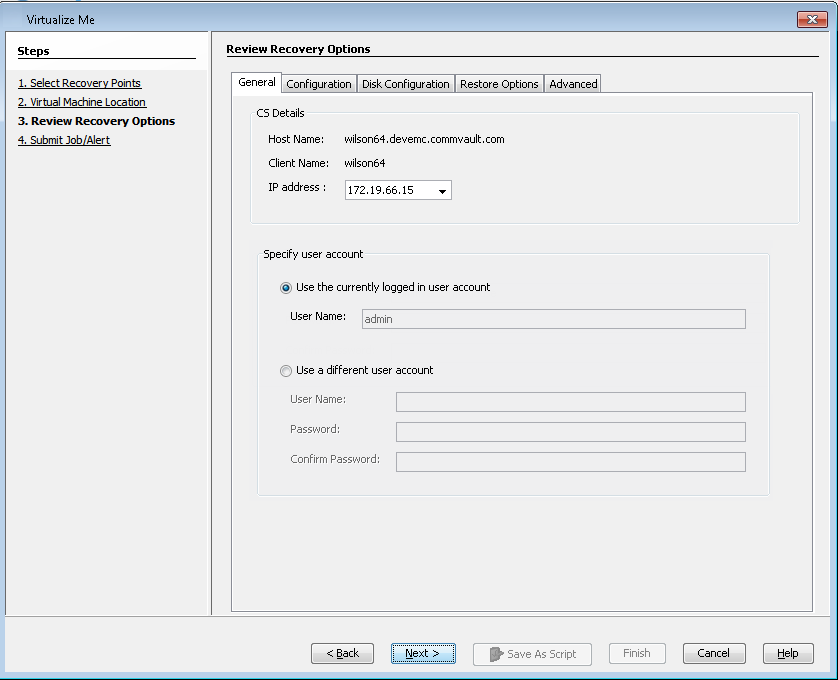
By default, the user account which you have used to login to CommCell console will be used to perform the virtualization job.
-
If you are using Active Directory User account to login to the CommCell console, enter the password for the user account.
-
If you have logged in as CommCell console administrator, the password is not required to perform the virtualization job.
-
-
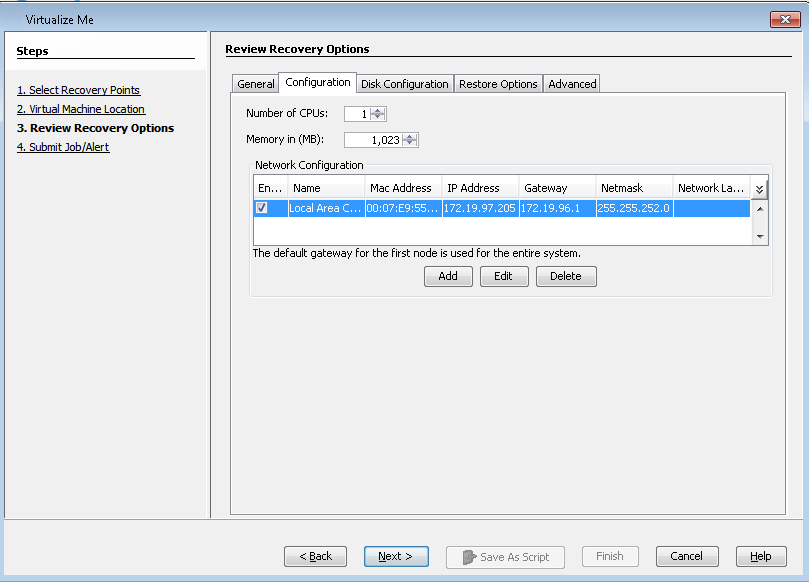
Click Configuration tab and review the following configuration:
-
Number of CPUs
-
Memory in (MB)
-
Network Configuration
The virtual machine will be created with this configuration.
-
-
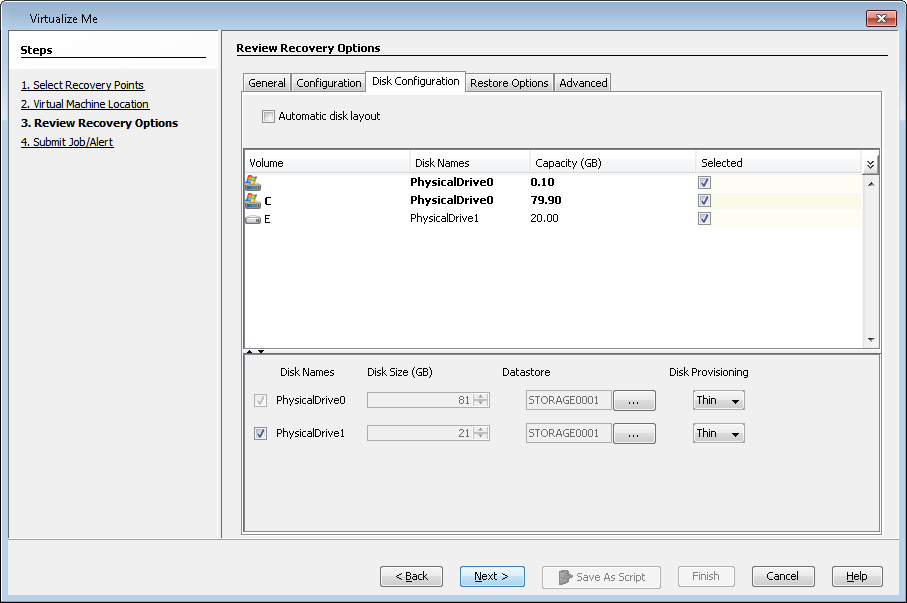
Click the Disk Configuration tab and review the available disk configuration. From the SCSI Controller list, select the storage controller. The virtual machine will be created with the available disk configuration.
-
Note: With Hyper-V, you can only create four SCSI controllers.
-
Optional: You can add the destination or the cloned computer to a domain based on your requirement. On the Review Recovery Options > Restore Options tab, click Change and enter the domain credentials.
-
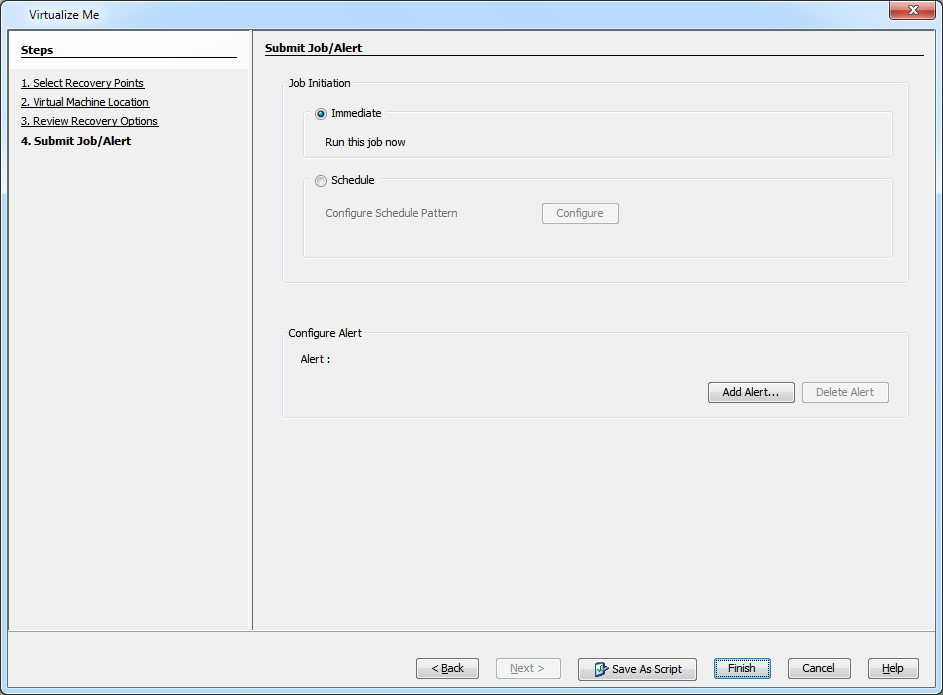
Click Finish to start the virtualization job.
-
You can track the progress of the Virtualization job from the Job Controller window of the CommCell Console. The virtualization operation includes the following three phases:
-
Provision VM
-
Configuration Restore
-
Full System Restore
After Virtualize Me Job completes if you power on the original client computer, it will no longer be authenticated by the CommServe. The newly created virtual machine will become the active client.
-
-
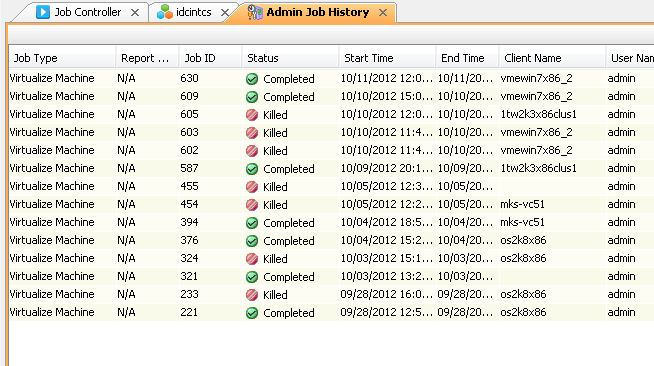
Once the job is complete, view the job details from the Admin Job History. From the CommCell Browser, right-click <CommServe> and select View | Admin Job History.
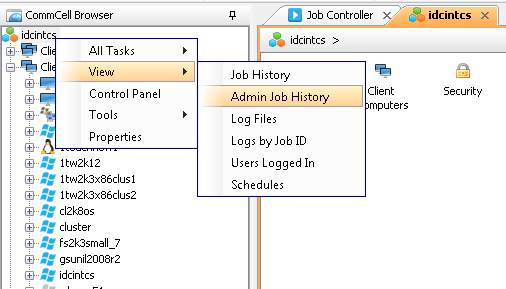
-
Select Virtualize Me under Job Type.
Click OK.

-
You can view the following options about the job by right-clicking the job:
-
Details of the job
-
Events of the job
-
Log files of the job
Resubmit the job to run it again
-
If you want to further explore additional options read the Advanced section of this documentation.