You can create a synchronous storage policy copy using an existing cloud, disk or tape library as the storage target.
Important
In fresh installations of Feature Release 17 and most recent versions, the Include Global policies in Storage Policy list option is no longer available in the Media Management. Therefore, you must create a storage policy copy using a storage pool instead of a library. For more information, see Creating a Synchronous Copy Using a Storage Pool.
Procedure
-
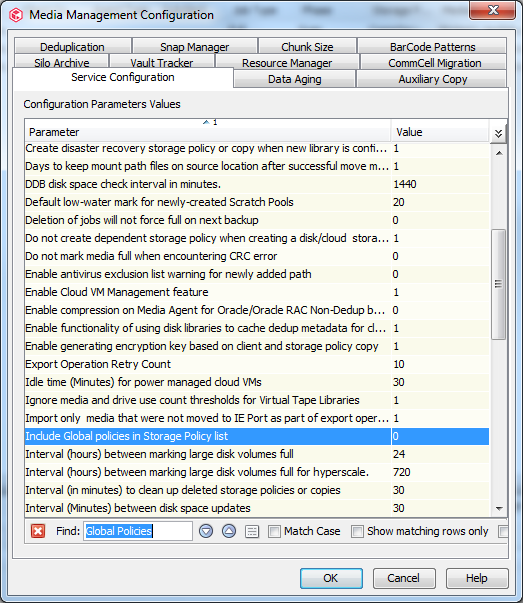
From the CommCell Console menu, click Storage > Media Management.
-
On the Service Configuration tab, set the value of Include Global policies in Storage Policy list option to 1, and click OK.
-
From the CommCell Console ribbon, go to Policies > Storage Policies > Storage Policy.
-
Right-click the storage policy and then go to All Tasks > Create New Copy.
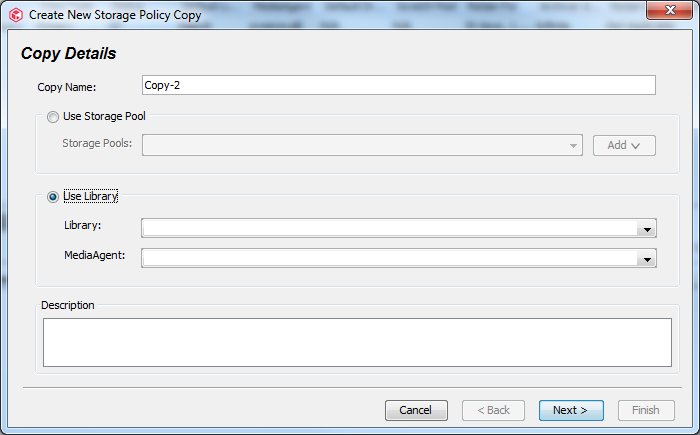
The Create New Storage Policy Copy - Copy Details page appears.
Note
If the Use Library option is not displayed, close the page and refresh the storage policies by pressing the F5 key from the Policies > Storage Policies node in the CommCell Browser.
-
Optional: In the Copy Name box, type a name for the copy.
-
Select the Use Library option.
-
From the Library list, select the library that must be used by the copy.
-
From the MediaAgent list, select the MediaAgent that must be used to access the library.
-
Click Next.
The Create Storagepolicy Copy - Retention Rules page appears.
-
Click Next.
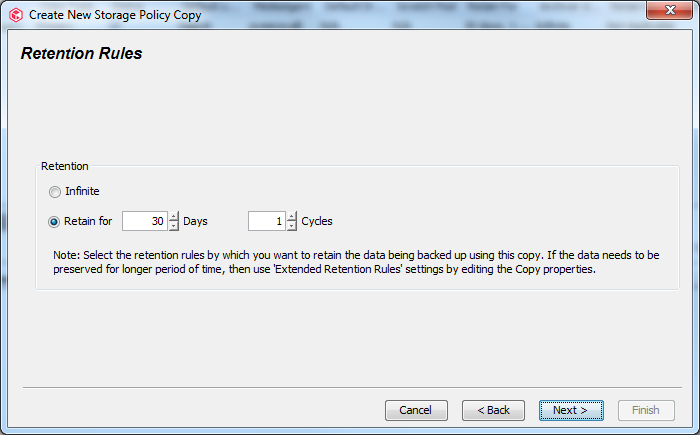
The Create New Storage Policy Copy - Retention Rules page appears.
-
Select one of the following Retention options:
-
Infinite: If you plan to retain the data in the copy for an infinite amount of time.
-
Retain for n days n cycles: If you plan to retain the data in the copy for a specific length of retention period and number of retention cycles. (Retention cycles will not apply to agents that do not have cycles).
-
-
Click Next.
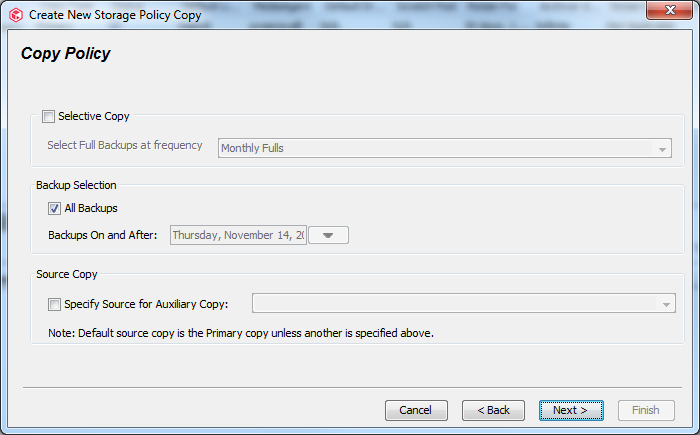
The Create New Storage Policy Copy - Copy Policy page appears.
-
Select one or more of the following Copy Policy options:
-
All Backups: If you plan to copy all the backup data in the primary copy to the secondary copy. (When you clear this option, the Backups on and After option is enabled.)
-
Backups on and After: If you plan to copy only the backup data after the specified date from the primary copy to the secondary copy.
-
-
Click Next.
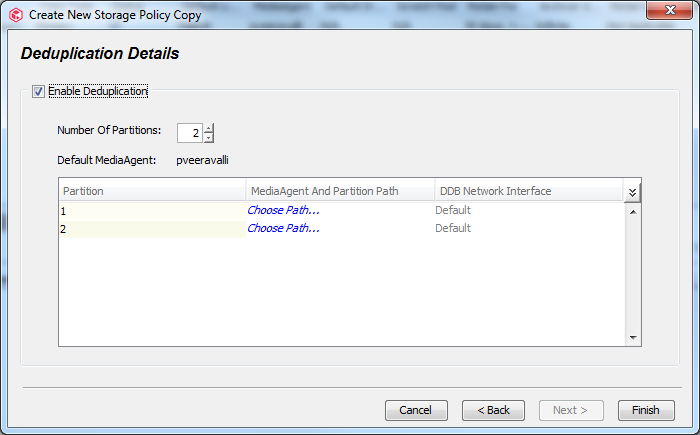
The Create New Storage Policy Copy - Deduplication Details page appears.
Note
This page will be displayed when you select a Disk or Cloud library in the Create New Storage Policy Copy - Copy Details page.
-
Select the Enable Deduplication check box.
All the other deduplication related options will be enabled.
-
In the Number of Partitions box, enter the number of partitions for the deduplication database (DDB).
-
For each partition, click Choose Path... to set the partition settings.
The Partition Path dialog box is displayed.
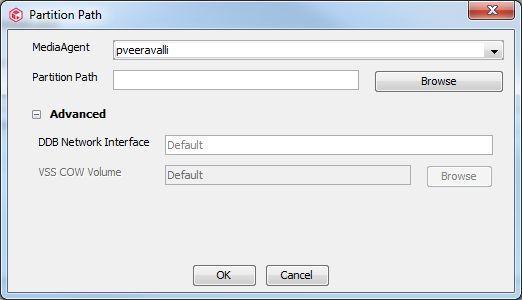
Enter the following information:
-
From the MediaAgent list, select the MediaAgent that will be used to access the partition path.
-
In the Partition Path box, enter the file path where you want to locate the DDB.
-
Optional: Click the Advanced button and add the following information:
-
DDB Network Interface: Define dedicated network interface name for each partition MediaAgent .
Notes
-
By default, no data network interface(DIP) pair is configured. We recommend that you configure a dedicated Network Interface Card (NIC) on each partition MediaAgent and set up DIP between the data path and partition MediaAgents to increase the speed of the communication between the MediaAgents, improve data protection job throughput and avoid network bottlenecks
-
If you have a NIC configured on a partition MediaAgent, specify the network interface name or IP address for the DDB Network Interface.
-
Push the firewall configuration on the DDB MediaAgent after adding a data interface pair and creating a storage policy copy. For more information, see Data Interface Pairs - Overview
-
If DIP is configured between two MediaAgents and if no interface pair is specified during storage policy creation, the existing DIP is used between two MediaAgents.
-
No more than one DIP should be created between two clients. If another interface is created, the clients will use only the newer defined interface pair.
-
If DIP is configured and the library setup with the DDB storage policy has the Automatically add data paths for new Drivepools configured, then on adding a new MediaAgent a DIP will automatically be configured.
-
-
VSS COW Volume: Drive to host the snapshot created by the DDB backup process using VSS Copy-on-Write (COW) method.
Notes
-
The VSS COW volume box is available only when no DDB subclient exists on a selected DDB MediaAgent and for version 11 MediaAgents.
-
If you changed the Windows shadow copy storage association to a different drive, the snapshot created during DDB backup is stored on that drive.
-
If you want to change the VSS COW volume location after storage policy creation, you can modify it on the DDB subclient. For more information, see Modifying the Properties of the Deduplication Database Subclient.
-
-
-
Click OK.
-
-
Repeat the above step in all the partitions, if more that one partition is used.
-
Click Finish.
Result
The storage policy copy will be created.
What to Do Next
-
Perform an Auxiliary Copy Operation or Create Schedules for Auxiliary Copies to make copies of the data.
-
You can also setup Additional Configuration Options For Storage Policy Copies.