You can use Arlie Recover to execute an automated threat response plan to review critical or high-risk virtual machines flagged by threat detection, and automatically initiate an orchestrated cyber restore workflow.
Note
To view Arlie Recover recommendations and initiate a response plan, you must enable the Arlie Recover additional setting in your environment. For more information, contact earlyadopter@commvault.com.
Prerequisites
-
Only Azure virtual machines are supported.
-
The Arlie Recover additional setting must be enabled (see note above).
-
A Threat Scan or Threat Analysis job must have run and detected anomalies or threats on the virtual machines.
-
You must have access to Threat Scan (Security Services > Threat Scan).
-
A destination hypervisor must be available to serve as the restore target.
-
For complete clean room setup requirements, see Cleanroom recovery: Isolated Recovery Environments (IREs) for cyber resilience.
Activating Arlie Recover for Cyber Recovery
-
Go to the Threat Scan dashboard.
-
Click View Response Plans (highlighted in red, below):
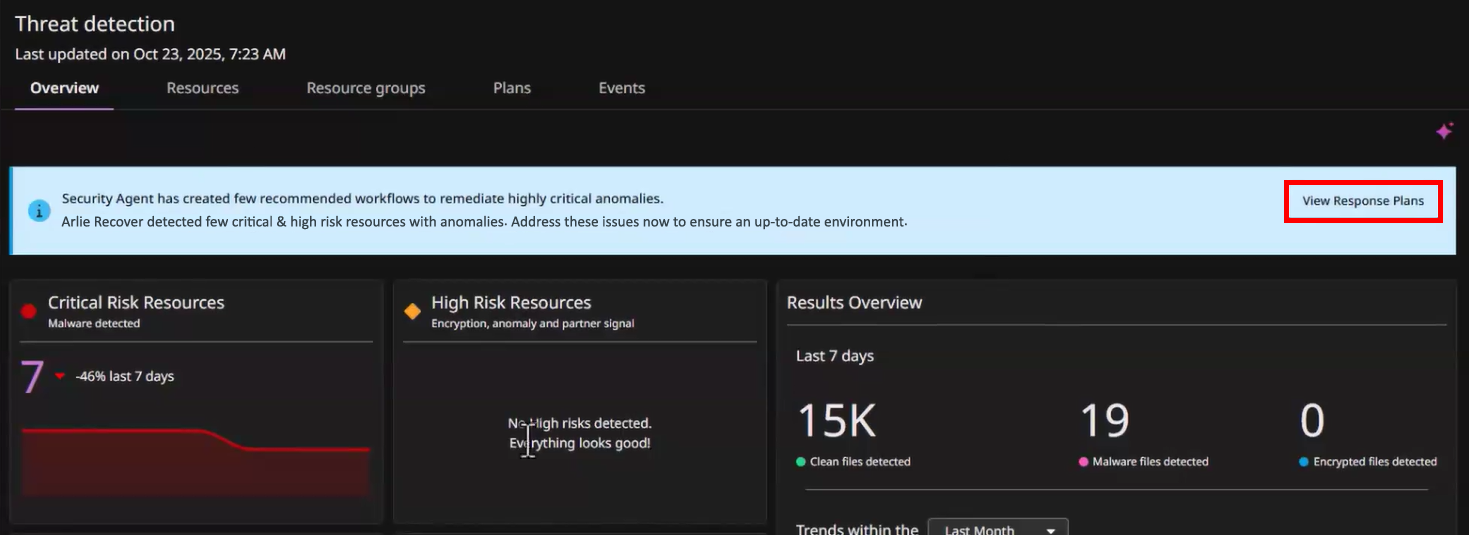
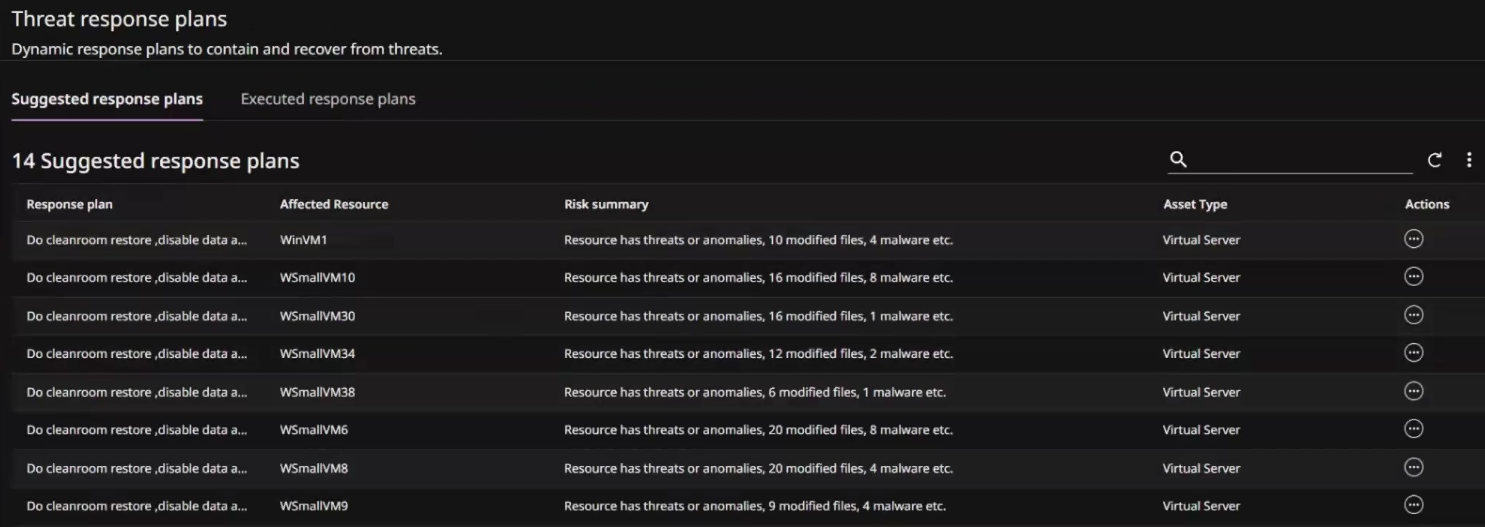
The Threat response plans page appears. The Suggested response plans tab shows recommendations for resources that are critically affected:
Reviewing and Approving Recovery Actions
-
For the affected virtual server, click the Action button
 , and then click Review & execute.
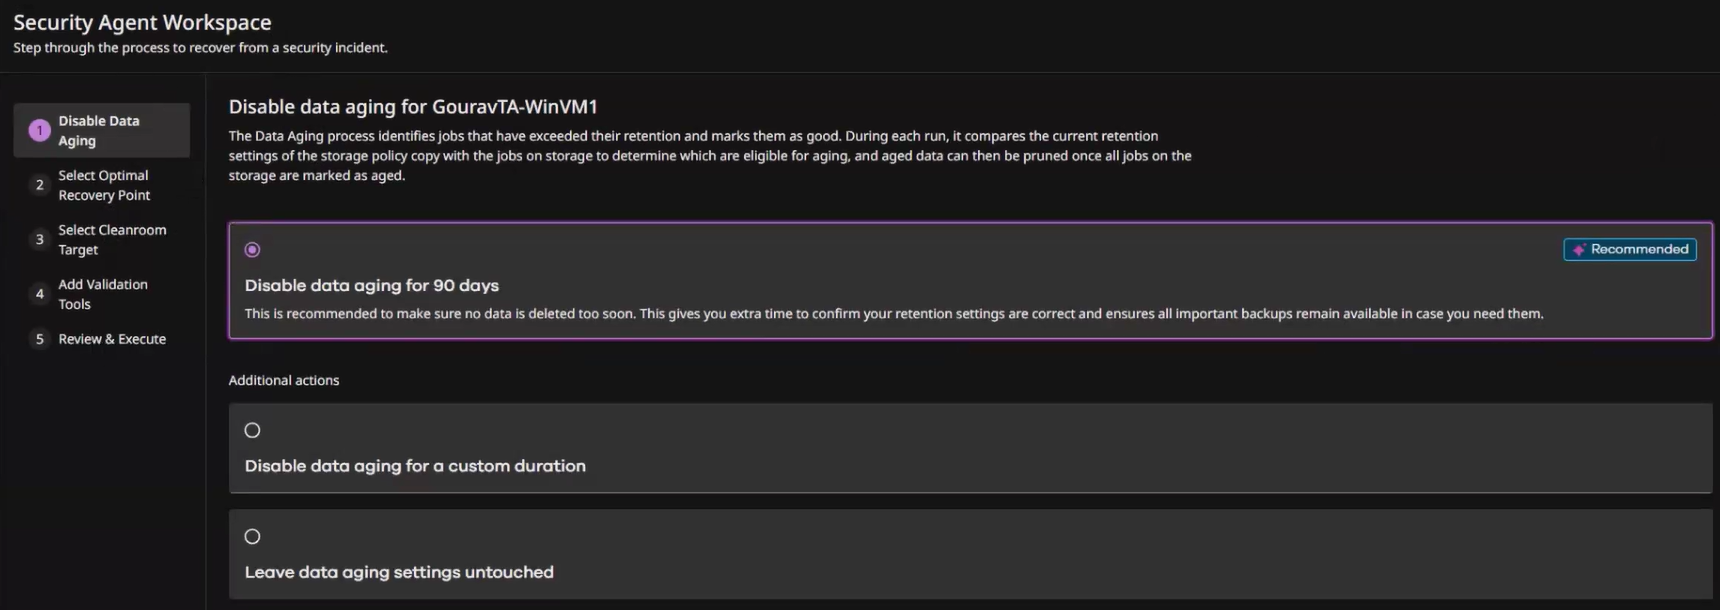
The Security Agent Workspace wizard appears:
-
Select a data aging option.
For example, you can disable data aging for 90 days, set a custom duration, or leave the data aging settings untouched.
-
Click Next.
-
Select the Automatic restore point option.
This option allows the system to automatically pick the most recent clean version for the restore.
-
Click Next.
Clean Room and Runbook Configuration
-
Select Create a new Cleanroom target.
-
In the Cleanroom name box, enter a name for the clean room.
Warning
The clean room name that you enter dictates the name of the generated runbook.
-
In the Target name box, enter a name for the target.
-
From the Destination hypervisor list, select the destination where the virtual machine will be restored.
-
Click Next.
Executing the Response Plan
-
Leave the recommended validation tools enabled.
By default, the options to run Threat Scan and Windows Defender after the restore job are enabled.
-
Click Next.
-
Review the configuration details.
-
Click Execute.
Backend automation will create the clean room site, generate the runbook, and run the restore job.
Retrying Executed Plans
If a response plan has already been executed for a virtual machine, you can retry it to access the setup screens again without generating new anomalies.
-
From the Threat response plans page, click the Executed response plans tab.
-
For the plan that you want to retry, click the Action button
, and then select Retry.