Prepare the Distributed Storage proxies, by installing the OS, assigning hostnames, and configuring the network settings.
Install the Commvault MediaAgent software in the Distributed Storage proxies.
Important
-
All the Distributed Storage servers and the proxies must have static IP addresses, and the mapping from IP to hostname be updated in
/etc/hostseven if DNS resolution is available. -
Storage proxies are configured with 2 ethernet interfaces and run as an HA pair (except for storage proxies that are used for object storage). For failover to work correctly, a public VIP address and a private VIP address are required for the ethernet interfaces.
Procedure
On each Distributed Storage proxy:
-
Create a mirrored volume (RAID-1) on the two SSD’s meant for the OS on each of the nodes. All HDD’s are to remain in the pass-through or JBOD mode. (The NVMe’s will be used for cache or DDB partitions as required.)
-
Mount the downloaded ISO as a virtual media and reboot the server.
-
Once the server boots from the mounted ISO, select the following options:
-
RAID-1 volume as the destination to install the OS
-
Perform a fresh install (do not preserve old partitions or data).
Provide the root user password (
hedvigby default) twice while the OS packages are installed. This step could take up to 30 minutes after which the server needs to be rebooted. -
-
Once the OS is installed, set the hostname, stop Firewall and Network Manager processes, and make the changes persistent using the following commands:
hostnamectl set-hostname <private_hostname> --static systemctl stop firewalld systemctl stop NetworkManager chkconfig firewalld off chkconfig NetworkManager off -
Edit the /etc/sysconfig/selinux file and disable SELinux as follows:
SELINUX=disabled -
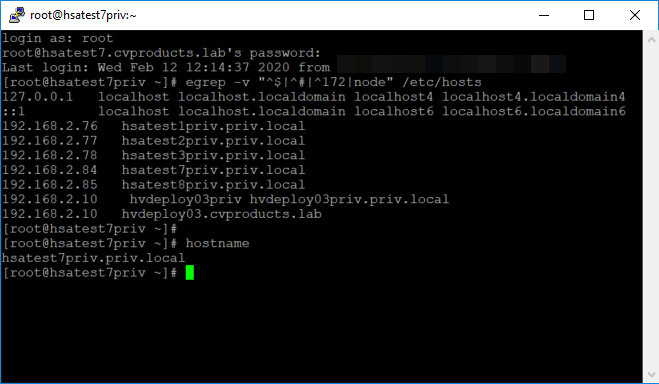
Edit
/etc/hoststo reflect entries for each proxy in the environment.The configuration shown in the following example, reflects 3 storage servers and 2 proxies with their respective private IP’s and hostnames.
Note
Assign hostnames to each of the proxies based on the private storage network. This can be managed through the /etc/hosts files on all servers, including the Deployment server. The Client facing data-protection IP on each proxy may be assigned through DNS.
-
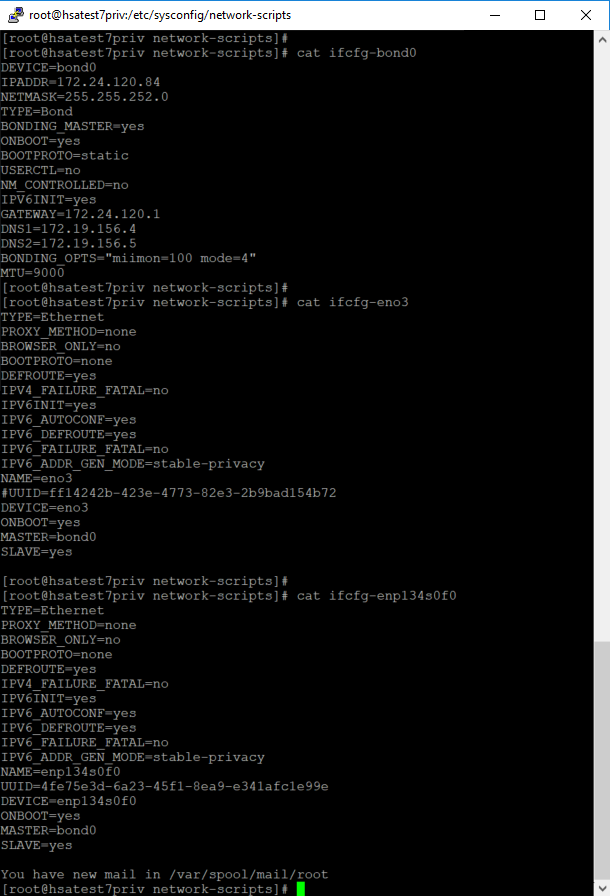
Navigate to
/etc/sysconfig/network-scriptsdirectory, and configure network port bonding for resilience of both the private storage and data-protection VLAN’s. As there is ingest from the data-protection VLAN and writes to the shared storage space, both bonds - bond0 and bond1 - must be implemented using 4x 10G physical ports, as shown in the following examples:-
The bond0 configuration files on a proxy for the data-protection interfaces (eno3 and enp134s0f0 in the following example) are as follows:
-
The bond1 configuration files on the proxy for the private storage network for the interfaces (eno4 and enp134s0f1 in the following example) are as follows:

-
-
Reboot the server for the above changes to take effect.
-
If RHEL is used as the OS, enable RHEL subscription to download software and updates using the following command:
subscription-manager register --username=<USER_NAME> --password=<PASSWORD> --auto-attach -
Install the MediaAgent software.
For more information about installing the MediaAgent software, see MediaAgent Installations.
The MediaAgents will be setup as proxy(s) later in this process.