You can directly install the required hot fixes to the downloaded ISO file using OneTouch.exe.
-
Log on to any computer where you have installed the Windows File System Agent package. For more information, see Preinstallation Checklist for the Windows File System Agent.
-
Double-click OneTouch.exe from the software_installation_directory/Base folder.
The 1-Touch wizard appears.
-
On the Please select one page, click 1-Touch Boot CD Wizard, and then click Next.
-
On the Welcome page, click Next.
-
On the Processor Type page, select the processor type from the list.
NOTE: The processor type must match with the processor of the computer where you are restoring the client.
-
On the Mass Storage Drivers page, select the required drivers from the list, and click Next.
If you do not find the required driver in the list, click Add to include the driver to the list.
-
On the NIC Drivers page, select the required NIC drivers from the list, and click Next.
If you do not find the required NIC driver in the list, click Add to include the driver to the list.
-
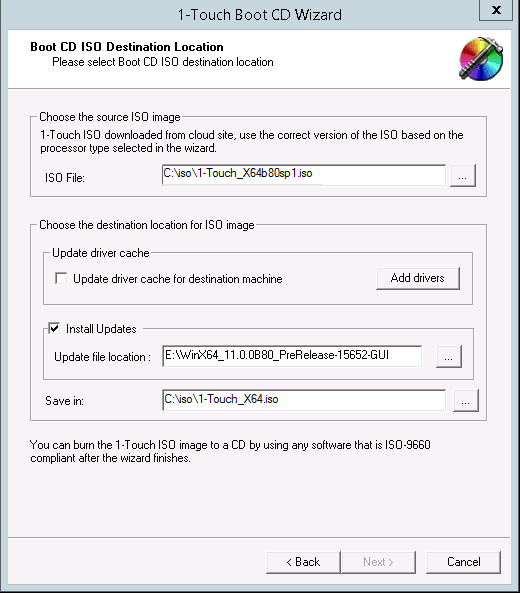
On the Boot CD ISO Destination Location page, make the following selections:
-
In the Choose the source ISO image area, browse the location for the ISO file.
TIP:
-
Enter the 1-Touch ISO.
-
Make sure that the version of ISO is compatible with the selected processor type.
-
-
Select the Install Updates check box and in the Update file location box, type the location of the hot fix.
Note: Do not enter an UNC path as the location for the hot fix.
-
In the Choose the destination location for ISO image area, browse and enter the location where you want to save the ISO image.
-
Click Done.
-