The procedure for using the Hedvig WebUI to generate security tokens depends on whether you are logged in with Hedvig SuperUser privileges or you are logged in as the actual user. You can deactivate, delete, and activate these tokens.
Procedure
-
Login to the Hedvig WebUI with the appropriate credentials (Hedvig or LDAP user).
-
This step varies depending on whether you are logged in with Hedvig SuperUser privileges or as the actual user.
-
If you are logged in with Hedvig SuperUser privileges, select the User icon at the top right. In the pulldown menu, select User Administration -> User Management.
The list of users in the cluster is displayed, as shown in the User Management dialog.
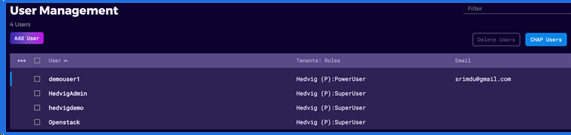
Select the user for which you want to send the security token, which will open the user’s Edit Profile dialog.
-
If you are logged in as the actual user, select the User icon at the top right. In the pulldown menu, select User Administration -> Edit Profile. The Edit Profile dialog is displayed.
-
-
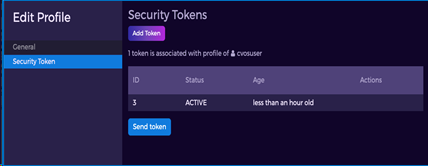
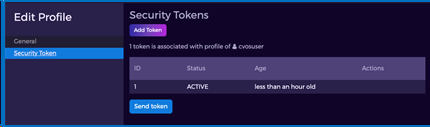
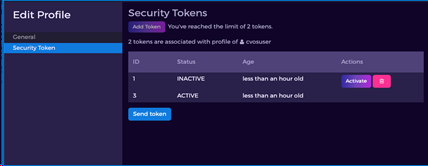
In the Edit Profile dialog, select the Security Token tab.
-
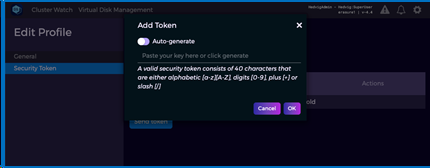
In the Security Token dialog, any tokens affiliated with this user are displayed. To add a token, select Add Token and choose whether you want to Auto-generate the token or enter it yourself.
-
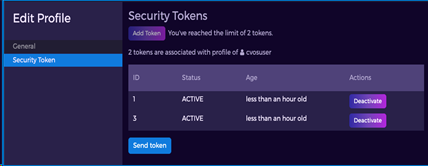
The new token is then displayed. Notice that you can have only two tokens at a time per user.
-
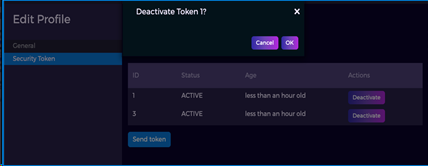
To deactivate a token, select Deactivate.
-
The token is then marked as INACTIVE.
-
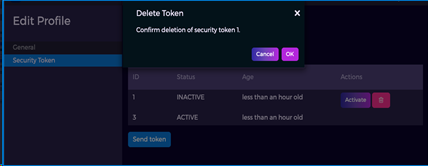
To remove a token completely, select the trash can icon.
-
The token is then completely removed.