As restoring your backup data is very crucial, it is recommended that you perform a restore operation immediately after your first full backup to understand the process. The following section explain the steps for restoring a database.
-
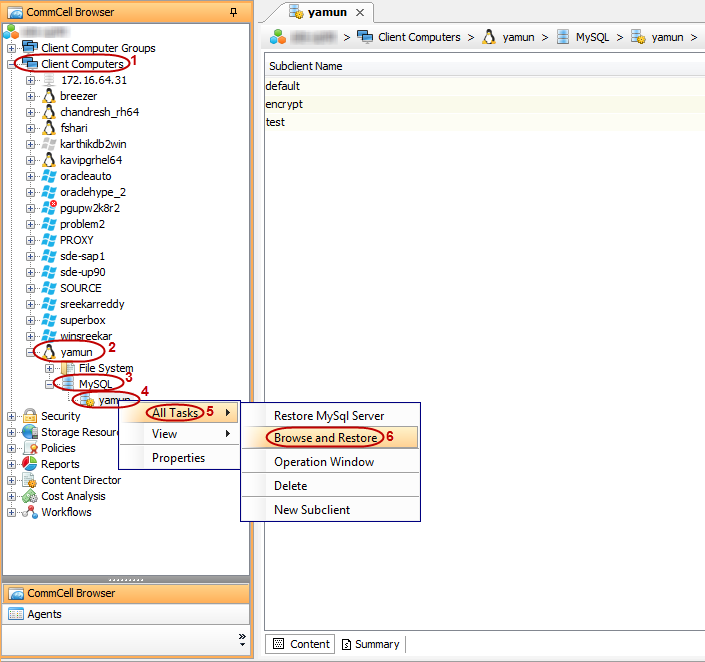
From the CommCell Browser, navigate to Client Computers | <Client> | MySQL.
Right-click the <Instance>, point to All Tasks, and then click Browse and Restore.
-
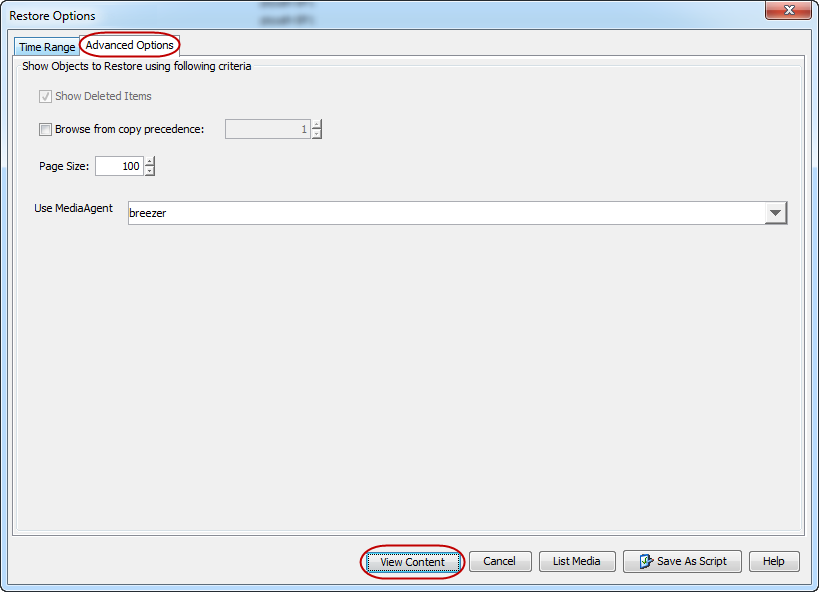
Click the Advanced Options tab.
Select the MediaAgent that was used during the storage policy creation from the Use MediaAgent drop-down list. This MediaAgent should be the one you installed along with your agent.
Click View Content.
-
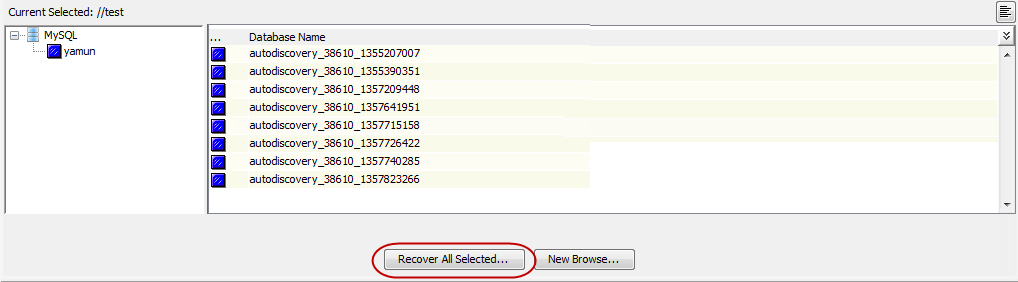
In the right pane of the window, select one or more databases that you wish to restore.
Click Recover All Selected.
The MySql Restore dialog box appears.
-
Select the Recover check box.
Click Browse to select the staging location.
Click OK.
-
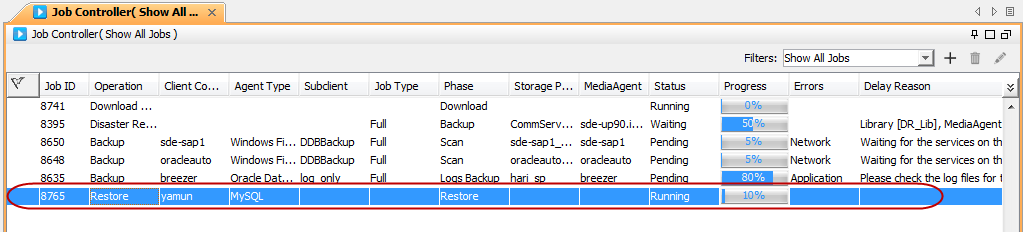
You can monitor the progress of the restore job in the Job Controller.
-
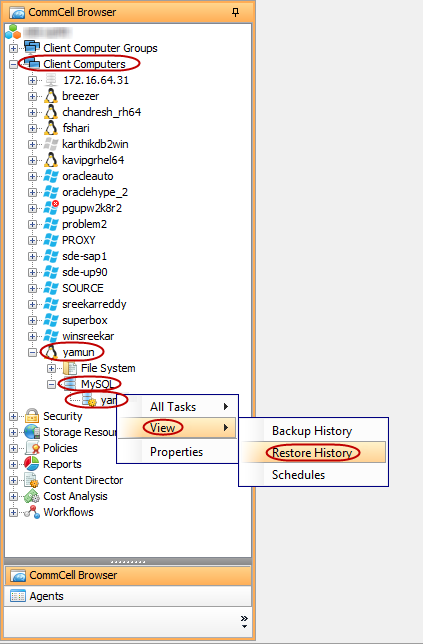
Once the restore job has completed, right-click the agent or <Instance>, point to View and click Restore History.
-
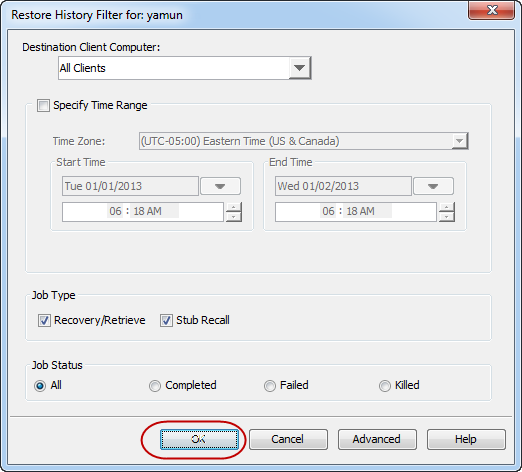
Click OK.
-
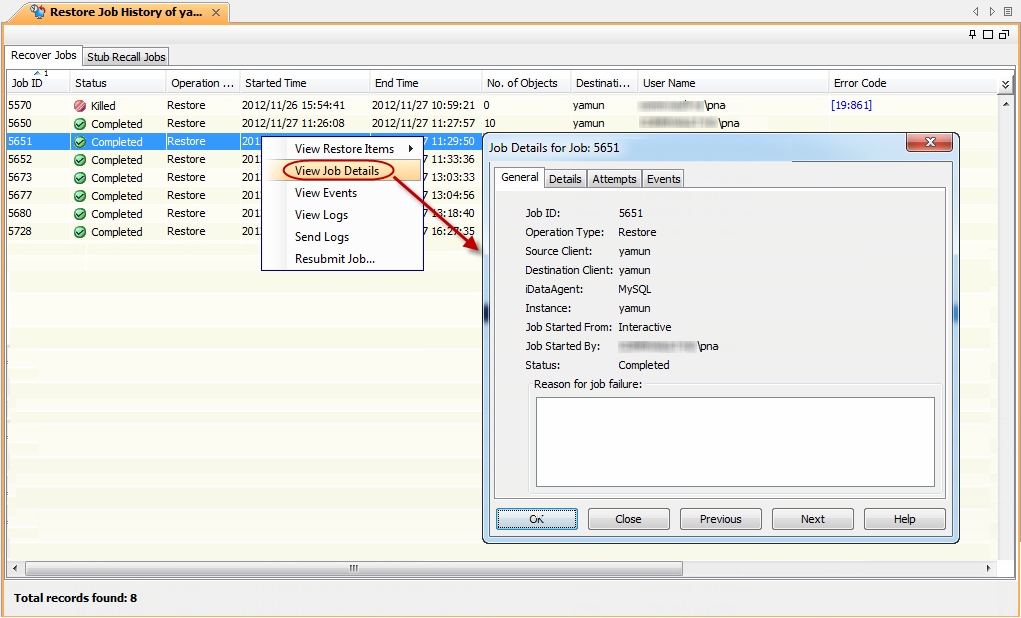
You can view the following details about the job by right-clicking the job:
-
View Restore Items - You can view them as Successful, Failed, Skipped or All.
-
View Job Details
-
View Events of the restore job.
-
View and send Log files of the restore job
-
Resubmit the restore job
-
-
Once the files are restored, verify that the restored files and folders are available in the restore destination provided in step 4.
mysql> show databases;
 | Database |
 +--------------------+
 | mysql |
 | performance_schema |
 | test |
 +--------------------+