You can integrate the Clumio service with Microsoft Entra ID (formerly Azure AD) for seamless user authentication. Follow the steps below to configure Microsoft Entra ID as a single sign-on service for Clumio.
Prerequisites
Ensure that you have the following before you start configuring Microsoft Entra ID.
-
Microsoft Entra ID account with admin privileges
-
Clumio account with Super Admin Role
Enable Microsoft Entra ID integration with Clumio
In Microsoft Entra ID
-
Log in to the Microsoft Azure portal, and then click Microsoft Entra ID.
The Microsoft Entra page appears.
-
Go to Manage > Enterprise Applications.
The Enterprise applications page appears.
-
At the top of the page, click New application.
The Browse Microsoft Entra App Gallery page appears.
-
At the top of the page, Click Create your own application.
-
Enter a name for your application and then click Create.
-
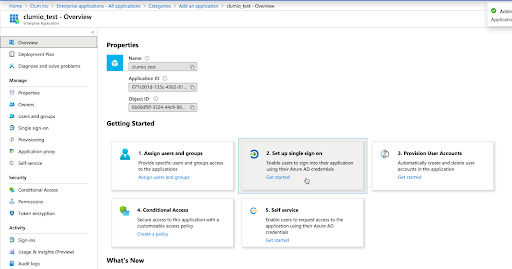
Click Set up Single Sign-on.
-
Select SAML.
-
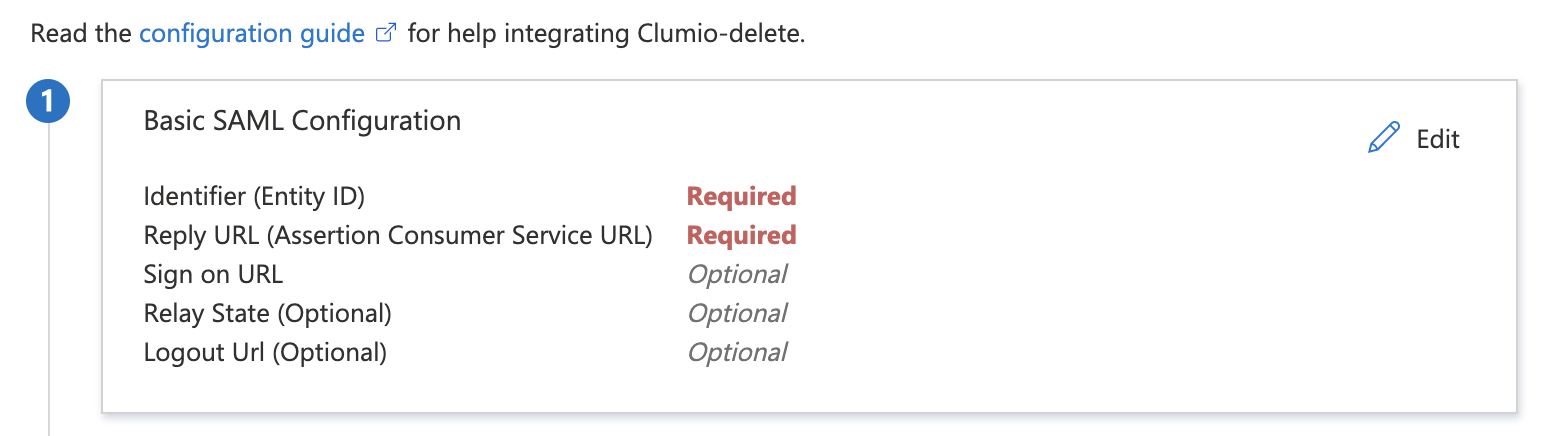
Under Basic SAML Configuration, click Edit.
-
Get the Audience Restriction, Reply URL (Assertion Consumer Service), and Reply URL (Default Reply) from Clumio (see Step 4 in "In Clumio", below).
-
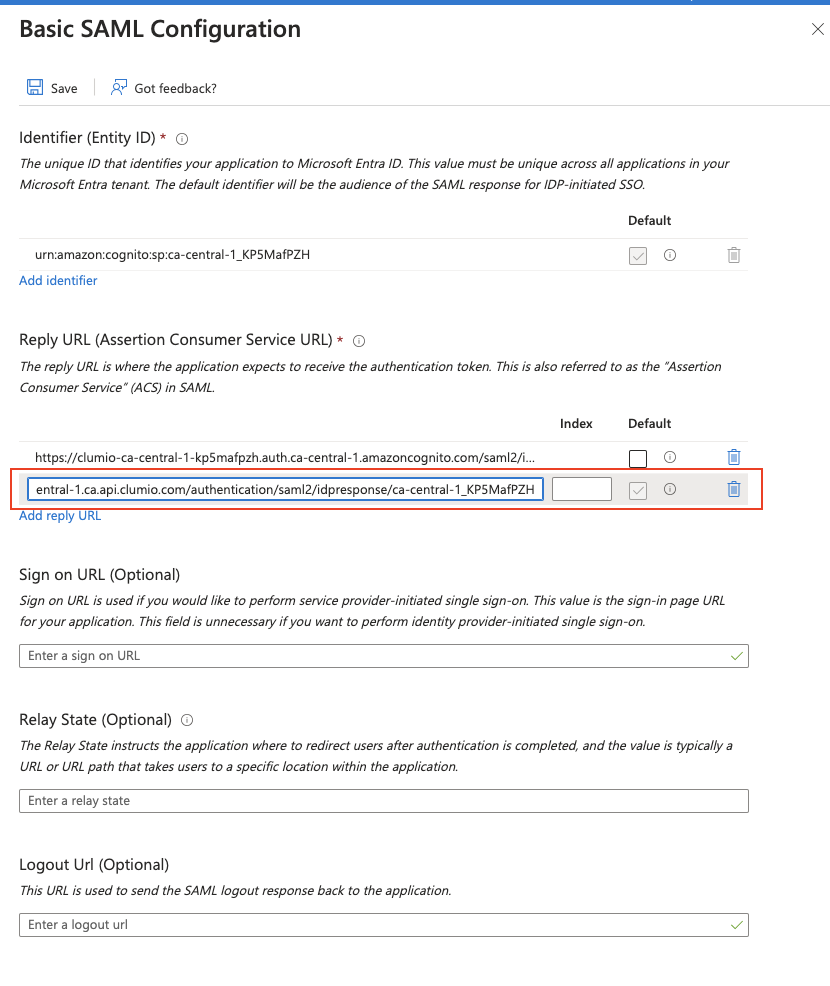
Under Basic SAML Configuration, paste the Reply URL (Assertion Consumer Service) and Reply URL (Default Reply), as shown below. Verify that the ACS ending in /idpresponse is selected as the default.

-
Click Save.
-
Close Basic SAML Configuration.
-
Navigate to SAML Signing Certificate, and then copy the App Federation Metadata Url field OR download the Federation Metadata XML. This will be needed in Clumio.
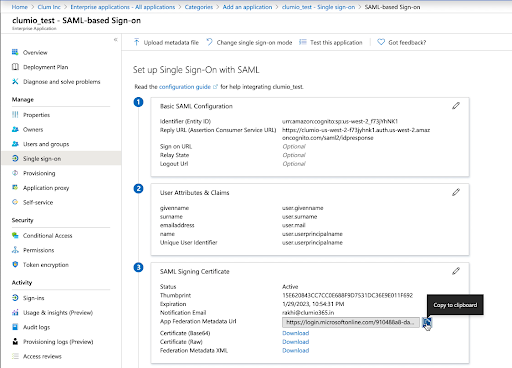
13 Under the User Attributes and Claims section, click Edit.
-
Verify that the Required Claim maps to Email Address and the value is either user.mail or user.userprincipalname (based on your organization's use).
-
Click Save.
-
Once SSO has been activated, go back to Basic SAML Configuration, change the other ACS URL not ending in /idpresponse as the default, and then click Save. This will ensure that both IDP initiated and SP initiated logins go through successfully.
In Clumio
-
Log on to Clumio.
-
Navigate to Administration > Access management > Authentication (SSO/MFA).
-
Click Configure SSO.
-
Copy the Audience Restriction, Reply URL (Assertion Consumer Service), and the Reply URL (Default Reply).
This will be needed for the IdP side setup.
-
Scroll down and upload the metadata retrieved from the IdP. You can either use the URL, upload the metadata XML file, or configure it manually.
-
Click Save Configuration.
-
Click Test with my Account.
A new tab opens to test the SSO connection.
-
Click Activate SSO.
Note
This step is important for SSO enablement.
-
Optional: Enable the check box to send emails to notify all users of the SSO enablement.
-
Click Enable.
Note
-
For any user to utilize Clumio login through Azure/Entra SSO, the user needs to be explicitly added in the Clumio UI (Administration > Access management > Users) and should be assigned to the Clumio SAML Application created in Azure/Entra Directory.
-
If there are two SAML signing certificates present under the SAML Certificates section when editing SAML configurations, delete the certificate that is no longer needed, as there is a known issue with Microsoft in which the metadata URL/XML file may potentially reference the undesirable certificate.
-