Before you get started, review the information about the prerequisites.
Create a Linux virtual machine by using one of the following methods:
-
Convert your Linux client computer to a virtual machine.
-
Create a virtual clone of your Linux client computer.
1-Touch recovery and Virtualize Me for Linux using Hyper-V is not supported if the virtual machine is generated using the Generation 2 Unified Extensible Firmware Interface (UEFI) specification.
Converting the Client Computer to a Virtual Machine Using Microsoft Hyper-V
Procedure
-
Disable the network connection for the client computer.
-
From the CommCell Browser, expand Client Computers.
-
Right-click the appropriate client, point to All Tasks > Virtualize Me > Hyper-V.
The Virtualize Me wizard is displayed.
-
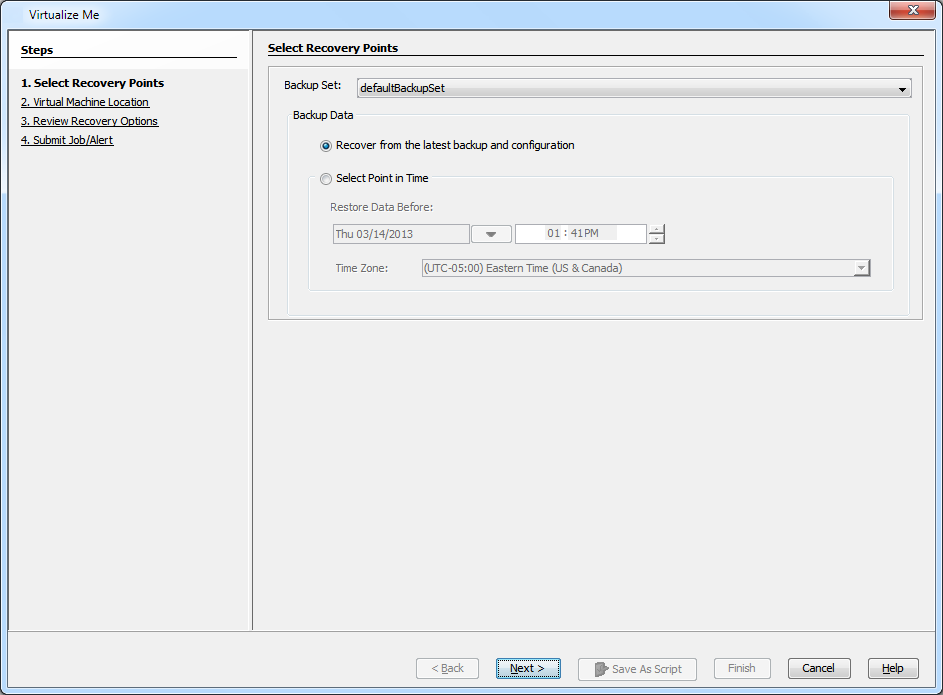
In the Select Recovery Points page, click Next.
By default, the latest data and configuration of the client computer, which is backed up by the default backup set, is used to create the virtual machine.
-
In the Virtual Machine Location page, virtualize your client computer by using Hyper-V:
-
From the Hyper-V instance list, select a Hyper-V instance .
-
From the Hyper-V Host list, select the Hyper-V host.
-
Click the browse button
 and select a location for storage.
 The path appears in the Storage box.
-
Next to the ISO Path box, click the browse button
and browse to the location of the Boot CD image on the Hyper-V Server. -
In the VM Name box, enter the name of the virtual machine.
By default, the name of the client computer is used as the name of the virtual machine.
-
If a virtual machine with the same name already exists, click the Overwrite VM check box.
The existing virtual machine is deleted during the virtualization operation.
-
Click Next.
-
-
In the Review Recovery Options page, on the General tab, choose your credentials for logging on to the virtual machine:
-
In the Host Name box, specify the host name of the CommServe for the selected client.
-
In the IP Address list, select the IP Address of the CommServe which is used to back up the client.
-
In the Client Group Name list, select the client group of the selected client.
-
By default, the user account that you used to log on to the CommCell console is used to perform the virtualization job.
-
If you are using the Active Directory user account to log on to the CommCell console, enter the password for the user account.
-
If you have logged on as the CommCell console administrator, the password is not required to perform the virtualization job.
Click Next.
-
-
-
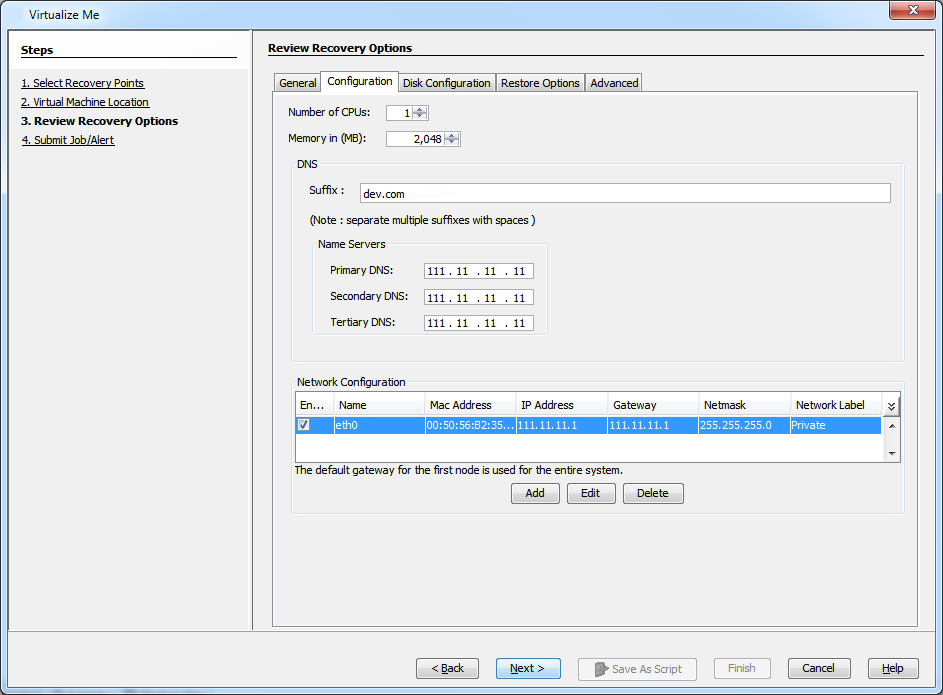
On the Configuration tab, verify the following configuration:
-
Number of CPUs
-
Memory in (MB)
-
Network Configuration
The virtual machine is created with this configuration.
-
-
On the Disk Configuration tab, review the available disk configuration.
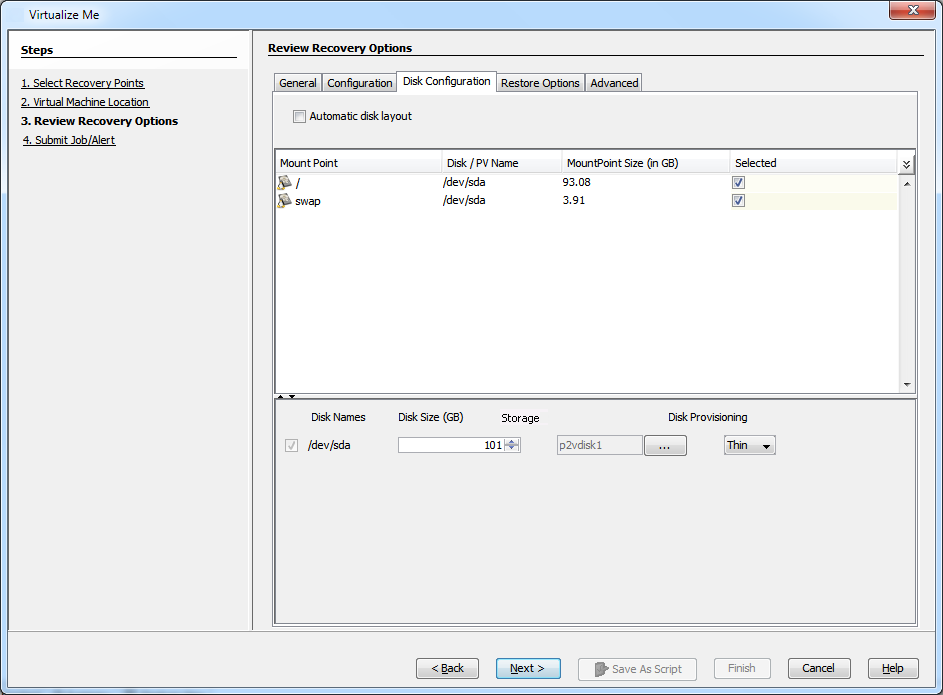
You can exclude bind mount points from backup operations. For more information, see FAQ - Skip bind mount points.
-
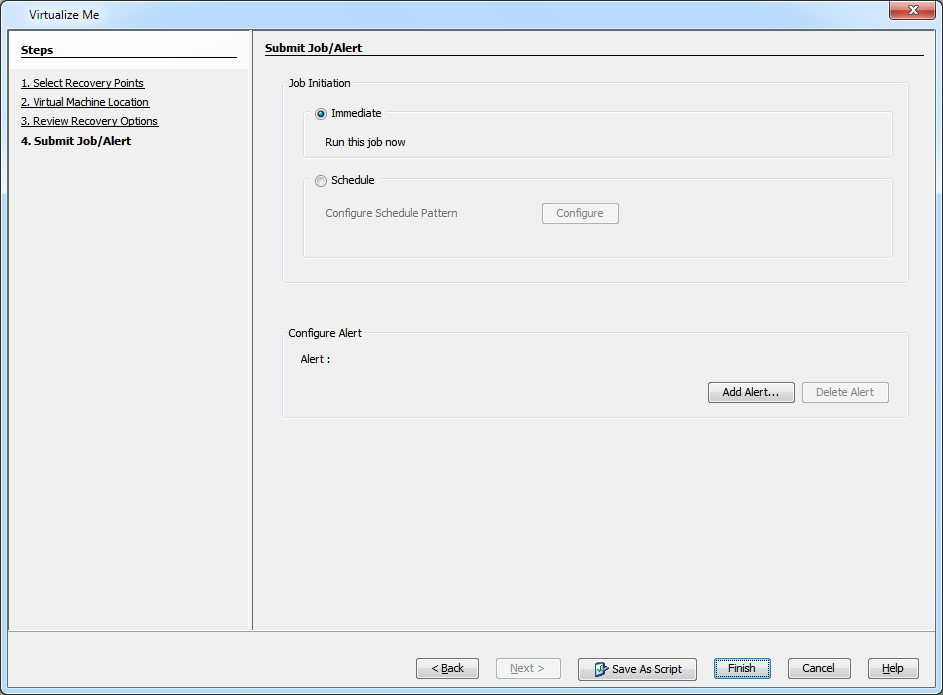
In the Submit Job/Alert page, click Finish to start the virtualization job.
-
Optional: Track the progress of the Virtualization job from the Job Controller window of the CommCell Console.
The virtualization operation includes the following three phases:
-
Provision VM
-
Configuration Restore
-
Full System Restore
After the Virtualize Me Job is completed, if you power on the original client computer, it is no longer authenticated by the CommServe. The newly created virtual machine becomes the active client.
-
-
Optional: When the job is finished, view the job details from the Admin Job History.
-
From the CommCell Browser, right-click the appropriate CommServe and select View > Admin Job History.
-
Under Job Type, select Virtualize Me, and click OK.

-
If you want to further explore additional configurations read the Advanced section of this documentation.
Creating a Virtual Clone of the Client Computer Using Microsoft Hyper-V
Cloning is the process of creating a virtual replica of a client computer from its backup. You can clone a physical or virtual machine. Cloning is useful in these situations:
-
You want to create a virtual replica of a client computer and still retain the original client computer as the active client on the CommServe.
-
You have configured a client computer with all the required software, and you want to create multiple replicas with the same configuration.
-
You want to migrate from a physical environment to a virtual environment.
Procedure
-
From the CommCell Browser, expand Client Computers.
-
Right-click the appropriate client, and point to All Tasks > Virtualize Me > Hyper-V.
The Virtualize Me wizard is displayed.
-
In the Select Recovery Points page, click Next.
By default, the latest data and configuration of the client computer, which was backed up by the default backup set, will be used to create the virtual machine.
-
In the Virtual Machine Location page, virtualize your client computer by using Hyper-V:
-
From the Hyper-V instance list, select a Hyper-V instance .
-
From the Hyper-V Host list, select the Hyper-V host.
-
Click the browse button
and select a location for storage. The path appears in the Storage box.
-
Next to the ISO Path box, click the browse button
and browse to the location of the Boot CD image on the Hyper-V Server. -
In the VM Name box, enter the name of the virtual machine.
By default, the name of the client computer is used as the name of the virtual machine.
-
If a virtual machine with the same name already exists, click the Overwrite VM check box.
The existing virtual machine is deleted during the virtualization operation.
-
Click Next.
-
-
In the Review Recovery Options page, on the General tab, choose your credentials for logging on to the virtual machine:
-
In the Host Name box, specify the host name of the CommServe for the selected client.
-
In the IP Address list, select the IP Address of the CommServe which is used to back up the client.
-
In the Client Group Name list, select the client group of the selected client.
-
By default, the user account that you used to log on to the CommCell console is used to perform the virtualization job.
-
If you are using the Active Directory user account to log on to the CommCell console, enter the password for the user account.
-
If you have logged on as the CommCell console administrator, the password is not required to perform the virtualization job.
Click Next.
-
-
-
On the Configuration tab, verify the following configuration:
-
Number of CPUs
-
Memory in (MB)
-
Network Configuration
The virtual machine is created with this configuration.
-
-
On the Disk Configuration tab, review the available disk configuration.
You can exclude bind mount points from backup operations. For more information, see FAQ - Skip bind mount points.
-
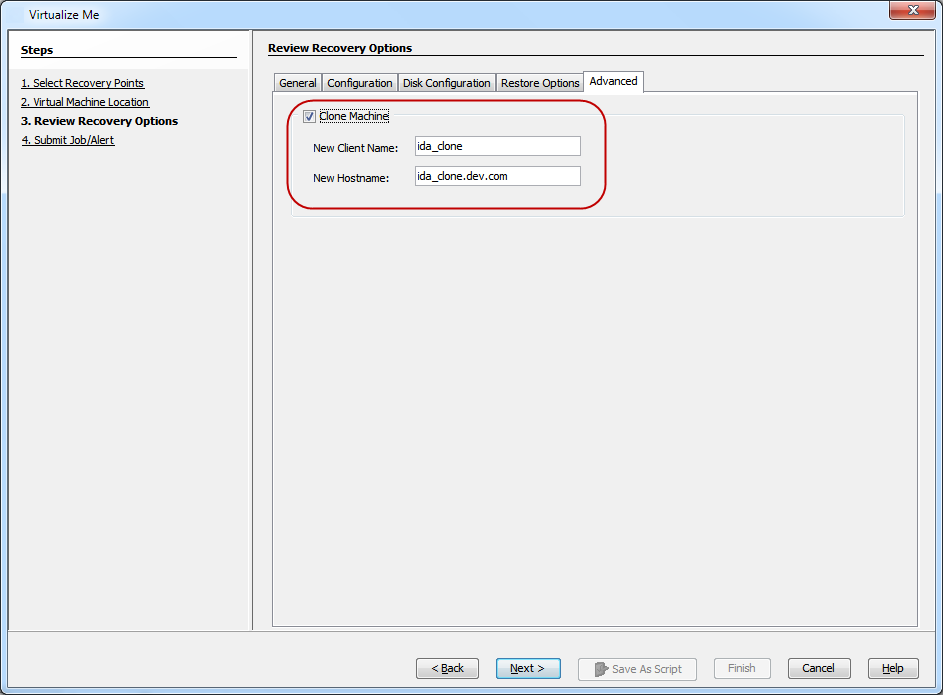
On the Advanced tab, set up the cloning of the client computer:
-
Select the Clone Machine check box.
-
In the New Client Name box, type the client name for the clone computer.
The new client name must be unique on the CommServe. You can type the same name that you entered in the VM Name box or you can specify another client name.
-
In the New Hostname box, type the host name of the clone machine.
This is the fully qualified host name or IP of the new virtual machine that you want to create. It must be resolvable from the CommServe and the MediaAgent.
If a static IP was used to configure the NIC on the Configuration tab, this host name must resolve to the provided IP. If the DHCP option is selected on the Configuration tab and the IP that will be obtained is unknown, do not supply the client host name. In such cases, a reverse lookup for a host name is done during the Virtualize Me process and the retrieved host name is used. If the reverse lookup fails, then the DHCP-assigned IP is used as the host name for the new virtual machine.
-
Click Next.
-
-
In the Submit Job/Alert page, click Finish to start the virtualization job.
-
Optional: Track the progress of the Virtualization job from the Job Controller window of the CommCell Console.
The virtualization operation includes the following three phases:
-
Provision VM
-
Configuration Restore
-
Full System Restore
-
-
Optional: When the job is finished, view the job details from the Admin Job History
-
From the CommCell Browser, right-click the appropriate CommServe and select View > Admin Job History.
-
Under Job Type, select Virtualize Me, and click OK.
-
If you want to further explore additional configurations read the Advanced section of this documentation.