When a computer where you have installed the MediaAgent becomes unavailable, all the storage resources configured for the MediaAgent become unavailable and you may have to reconfigure all the storages policies which are using the MediaAgent. Now you can avoid such scenario by performing 1-Touch recovery of the MediaAgent if the MediaAgent backup is available on the PnP disk library or library in a Network location.
The magnetic library, located on any volume of the MediaAgent, will not be restored automatically.
Prerequisites
-
Ensure that the Windows File System iDataAgent is installed on the MediaAgent.
-
Ensure that the PnP disk library or library in a Network location is used to perform the backup of the MediaAgent and the backup is not stored on a disk library or a tape library. For more information on how to configure a PnP library, refer to PnP (Plug and Play) Disk Libraries.
-
Perform the full backup of MediaAgent using the Windows File System iDataAgent. Ensure that at least one subclient is configured to backup the system state. For more information, refer to Configuration.
-
Depending upon the type of processor of the computer, create the required Live CD to boot the MediaAgent. For more information, refer to Preparing for Recovery.
You can perform one of the following 1-Touch recovery to restore the MediaAgent.
Non-Interactive Restore
-
From the CommCell Console, navigate to Client Computers | <MediaAgent>.
-
Right-click the <MediaAgent> and click All Tasks | 1-Touch Recovery Points.
-
Click Next.
-
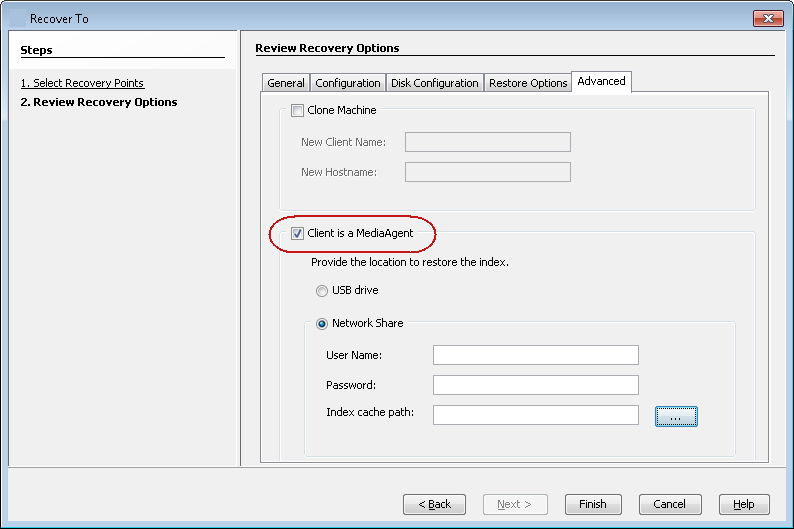
On the Review Recovery Options page, click the Advanced tab.
-
Select the Client is a MediaAgent check box.
-
Specify the location where you want restore the index. By default, the index will be restored to a USB drive. If you want to restore the index to a Network location, click Network Share and specify the following details:
-
User Name - User name for the user account which will be used to access the network location.
-
Password - Enter the password for the user account.
-
Index cache path - Enter the location where you want to restore the index. Click
 to specify the location.
If you are restoring from a secondary copy, ensure that the secondary copy is available on the same MediaAgent where primary copy is available. For more information about how to recover the MediaAgent from the secondary copy, refer to this FAQ.
-
-
Click Finish.
-
Save the recovery response file as onetouchresponse.xml.
-
Connect the formatted USB drive to the computer where recovery response file is stored.
-
Copy the recovery response file to the formatted drive.
Do not copy the response file on the same USB drive which is used for the PnP library attached to the MediaAgent. During the 1-Touch recovery, the USB drive is scanned to locate the onetouchresponse.xml. The scanning process will take long time if the size of the disk is huge. Use a USB drive (USB stick) with a smaller size to copy the response file. Alternatively, you can use a use a network location to copy the response file.
-
Connect the USB drive to the client that you want recover.
-
Perform the Non-interactive restore.

Additional Options
Restoring a MediaAgent from a Secondary Copy that is Available on a Different MediaAgent
Make the following selections when you perform the restore procedure:
-
On the Review Recovery Options page,
-
Click the Restore Options tab and specify the Copy Precedence of the secondary copy.
-
Click the Advanced tab and ensure that the Client is a MediaAgent check box is not selected.
-
Click Finish.
-
What to Do Next
Sometimes the index cache is disabled after you restore the MediaAgent. Enable the index cache by following the instructions in Enabling or Disabling Index Cache Access.