Changes that you make to the SNMP configuration are applied to all nodes in the storage cluster.
Procedure
-
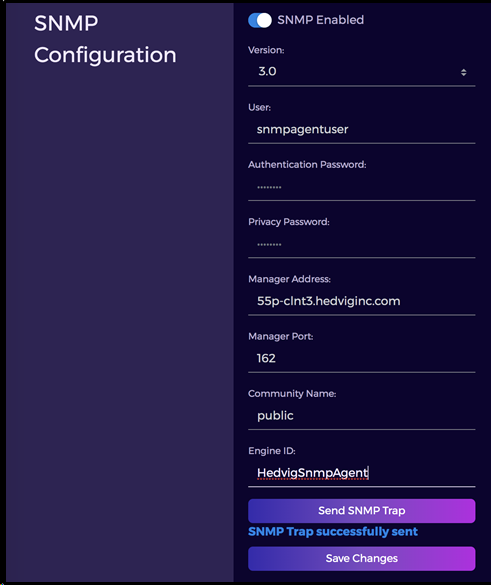
In the Hedvig WebUI, select Configuration > SNMP.
.
-
In the SNMP Configuration dialog, complete the information, using the descriptions and values described in the following table.
-
form field
description
SNMP Enabled
Enable or disable SNMP.
Version
Select SNMPv2c or SNMPv3.
User
Enter the SNMP user name, which must be no more than 30 characters.
Authentication Password
Enter an authentication password, which must be from 8 to 30 characters.
Privacy Password
Enter an AES (Advanced Encryption Standard) password, which must be from 8 to 30 characters. This can be the can be the same password as the Authentication Password, or it can be different.
Manager Address
Enter the address of the SNMP manager. You must change this from the default.
Manager Port
Leave the default port of 162, or enter a different one, which must be a valid port number.
Community Name
Leave the default name of public, or enter a customized community name.
Engine ID
Leave the default identifier of HedvigSnmpAgent, or enter a customized engine identifier.
Note
Engine ID is required for SNMPv3.
-
To send a test SNMP trap, select Send SNMP Trap.
-
To save your completed changes, select Save Changes.