You must add access to the proxy(s) in the virtual disks.
Before You Begin
Export the virtual disks, so that it can be shared with the proxy(s).
Procedure
-
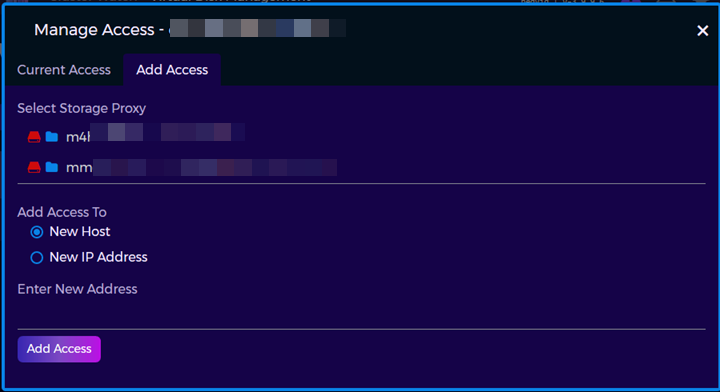
From the Virtual Disk Management page, click the three ellipsis ( ... ) in front of the virtual disk that you just added, and then click Manage Access.
-
From the Manage Access page, highlight and select the proxy MediaAgent.
-
Select the New IP Address option.
-
Type 127.0.0.1 in the Enter New Address box.
-
Click Add Access.
For more information about adding access to virtual disks, see Adding Access for Block and NFS Virtual Disks.
What to Do Next
Mount the virtual disks on the MediaAgents /proxies so that it can be configured as a storage target.