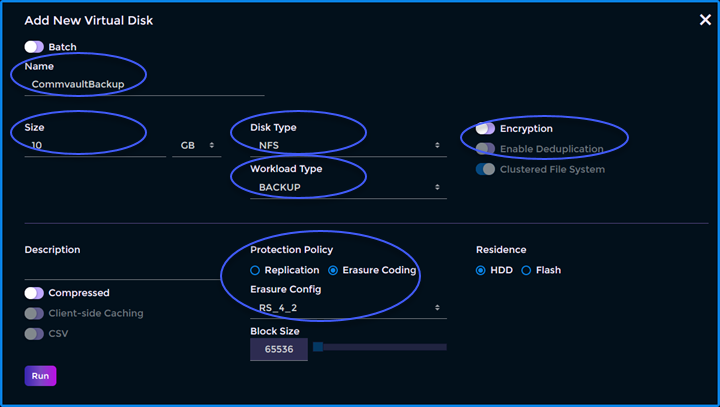
You can create a Virtual Disk using the Distributed Storages With EC (4.2) to be added as storage library in Commvault software.
Before You Begin
Launch the Hedvig Web User-Interface (UI).
Procedure
-
On the Virtual Disk Management page, click Add Disk.

-
Select or enter the following information:
-
In the Name box, type the name of the virtual disk.
Note
This name will be used as the export name for mounting the disk library on the MediaAgent.
-
In the Size box, type the size of the virtual disk used for the disk library.
-
From the Disk Type list, choose NFS.
-
From the Workload Type list, choose Backup.
-
Under Protection Policy choose the Erasure Coding option.
-
From the Erasure Config list, select the RS_4_2 option.
-
Encryption and Enable Deduplication should be disabled (turned-off).
For more information about adding virtual disks, see Creating Virtual Disks.
-
-
Click Run.
What to Do Next
Export the virtual disks, so that it can be shared with the proxy(s).