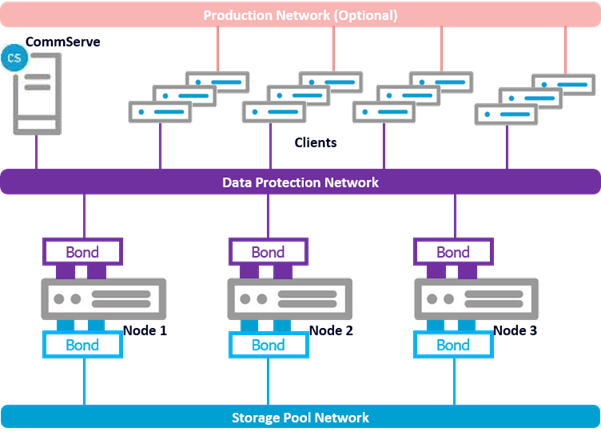
HyperScale X Appliance can be setup with bonded interfaces using 4 10GigE ports per node as follows:
-
2 bonded ports for Data Protection
-
2 bonded ports for internal Storage Pool traffic
With active backup, the interfaces are bonded for redundancy (or fault tolerance mode). Only one interface works at a moment and the other one will work when the first one fails.
Optional Production Network for clients can be used to segregate production traffic from the backup traffic. When this network is not available, all production and backup traffic traverses the same network.
Before You Begin
-
Complete the following before you start:
-
Use the data collected in the Pre-Installation Checklist to setup the nodes.
-
Ensure that the bonded connections are setup using the guidelines provided in Cabling HyperScale X Appliance for Redundant Networking.
-
Setup up a bonded network by assigning IP addresses to the bonded interfaces in the nodes. For more information, see the following pages:
-
Configure the block to ensure that the correct nodes are identified and configured when the setup is run.
-
-
If you plan to attach the nodes to an existing CommServe, make sure that you are logged in as an user with necessary permissions on the CommServe to install the software. For more information about the permissions needed to setup the node as a client in the CommServe, see User Security Permissions by Feature - Deployment. (If necessary, the deployment permission can be removed for the user after the installation, as this permission check is performed only when the nodes are registered in the CommServe.)
Procedure
-
Open a Web browser from any computer that can connect to the nodes.
-
Type the IP address associated with any one of the nodes.
For example: http://10.1.5.21
Tip
Use http instead of https.
-
The login dialog box is displayed.
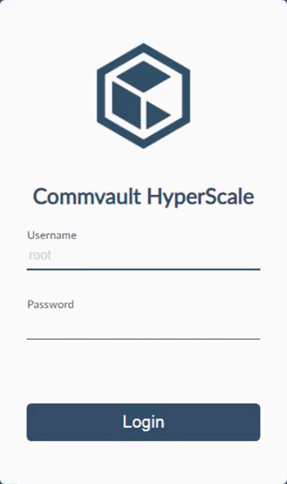
Type root as the Username and cvadmin as the Password.
-
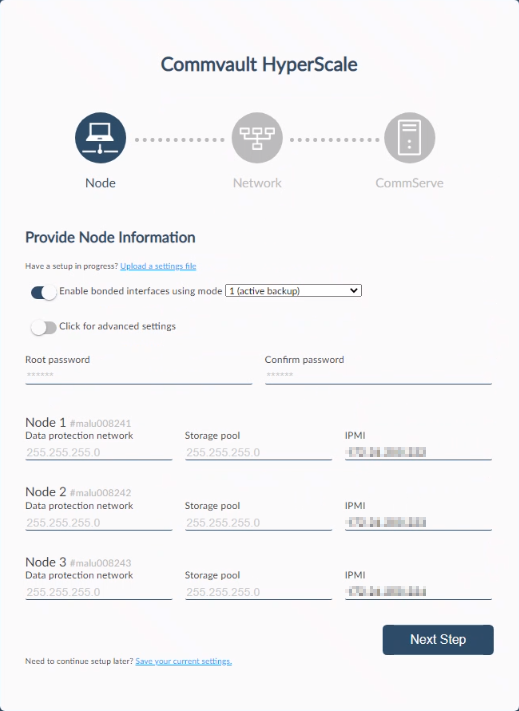
The Provide Node Information page is displayed.
Note
The Enable bonded interfaces using mode toggle key is selected by default with the option 1 (active backup) selected. This option will automatically setup the nodes with active-backup bonding.
-
In the Root password and Confirm password boxes, type the password for the nodes.
Note
The password must not contain \ (backslash), ' (single quote), and blank spaces.
-
In the Data Protection network and Storage pool boxes, the IP addresses associated with these networks are displayed for Node1, Node2, and Node3.
Verify and validate the information using the data collected in the Pre-Installation Checklist. If necessary, edit the information to make sure that the correct network related information is provided.
-
Click Next Step.
-
-
The Provide Network Information page is displayed.
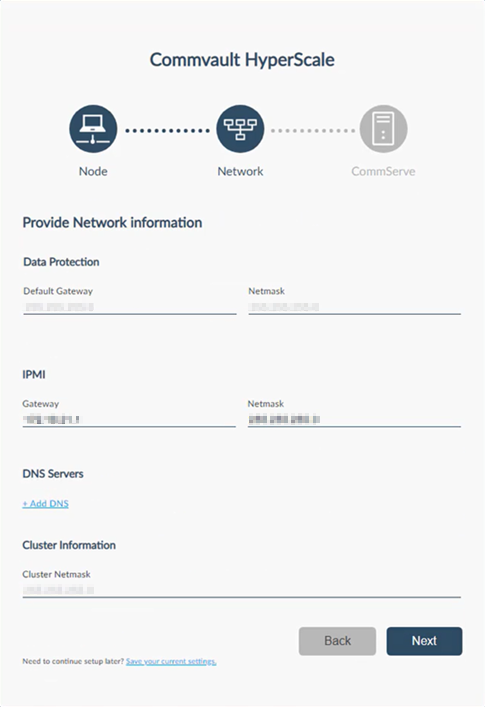
In the Gateway, Netmask, and DNS Server boxes, the IP address associated with these networks are displayed.
Verify and validate the information using the data collected in the Pre-Installation Checklist. If necessary, edit the information to make sure that the correct network related information is provided.
-
Click Next.
The setup process validates the network information and will take some time to complete.
-
The CommServe Information page is displayed.
Depending on your deployment, choose an appropriate method for configuring the CommServe as described in Configuring the CommServe.